
Users can enter values in the input and output fields that are taken into account by the Rule Set when making a decision.
The following example is done in the context of a Rule Set in which sushi menus are proposed based on the number of people seated at the table and whether they are vegetarian or not.
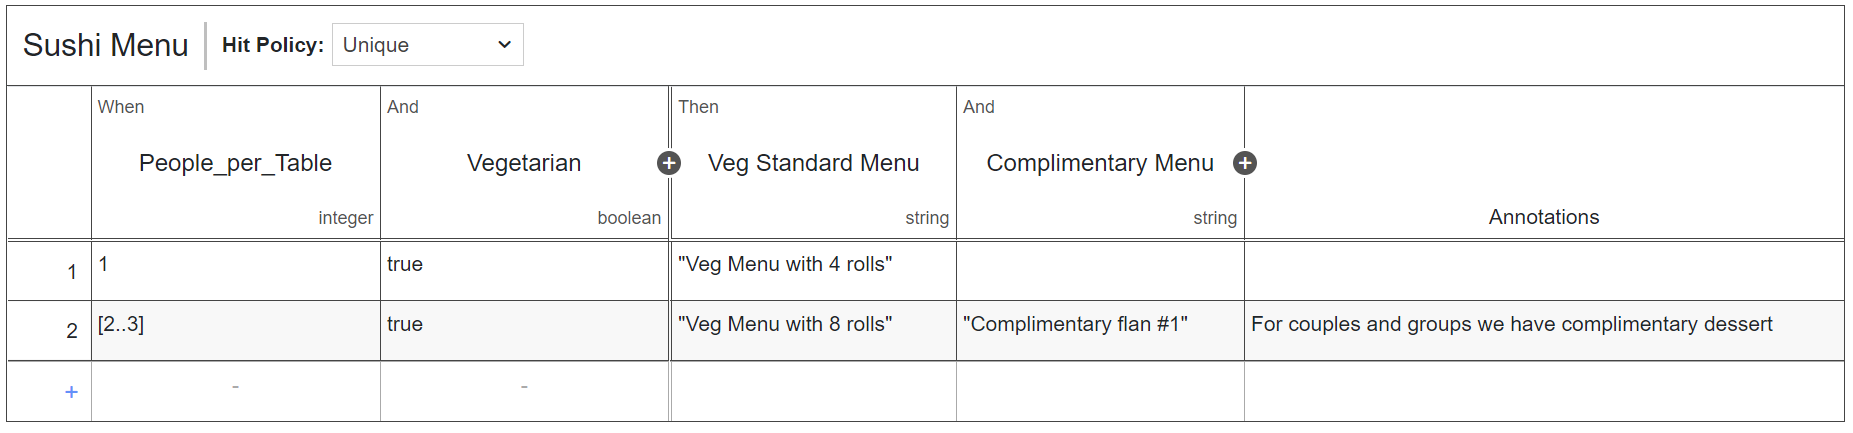
As shown in the example above, the Rule Set can draw a value from more than one input field, making it a requirement that the entire input section of the row be true for the output to be generated. Additional input and output fields can be added or removed to and from the Decision Table by clicking on the "Plus/Minus" buttons. This can also be done, among other options, via the context menu.
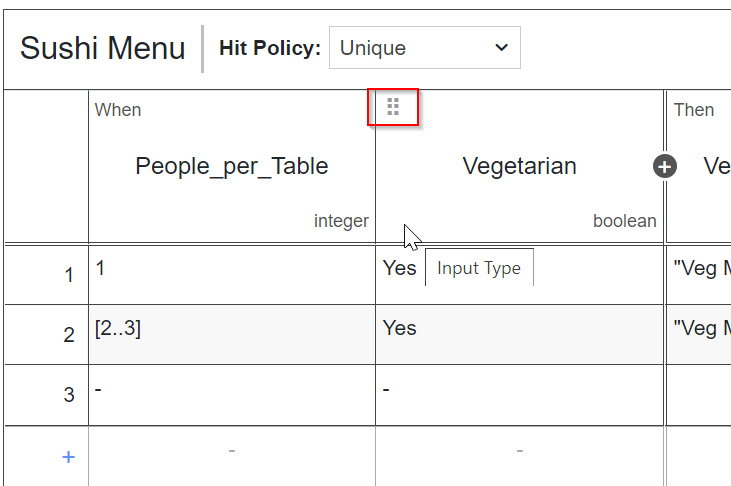
It is important to note, that each input must be defined by their data type.
Every Rule Set can have multiple input conditions and predefined outputs. This is shown by the number of rows displayed in the Decision Table.
Once a Rule Set has been completed, users are able to deploy any locally saved Rule Sets into the system and make these available for selection when creating or editing workflows with the Workflow Designer.
Testing a Rule Set
VidiFlow users also have the opportunity to test the Rule Set before implementing it as a potential Decision Task for the Workflow Designer.
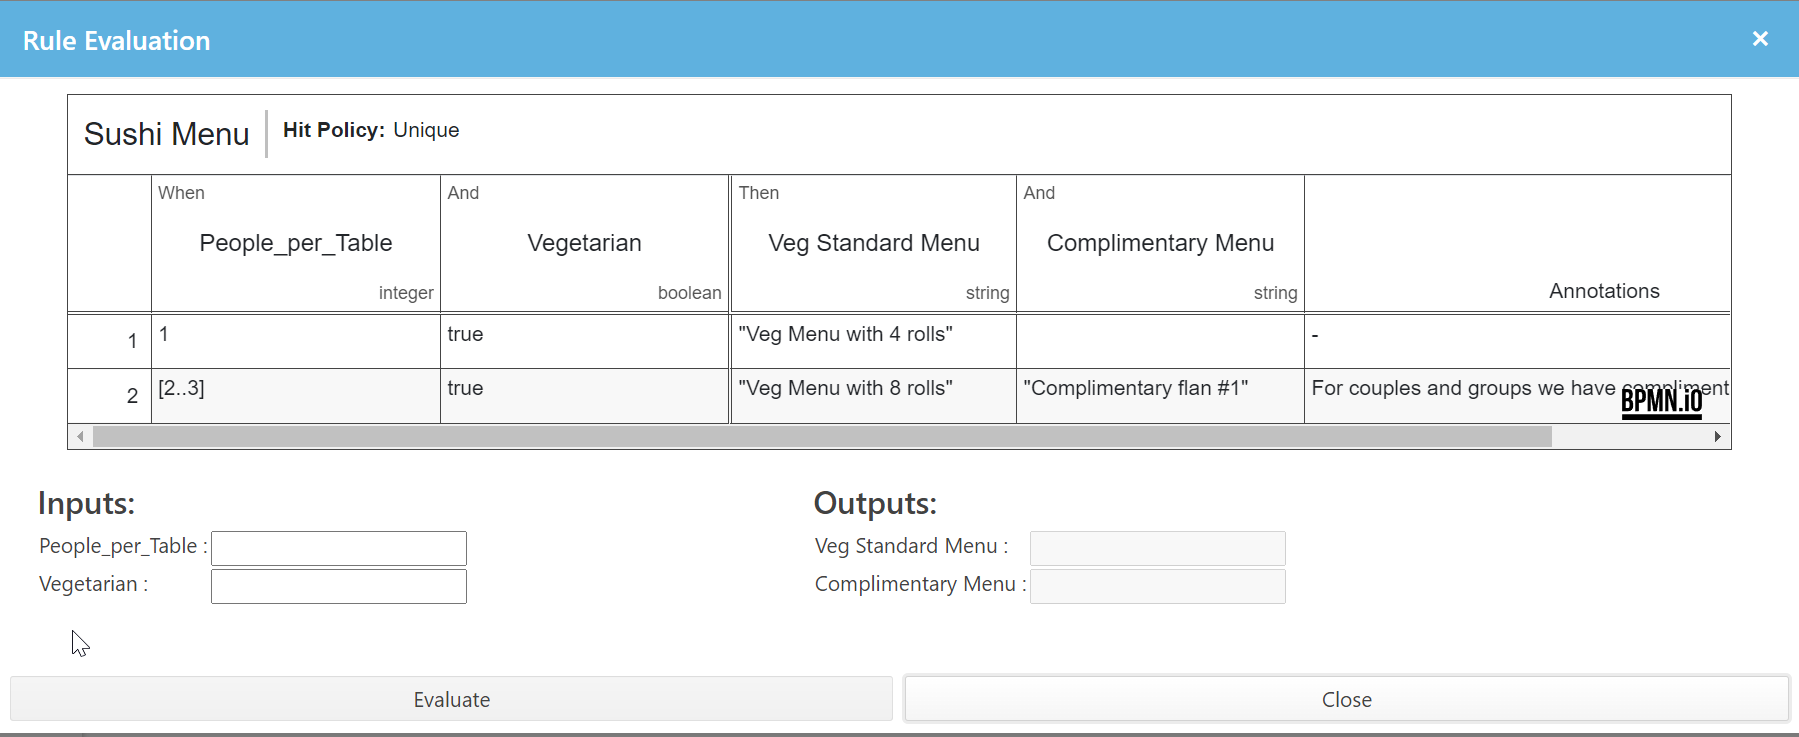
By selecting the Test Decision Option on the Main Menu, users are redirected to an interface in which input values can be entered to determine whether the actual output matches the intended output.
Adding a Rule Set to a Workflow
Once the Rule Set has been defined and evaluated successfully, users may wish to integrate the Rule Set into a particular workflow. This is achieved by first selecting the workflow in which the Rules Set is intended for use. Once the intended workflow has been selected and opened in the Workflow Designer, users must select a task class BPMN element which is immediately followed by a gateway class BPMN element.

The task class element placed before the gateway must then be modified in terms of the nature of task type.
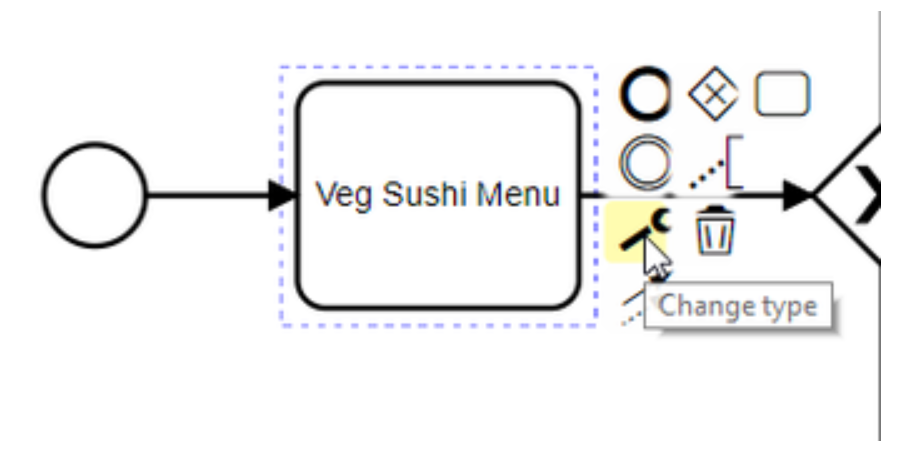
Select the Business Rule Task from the task types available.
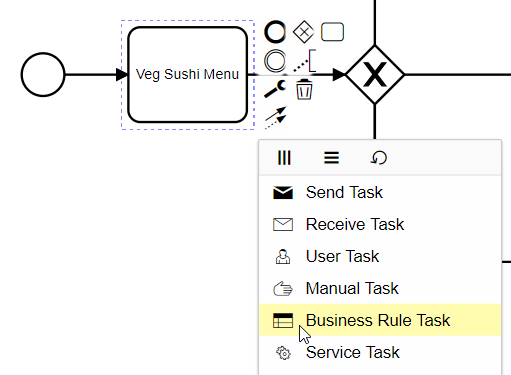
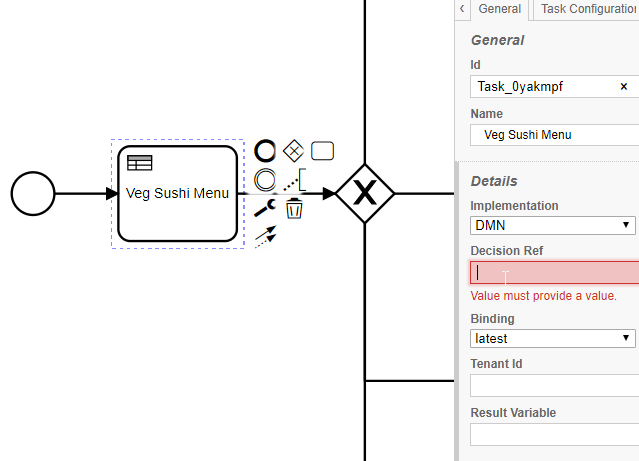
Once the task type has changed to a Business Rule Task, view the Properties and Executions table and enter the reference ID to the Rule Set created via the Rule Designer intended for this task.
Usage of Timecodes in Rules
VidiFlow calculates the framecount based on input parameters of the following sub-types:
-
"Timecode"
-
"TargetTimebase"