
The Camera Card Upload feature enables users to upload complete folders or batches of files into the system that will be handled as one object for a user (E.g.: Imagine to find one result with all media uploaded in a batch when searching). Depending on the system design, the upload configuration and the used media the users behaviour can differ here. In general the feature can be devided into two different modes:
-
Stitched Camera Card Uplaod
-
Non Stitched Camera Card Uplaod
Those are basically differentiated in the fact if the resulting media in the end is one combined file over all uploaded clips or if the original clips of the upload are handled as single files. Both approaches have their advantages and drawbacks and its up to the system design to configure the wanted behaviour. Also the handling of the files as consolidated file or independent clips is a functionality designed inside a VidiFlow Worflow. Anyway MediaPortal supports both flavors while controlling the upload flow differently.
Configuration
The Camera Card Upload can be configured under:
ConfigPortal → MediaPortal → Upload → Cameracard
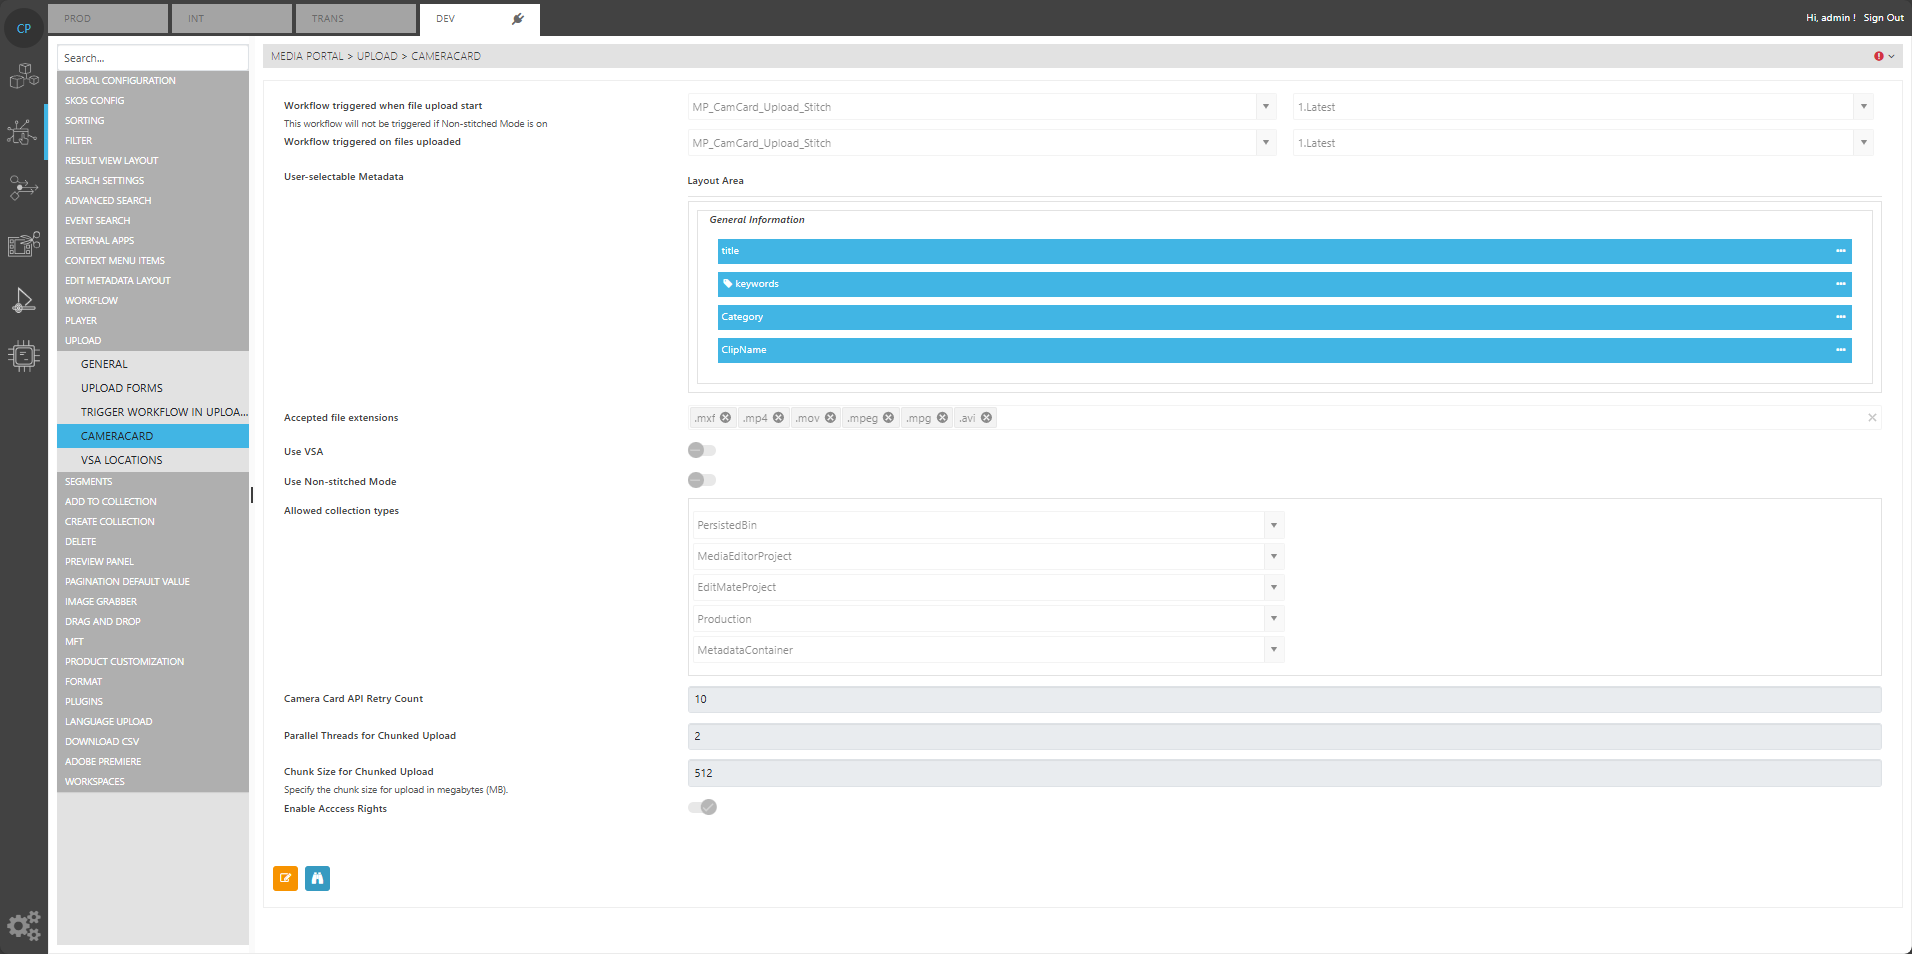
Following options can be controlled:
Workflow Trigger when file Upload start
This defines a VidiFlow Workflow to be started after user clicks the upload button but before the files are transferred to the upload target storage. This option is only executed in stitched mode
Workflow Trigger om files Uploaded
This defines a VidiFlow Workflow to be started after user clicks the upload button and after all files are uploaded to the target storage.
User Selectable Metadata
This option can be used to create a form dialogue for the user to enter metadata for the camera card item being created on the upload.
Accepted File Extension
Users can specify which file formats are recognized by the system during the import of camera cards. Only the configured file types will be processed and displayed in the upload view.
Use VSA
This option defines if the transfer to the target location is performed by MediaPortal directly or if the data transfer is performed via the VidiCore VSA. This option usually is of advantage if the target storage is not reachable directly for the MediaPortal frontend.
Use non stitched mode
This switches the mode between stitched and non stitched mode resulting in different handling of the clips and the flow in MediaPortal as well as of different workflow triggers being executed.
Workflow on Clip Upload
This option is only present if “Use Non Stitched Mode” is toggled on. It will start a workflow per clip uploaded to handle backend processes per file.
Allowed Collection Types
A list of collection types available that the user can directly upload to, This is of advantage to allow user to directly upload in to a media wrapper object, an editing project or metadata placeholder for example.
Camera Card API Retry Count
Defines the amount retries for API calls being done.
Parallel Thread of Chunked Upload
This defines if and in how many chunks uploads will be sliced.
Chunk Size for Chunked Upload
This defines the size per chunk being uploaded. Depending on the used media files sizes, the target storage and the network this setting can have a big impact on the upload speed.
Enable Access Rights
This allows to blend in an additional option for the upload form dialogue allowing the user to set ACLs manually using the same option as described in Details View. In result it can be controlled on upload process what users or user groups can access the media later on.
Stitched Vs non stitched mode
Basically the 2 modes can be differentiated by their goal of preserving the original clip structure in independent clips or while combining all clips of the upload into one continious file. Both approaches have their pros and cons. Following table gives an overview about the different implementation in MediaPortal.
|
Aspect |
Stitched |
Non Stitched |
|---|---|---|
|
Thumbnail before Upload |
Yes |
Yes |
|
Evaluate Timecode before Upload |
No |
Yes depending on format |
|
Write Original TC Segments by MP |
No |
Yes depending on format |
|
Start overall Workflow on Upload Start |
Yes |
No |
|
Start overall Workflow on Upload End |
Yes |
Yes |
|
Start Workflow per Clip |
No |
Yes |
|
Form Dialogue |
Yes |
Yes |
|
ACL Control |
Yes |
Yes |
|
Write Sequence Document by MP |
No |
Yes depending on format |
|
Support of XDCAMHD Crads |
Yes |
Yes |
|
Support of P2 Cards |
Yes |
No |
VSA Upload
Enable this option in
-
ConfigPortal > UPLOAD > GENERAL or UPLOAD > CAMERACARD
-
Set Use VSA Upload to True
Assign VSA Locations:
-
Assign Storages with VSA Method (VXA) to upload locations.
-
These locations will appear as selectable destinations during upload.
To configure specific file formats that the system will support during the ingest process. Additionally, this feature allows users to define which workflows are triggered automatically when media is ingested from camera cards.
-
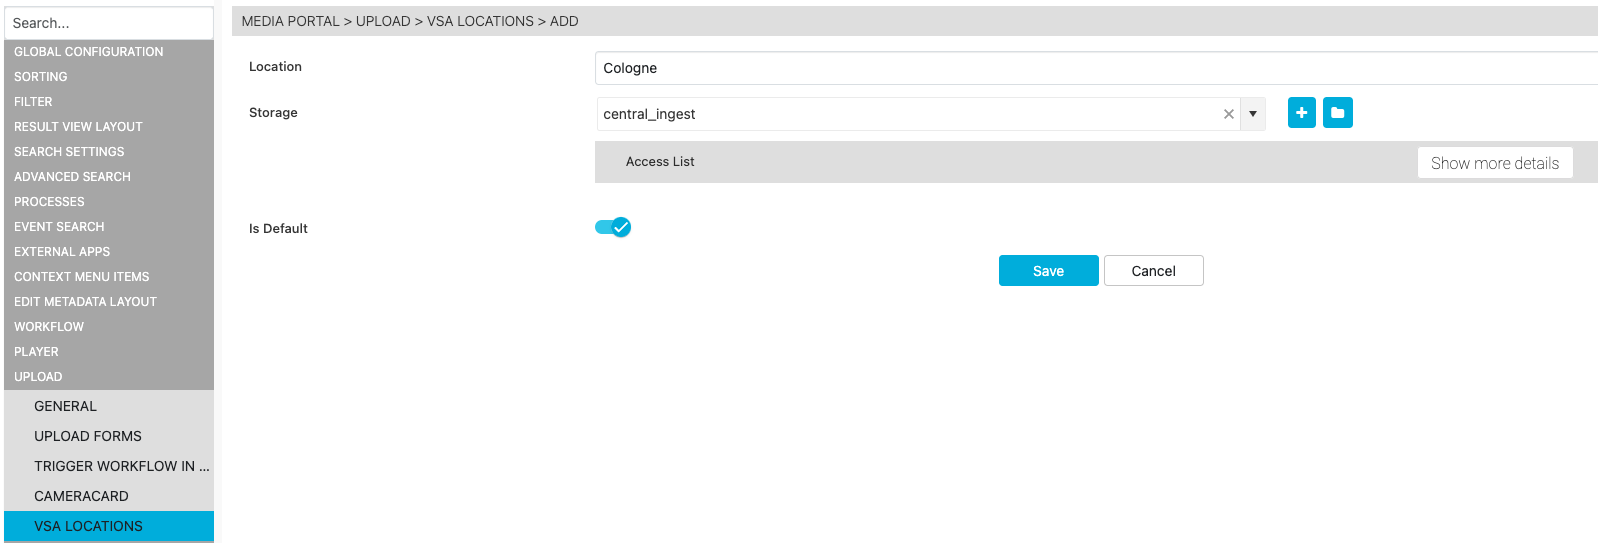
Configure Locations:
-
Navigate to UPLOAD / VSA LOCATIONS in the MediaPortal Config Area.
-
Define locations:
-
Enter the location name.
-
Associate the location with designated storage.
-
-
If multiple locations exist, set a default. The latest default will be used for uploads.
-
-
Assign VSA to Location:
-
In the general settings of the ConfigPortal, ensure a VSA is assigned to each defined location.
-
Verify that the VSA is operational and properly linked to the storage destination.
-
-
Enable Default Location:
-
Confirm the default location for VSA uploads to streamline user selections during the upload process.
-
Considerations
-
Ensure that sufficient storage is allocated to handle multiple individual files created during the ingest.
-
Verify that downstream systems (editing, MAM, automation) are prepared to handle sequences and individual clips rather than stitched single items.