
Systems running VidiEditor with Web Render Engine (WRE) Timeline playback have the possibility of using keyframes on video and image segments to change video effects over time. A specifically designed and optimized view for video effects is available and will be explained in the following article.
Accessing and leaving the view
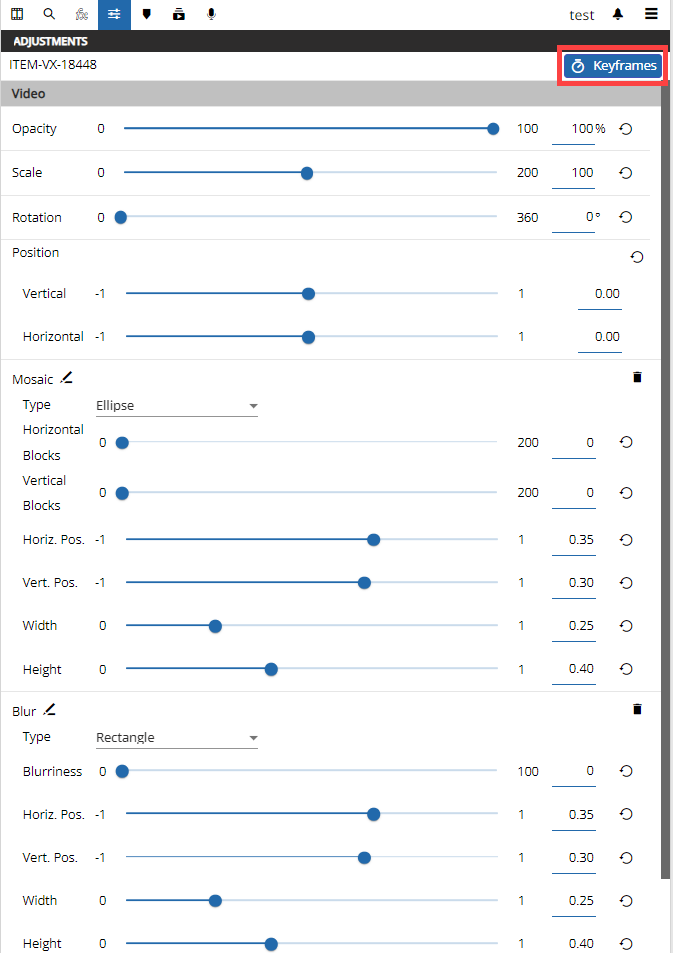
As long as the user stays on the standard Timeline view, keyframes are only usable for audio levelling. To use keyframes on video effects go to:
VidiEditor → Media Management → Settings Pane
and click the Keyframes button:
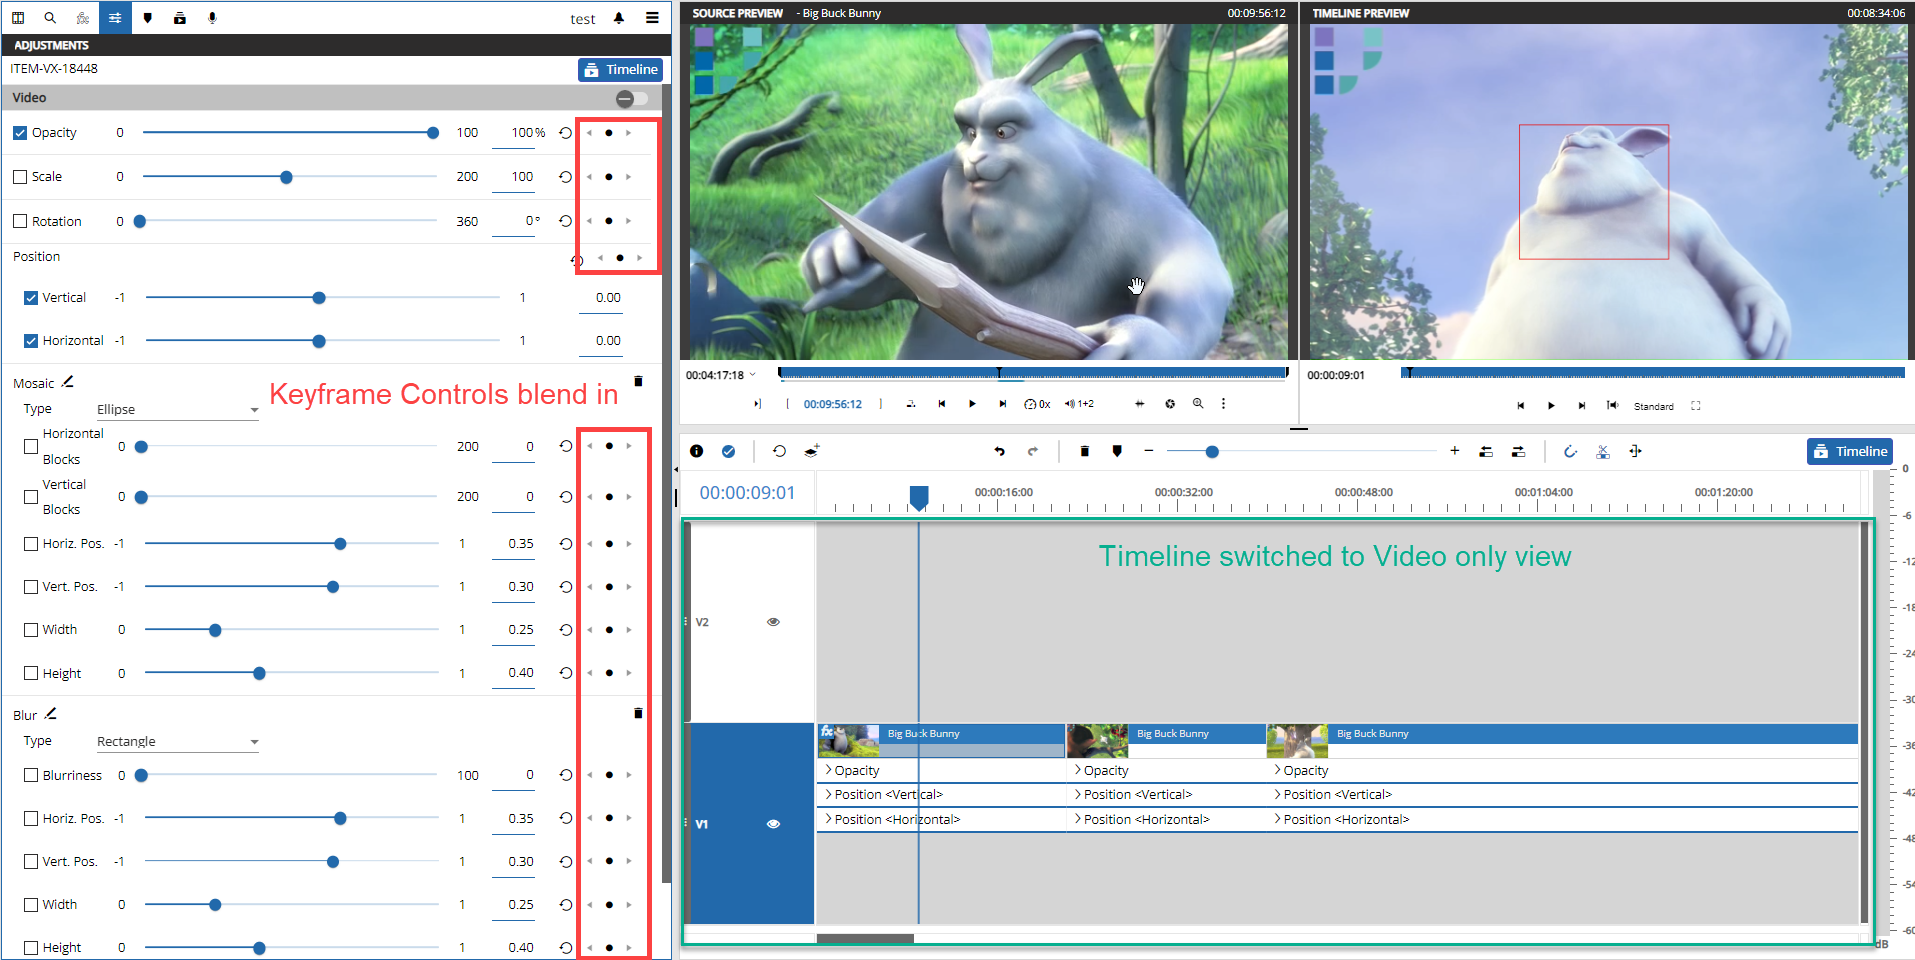
As a result, the graphical timeline will change blending out audio tracks and animated graphics giving the user more space to work with keyframes on the video elements. Also keyframes controls will be blend in wherever keyframes are possible:
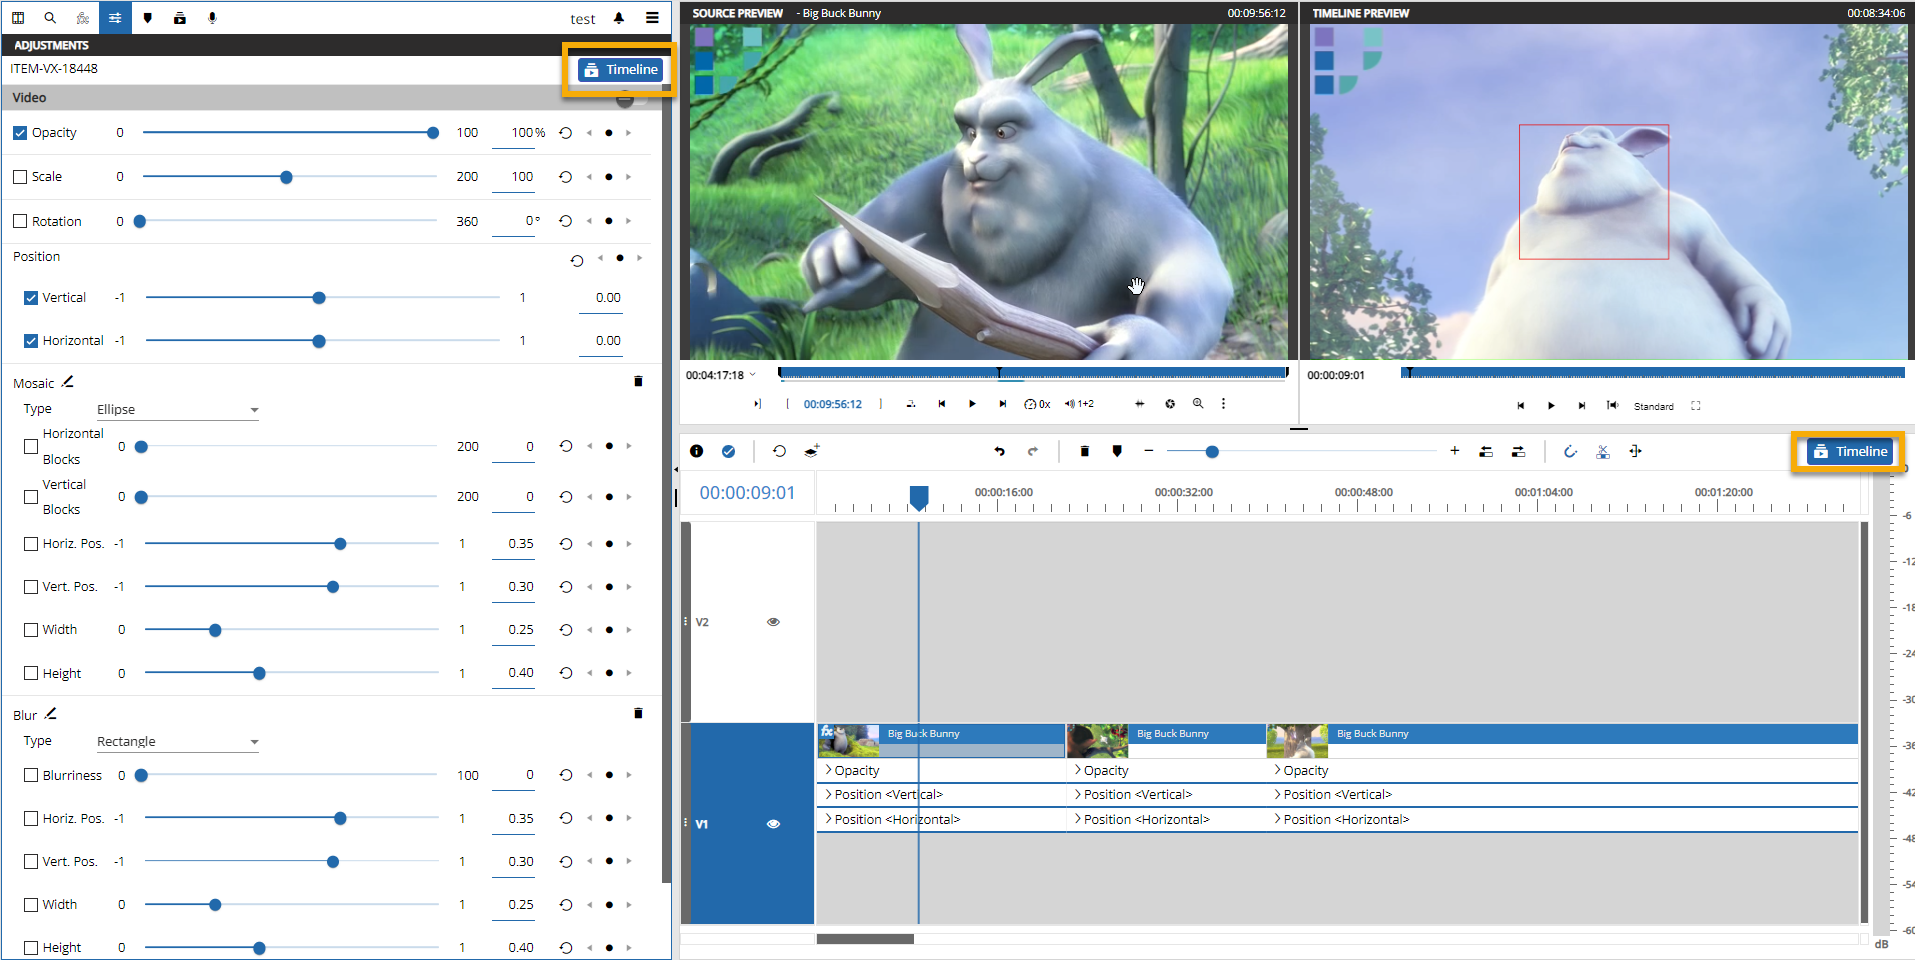
To switch the view back to the normal timeline editing simply click the timeline button:
Settings Pane options
With Keyframes new options are displayed in the settings pane. Most essentially are the keyframe controls that are blend in for each supported effect:
Those allow one to set a new keyframe with the current effect value at the timecode position of the timelines playhead while clicking the dot. It is also possible to navigate between existing keyframes of an effect while clicking the left/right arrow buttons.
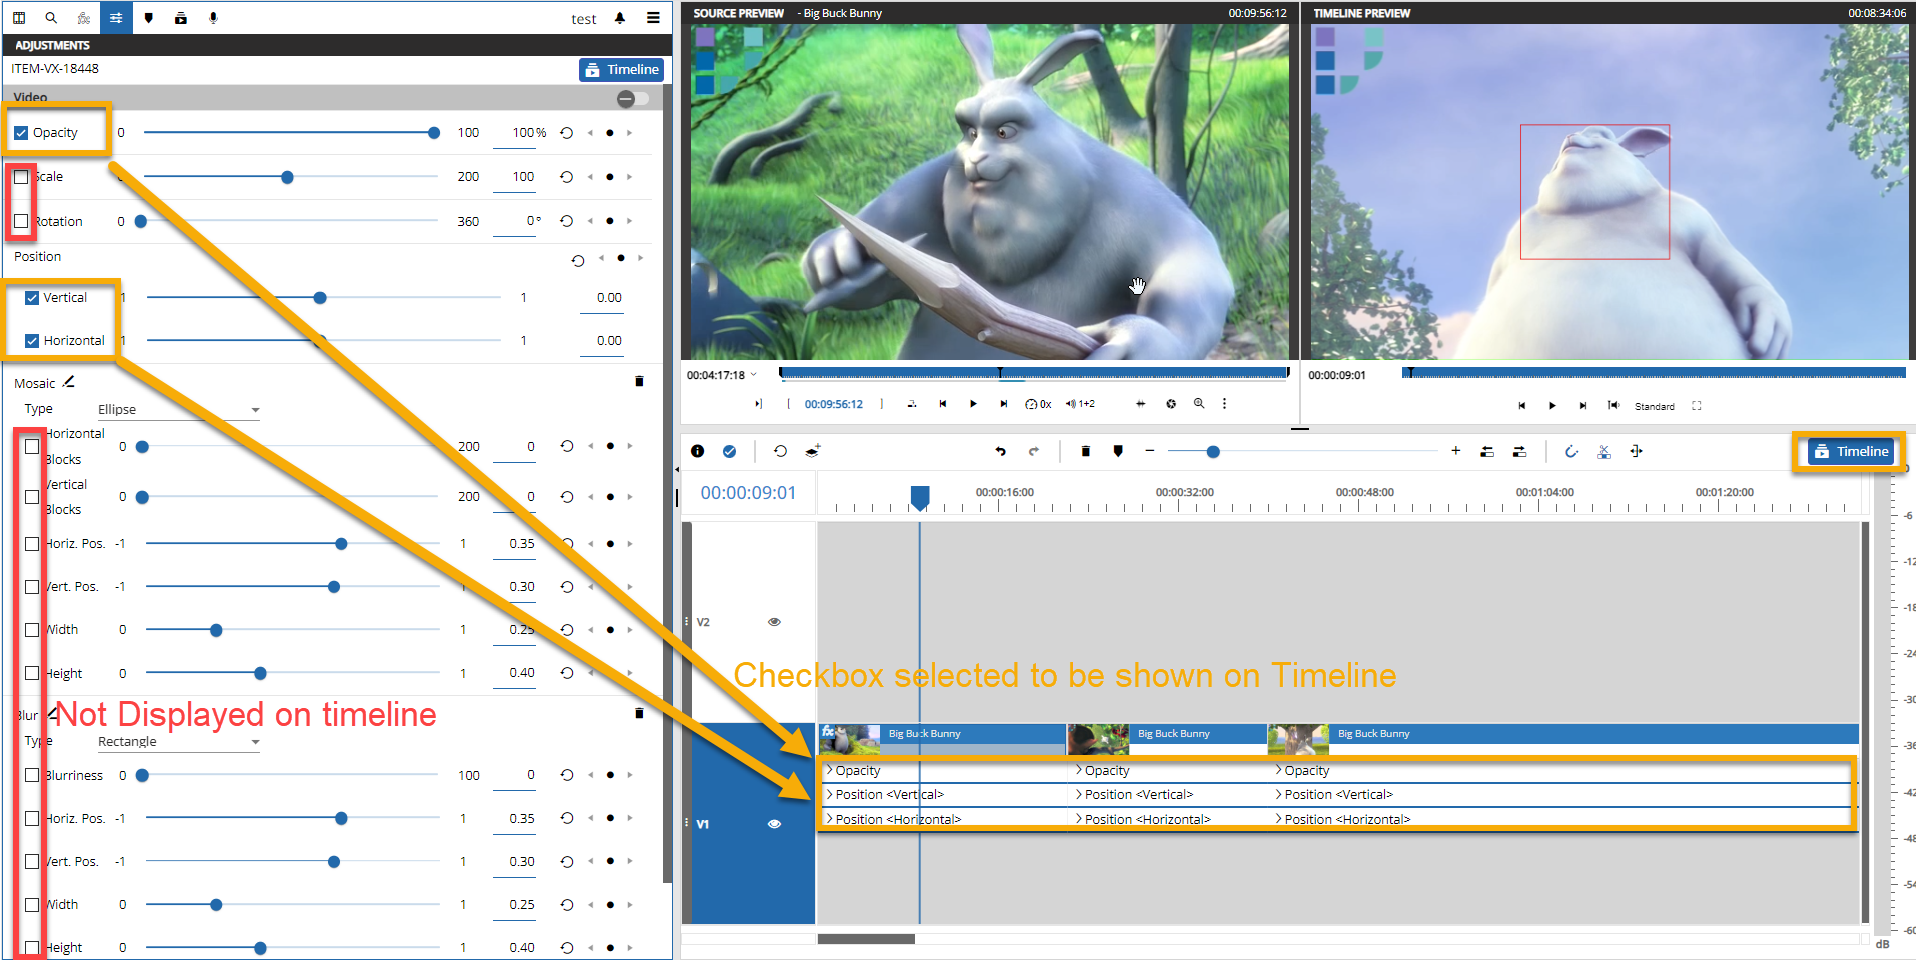
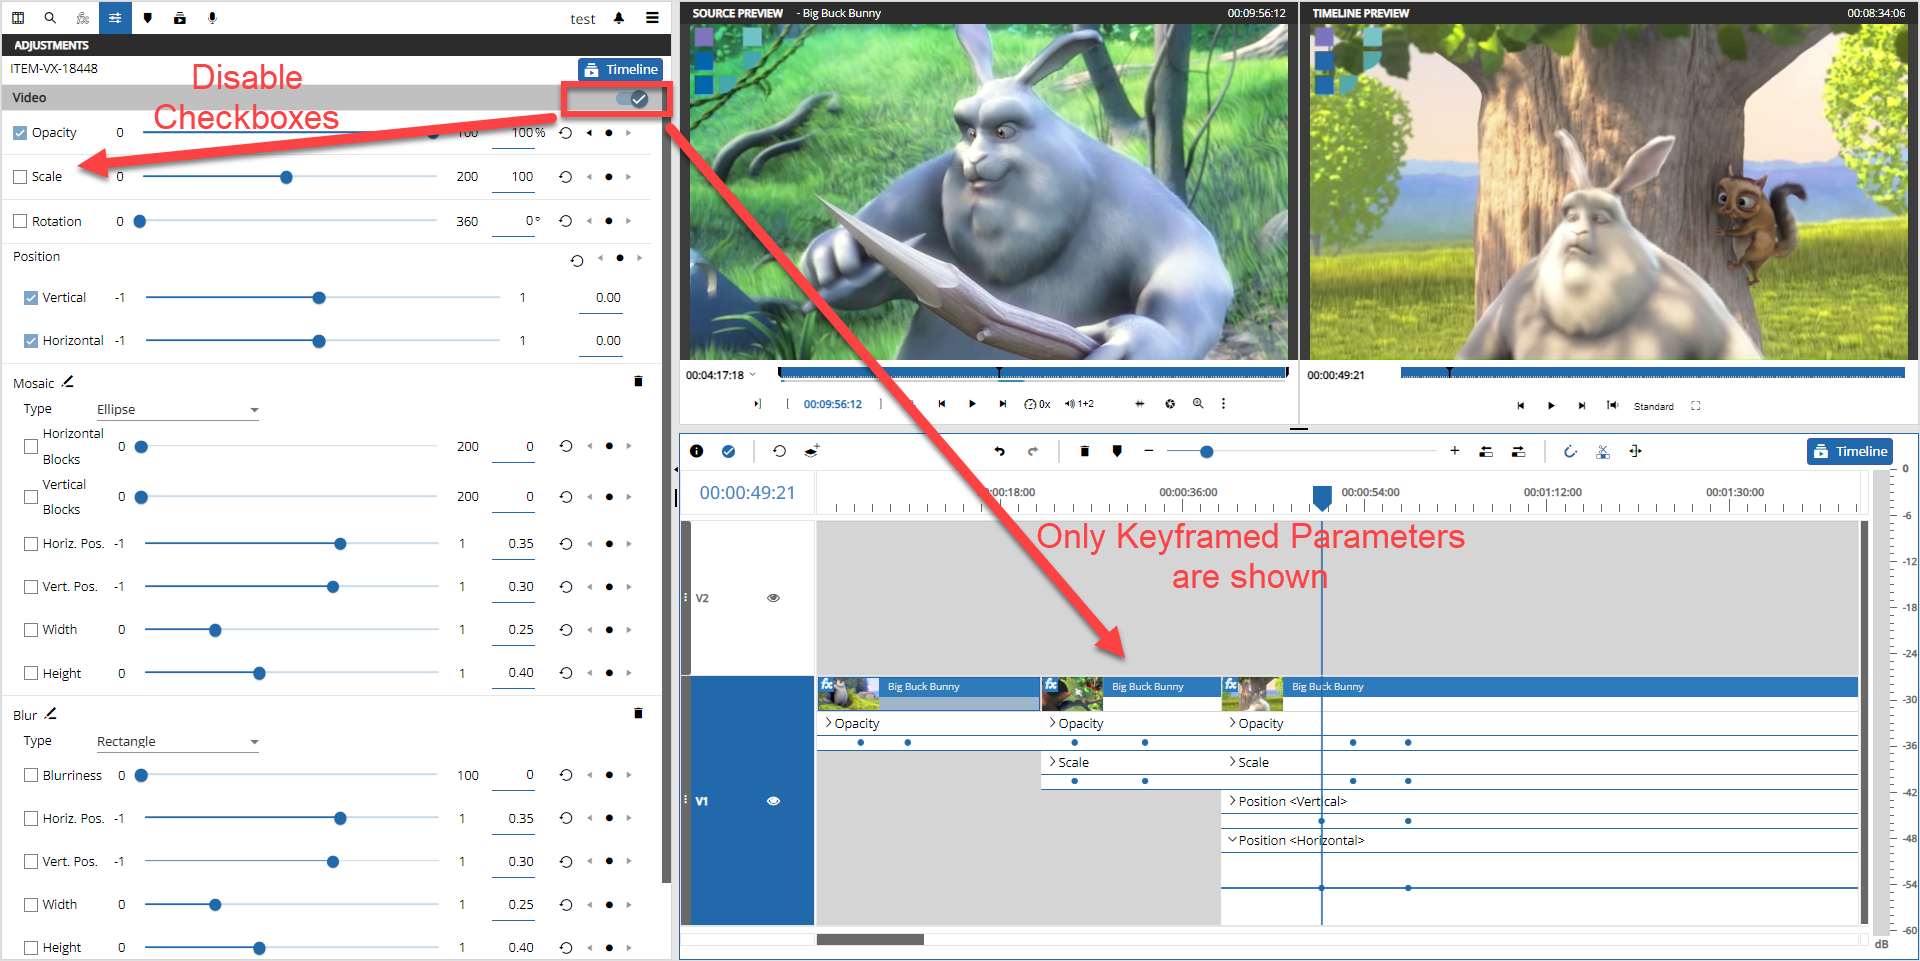
There is also a checkbox is blend in before the effects value slider:
This allows the user to define what effect parameters are displayed on the timeline and what are not. This is meant to offer an advantage when a higher amount of segments and parameters are used on a timeline to give a better overview. The following illustration explains the behaviour:
The “Reveal all Keyframes” switch can be found in the settings pane header bar. Toggling it on will disable the beforehand explained checkboxes and switch the timeline view to display only parameters where keyframes are located on.
Example usage of keyframes in the timeline
There are various options to work with above mentioned options in combination with the graphical timeline. The following an example explains how keyframes can be used and adjusted.
Starting on a simple scene having only one segment on the timeline, where the user decides to use keyframes blending from black into the video. Doing the following:
-
Position timeline playhead at beginning of the segment.
-
Add a keyframe by clicking the dot button after which a dot and line on segment will be displayed.
-
Changing the opacity value to 0 - updating the timeline preview and the dot/line on segment.
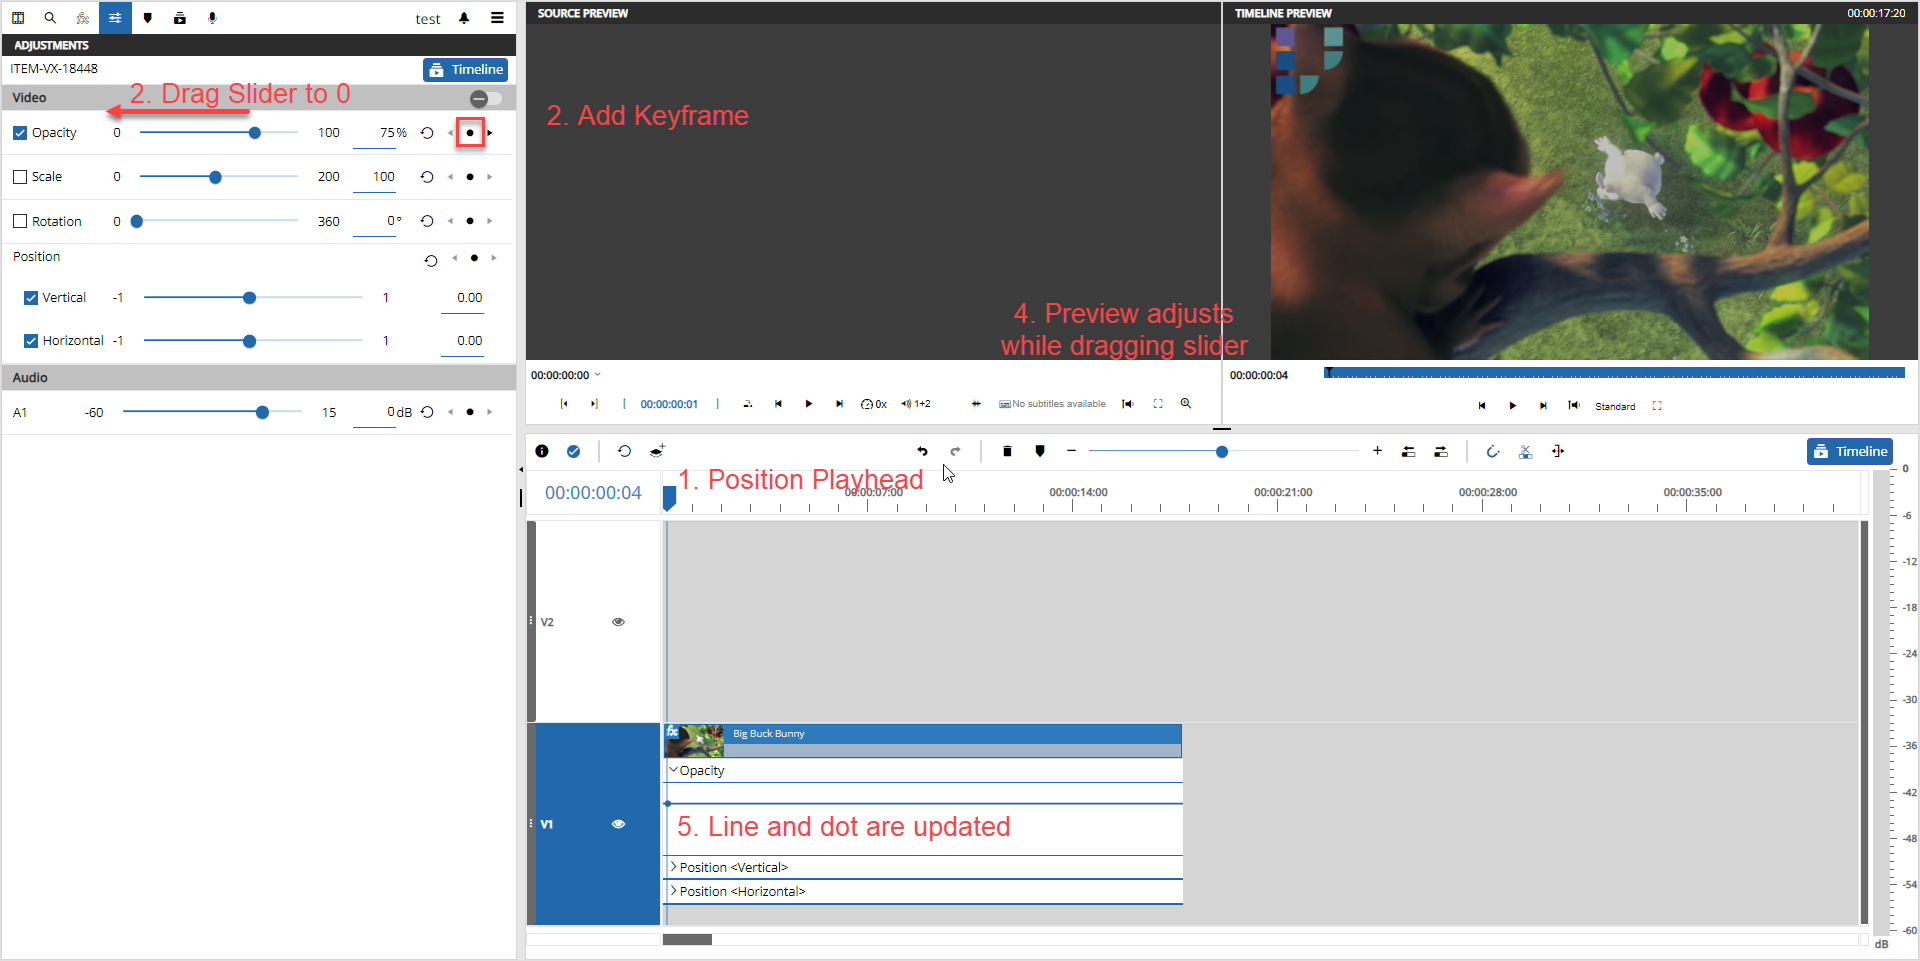
So the first keyframe is added which blends the complete video out. To build the fade in now the user can:
-
Navigate the playhead to the position where the video should be displayed fully
-
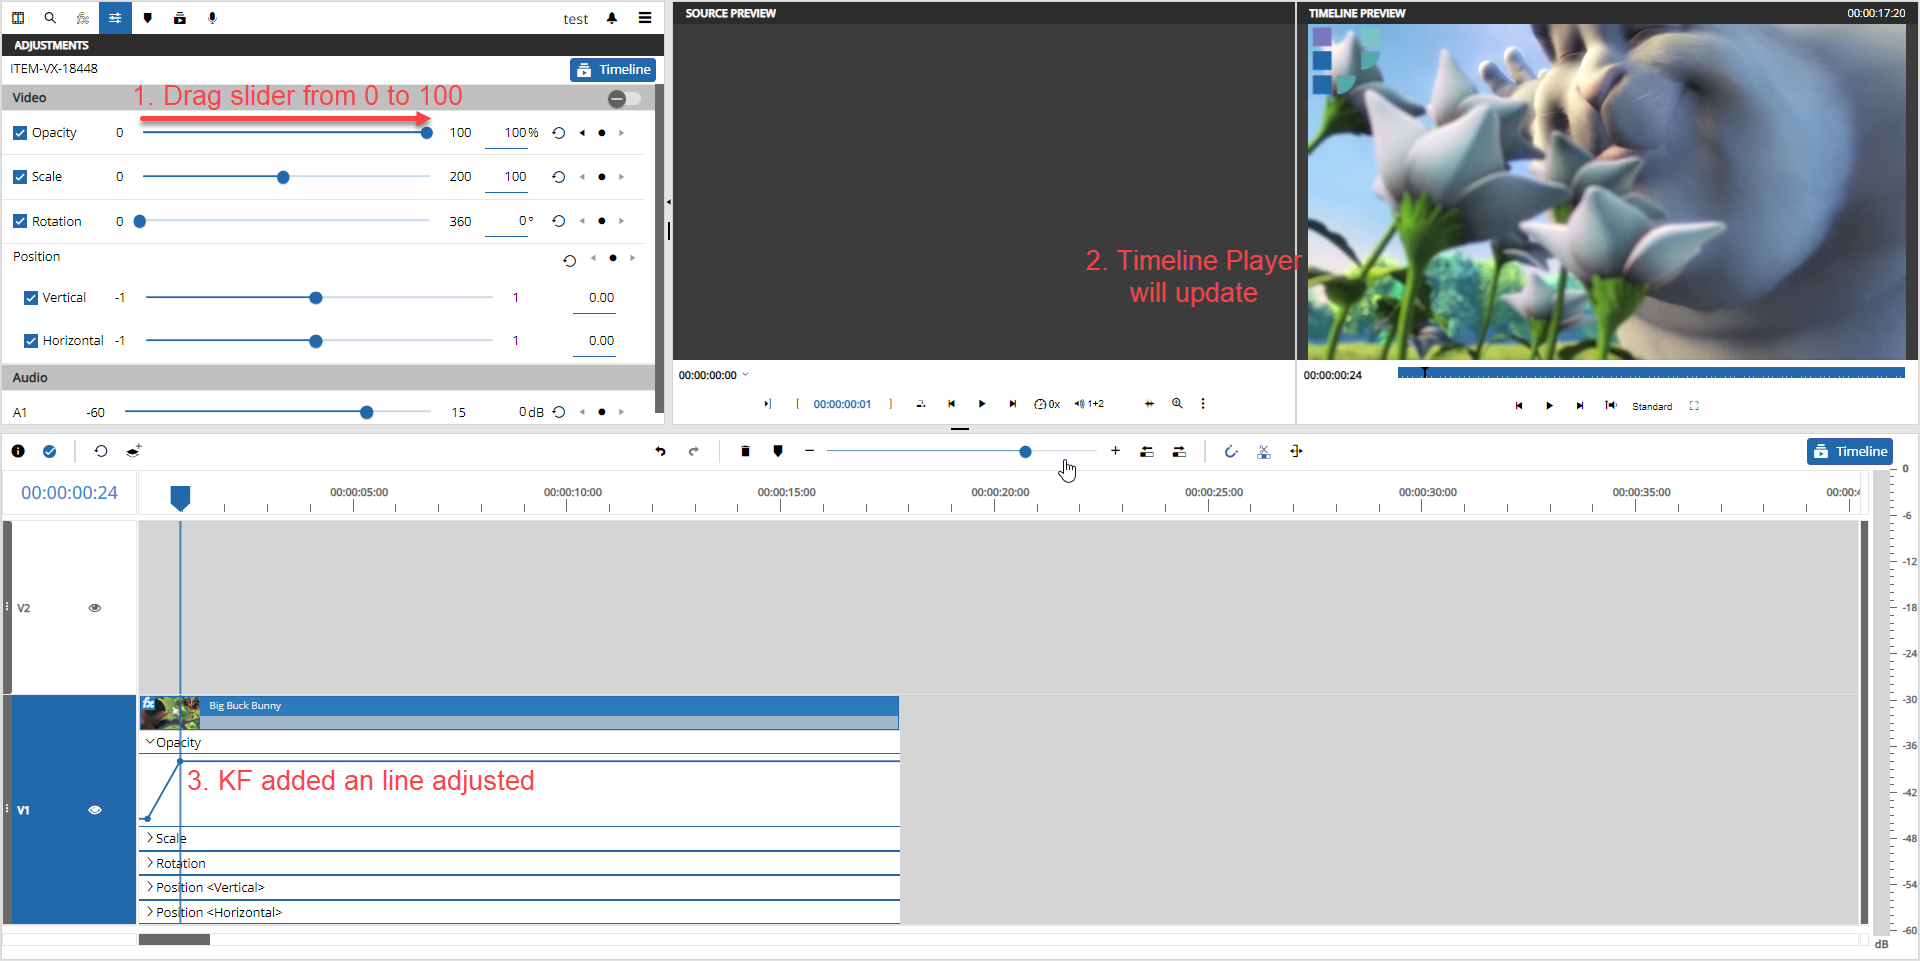
Drag the opacity slider to 100 to set a 2nd keyframe. No add keyframe button is needed as value changes after setting the first keyframe will set keyframes automatically.
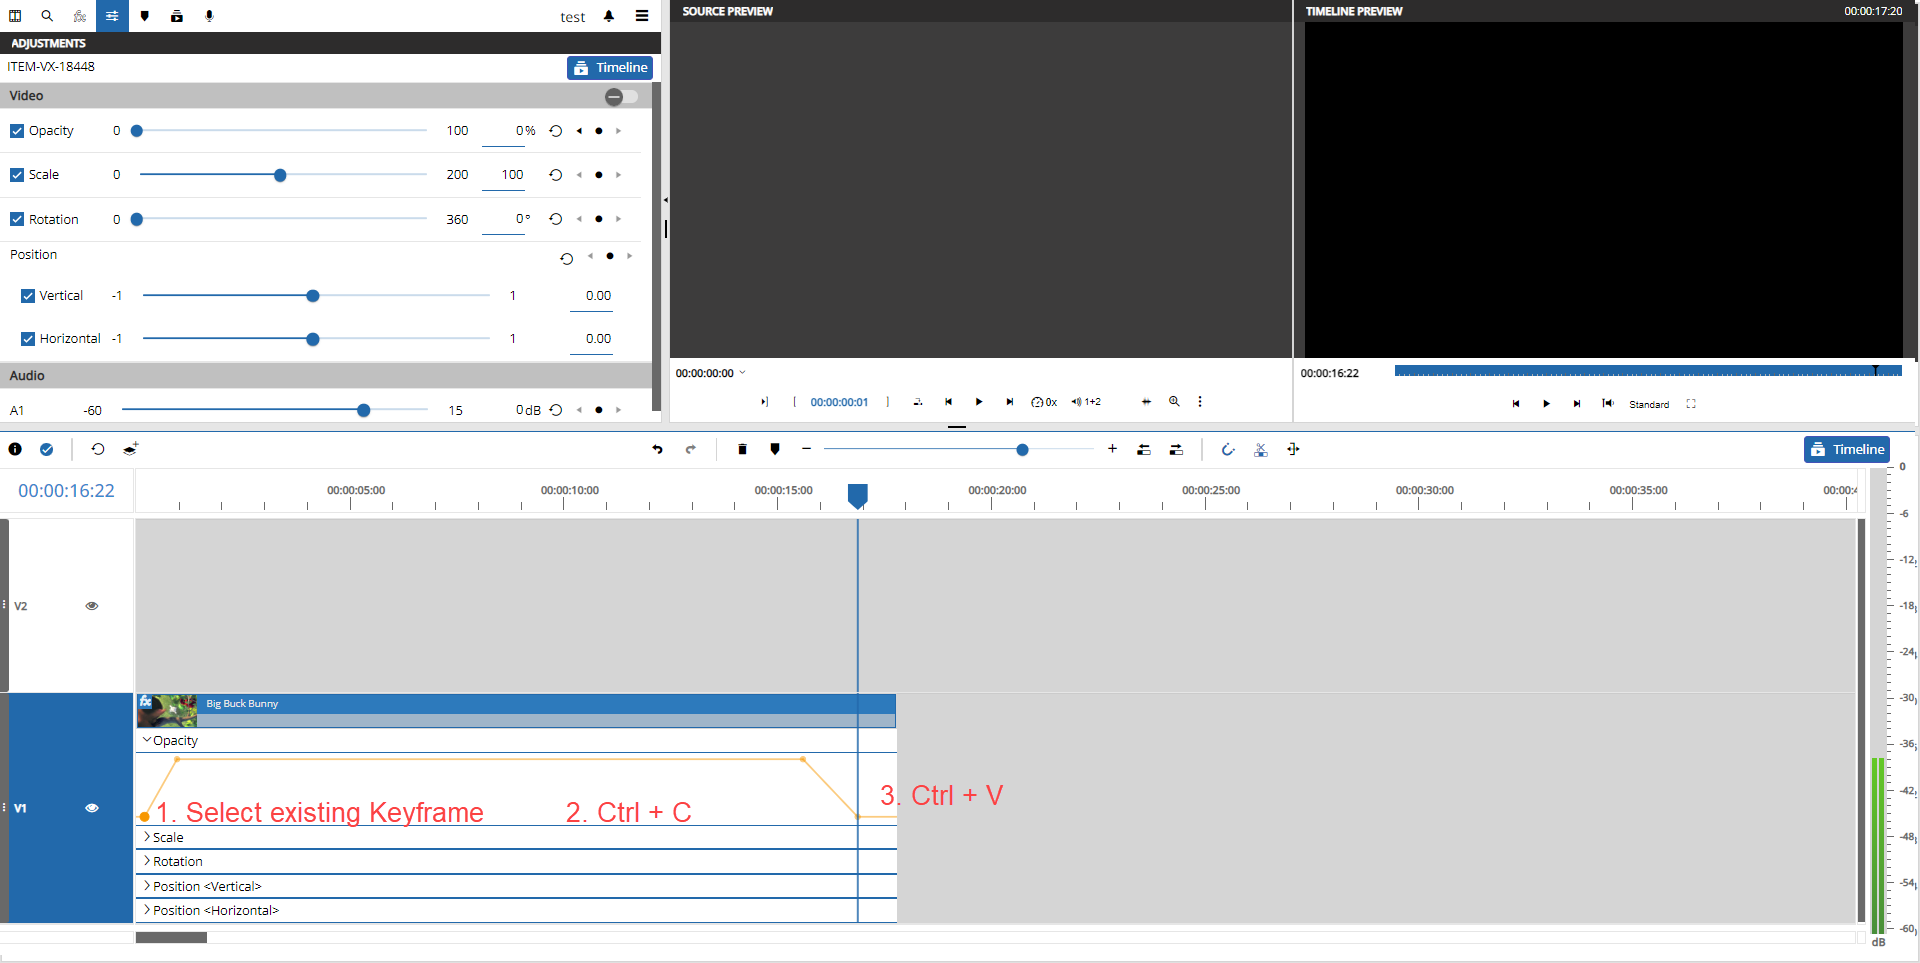
Lets say the user wants to build the same thing as a fade out at the end of the clip, the user can easily do this while:
-
Select an existing keyframe with single mouse click.
-
Click Ctrl + C
-
Position playhead at target timecode on timeline.
-
Click Ctrl + V
In result the keyframe will be copied to the new position with the given effect value.
Working Options
The above example offers an overview of how working with keyframes can be done. Here are more options to support the user listed below.
-
Drag and drop interactions
-
Drag and drop position of a keyframe freely using the mouse.
-
Drag and drop position of a keyframe horizontally while holding ctrl key down and using the mouse.
-
Drag and drop position of a keyframe vertically while holding shift key down and using the mouse.
-
Adjusting 2 keyframes at a time while dragging the line between them.
-
Trim over keyframes without deleting them.
-
-
Select interactions
-
Select a keyframe and hit Delete key to remove it.
-
Select a keyframe and hit Ctrl - C to copy it to the clipboard.
-
Select segment and copy / paste it including keyframes.
-
-
Visualizations
-
Selected keyframe is sized bigger.
-
When the line segment are hovered, they become orange to highlight the area of the user interaction.
-
Fx icon on segment as soon as a keyframe exists different to default value.
-
-
MediaManagement options
-
Reveal/Show all keyframes in timeline toggle button.
-
Select individual effect parameters to be displayed.
-
Reset effect for selected segment.
-
Navigate between keyframes.
-