Source Preview Player Functions
The Source Preview Player offers users a wide variety of options to further specify what sections of the media they wish to add to the timeline. These options can all be found in the player menu.
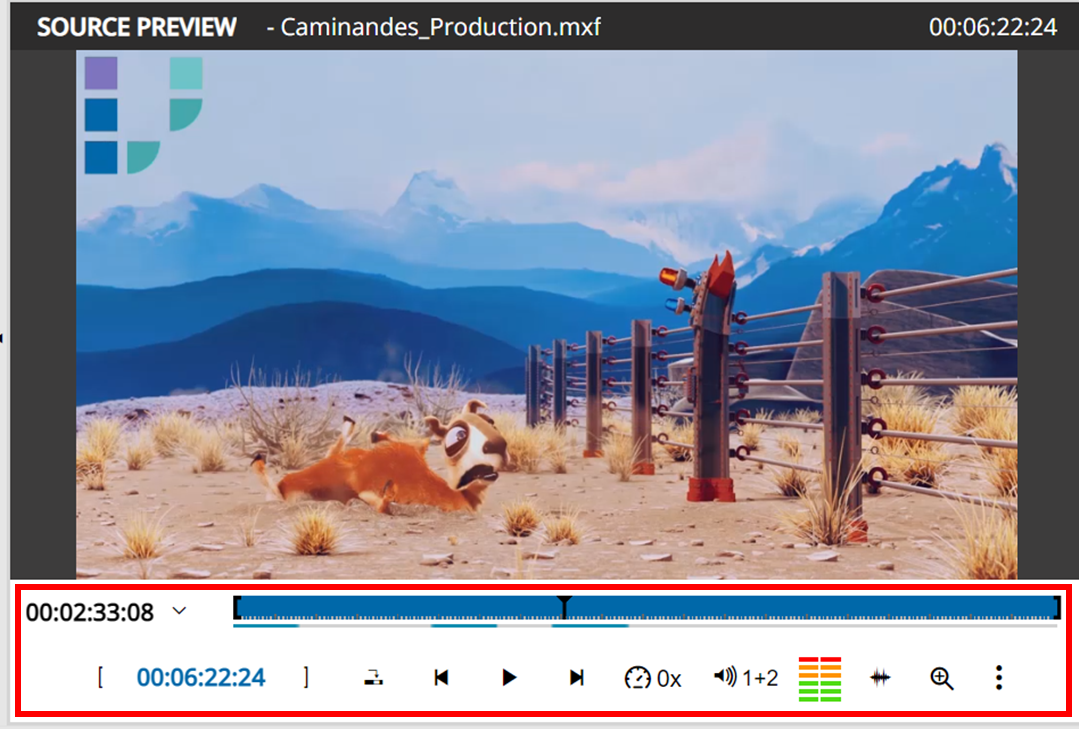
IN and OUT Points
When adding media ot the timeline, editors may want to add only a partial clip instead of the entire media asset. In order to achieve this, the player's IN and OUT points can be used to specify which portion of the clip users want to insert into the timeline. The "Add in" and "Add-out" (1) buttons for setting the points (2) in the player's timeline, as shown below.
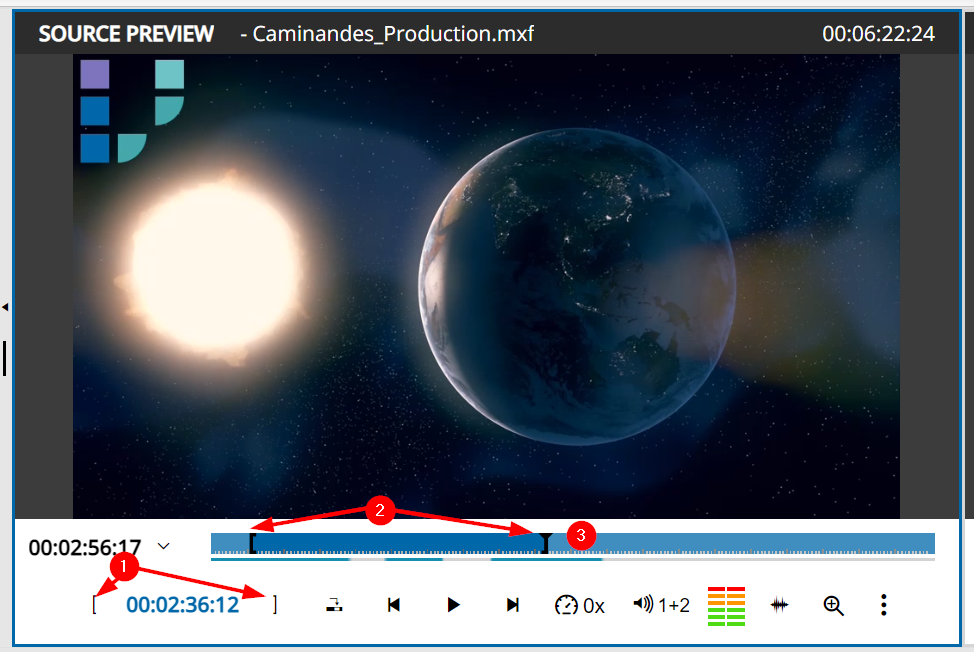
If users want to specify the insertion of an IO point, they can do this by dragging the playhead (3) to the desired position. Once an IO point has been set, users may also drag the point to the desired position.
Users are also able to set the IN and OUT points by:
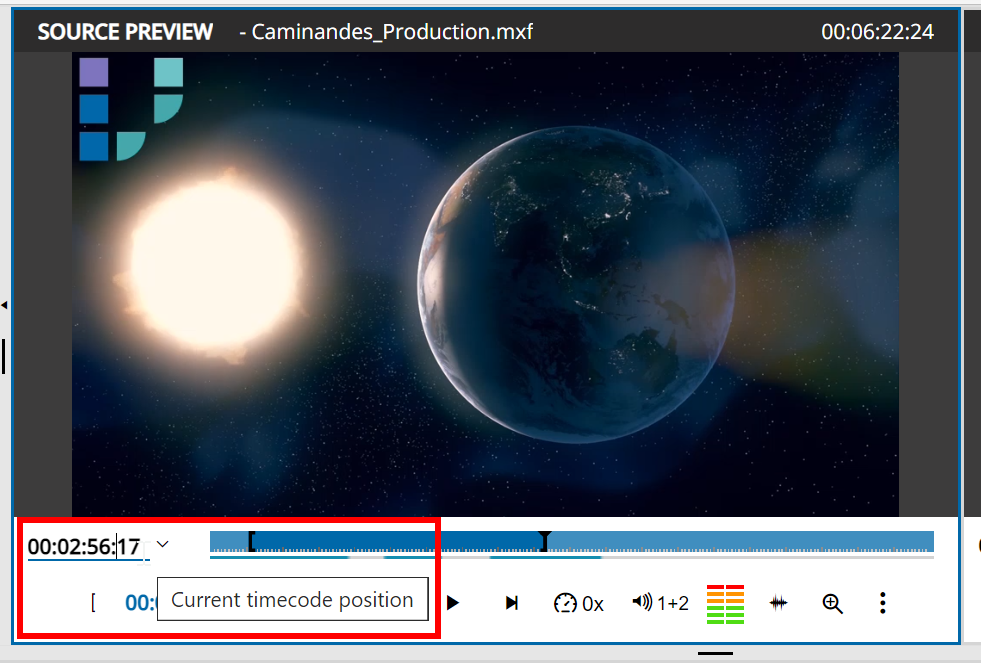
Using the TC navigation in the player menu to specify the playhead's position before using the IN/OUT menu option.
Using the skip frame option in the player menu to reach the desired frame in the player timeline.
Both of these options offer more accuracy when determining IN/OUT point positioning.
TC Navigation
If users want to accurately specify the insertion of an IO point to a particular frame, they can determine the position of the playhead, which is also the point of insertion, via time-based navigation. Once the desired TC has been selected, pressing enter will move the playhead to the desired position.
Play, Pause and Skip
Apart from the typical player functions, such as play and pause, users are able to skip on a frame by frame basis. This is particularly helpful when accurately specifying the insertion of IO points. Naturally, frame skipping and the change in TC is indicated on the timecode area below the player.

Playback Speed Factor
When using the player to view content, users can choose to increase or decrease the speed factor by selecting the factor option in the player's menu.
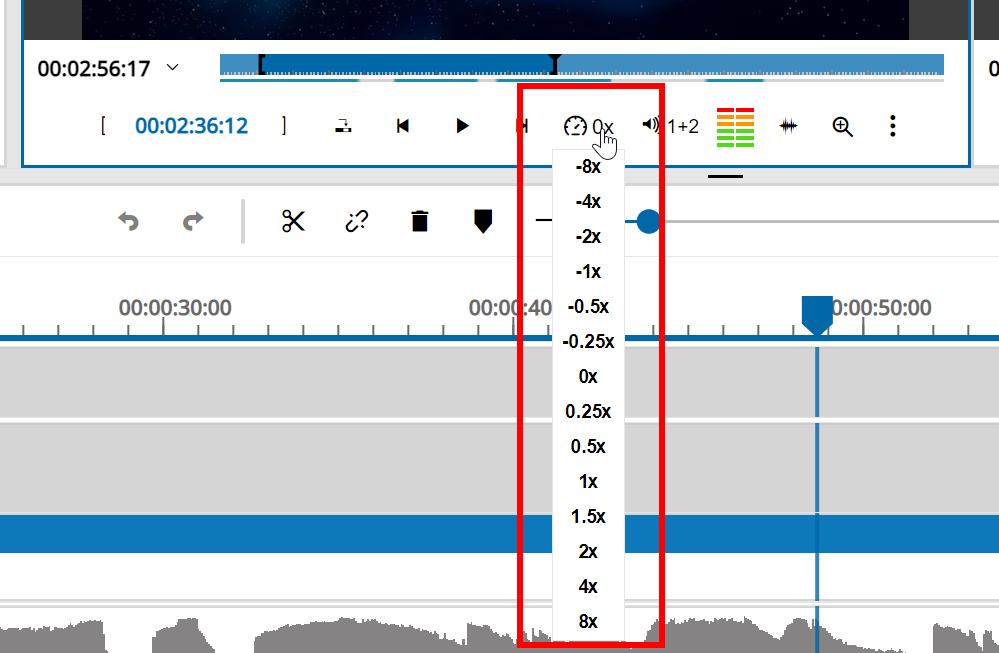
Please note that playback speed factor affects the amount of frames skipped when using the skip option in the player menu.
Add to Timeline
With the add to timeline option (1), users can add either the entire media being played in the Source Preview Player, or a specific portion of the clip when IO markers are set. It is important to note that when using this function the point of insertion in the timeline is always the needle's position in the timeline (2).
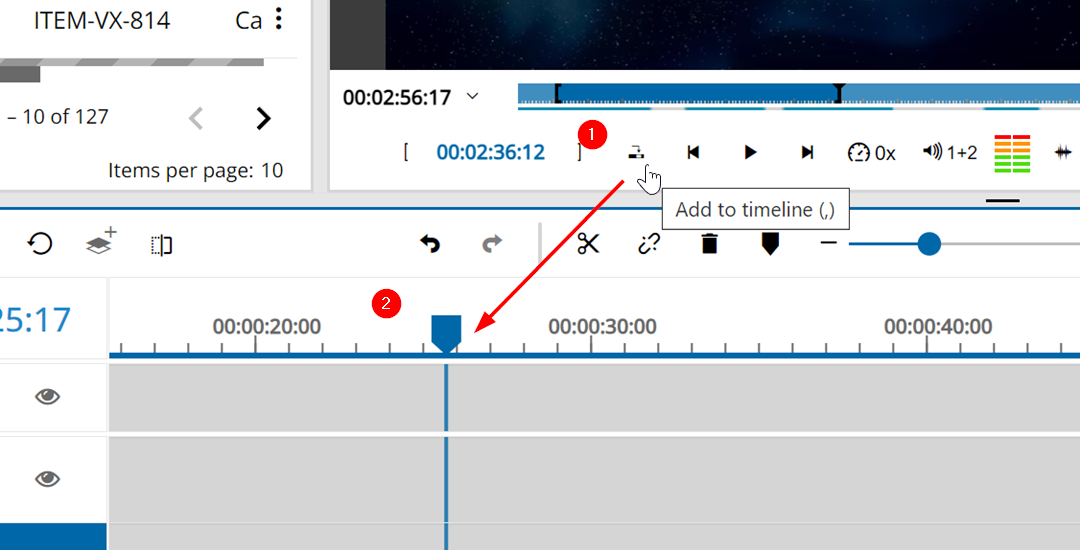
Immediately after the media segment has been added to the timeline, the needle will shift its position to the end of the inserted segment.
Audio Channel Selection
Users can select which audio channels should be played back in the source player. This option also controls which channels are inserted into the timeline when executing the add to timeline action. Please read more about audio channel handling in Audio Channel Selection for Timeline describing the functionalities associated in deeper detail.
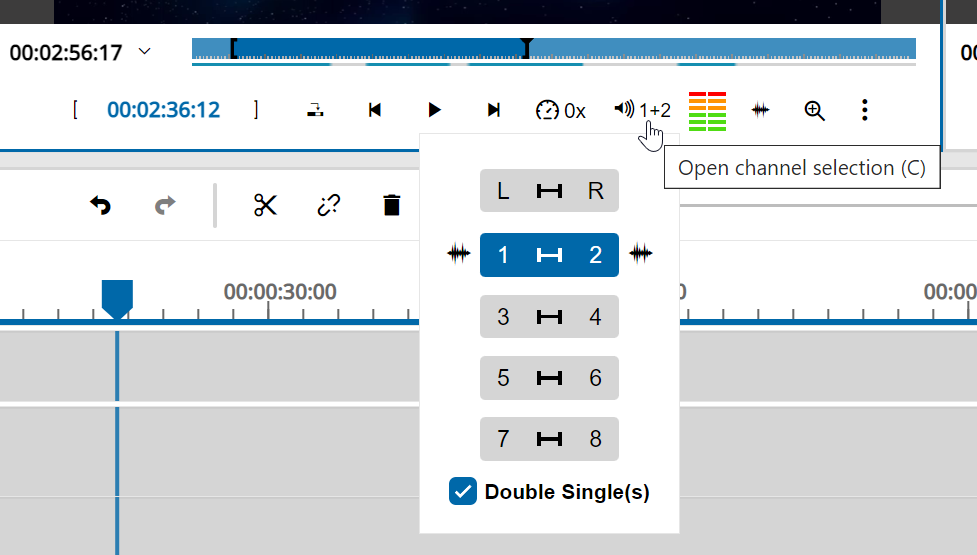
The waveform symbol next to the audio channel number indicates, which audio channels have waveform information (= audio signal) and which don't based on the available waveform data from VidiCore API.
Fullscreen Mode
Whenever viewing material on either of the players, Source Preview and Timeline Preview, users are able to switch to a fullscreen mode.
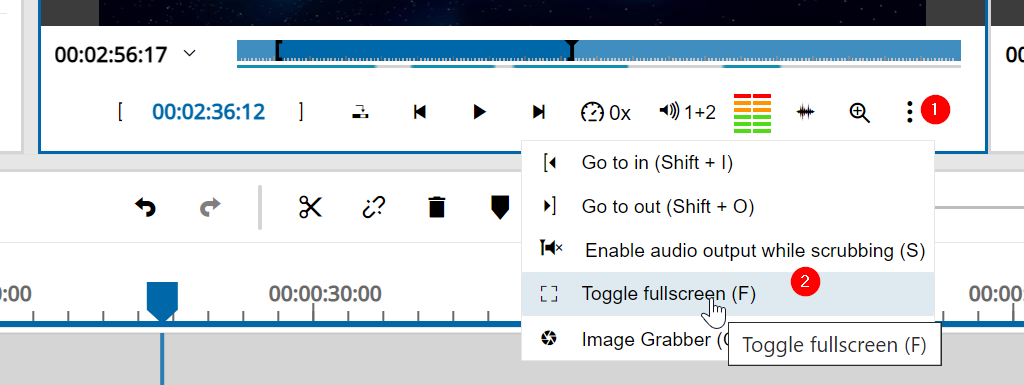
When using the fullscreen mode, hovering over the bottom edge of the screen will prompt the player's menu options. Clicking on the "X" button will revert the player to its normal mode and return to the standard VidiEditor UI.
Audio Scrub Toggle
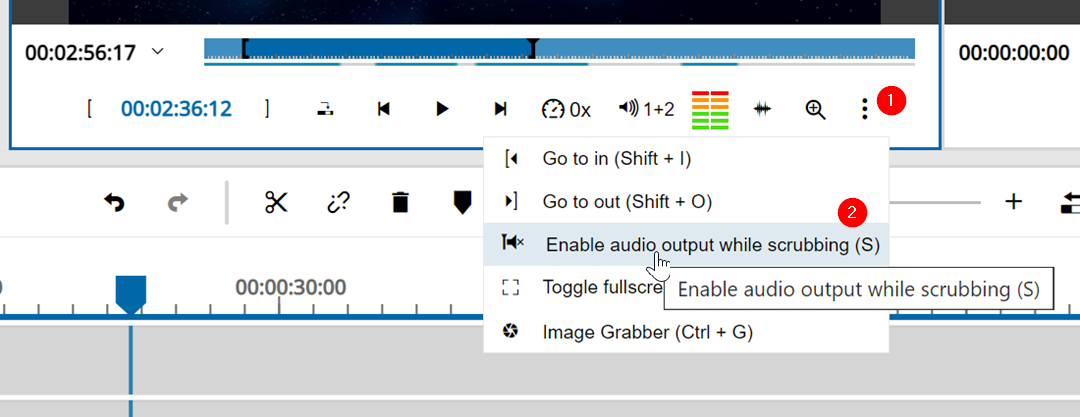
When scrubbing the source player, users can select whether to have sound. Selecting the playhead/speaker button on the source player will toggle this option on or off.
Timeline Zoom
Particularly with long videos, the navigation in the source player might be not sensitive enough to what one would expect. This is due to the fact that the visible player size does not allow one drag the playhead with greater precision between frames. While this is no problem working with a short file, using a long file and dragging the playhead might already navigate the videos position several seconds or even minutes in the source material.
With 22.2, VidiEditor users can zoom into the timeline using the lens symbol. While this allows one to see a smaller range of the video it also permits one navigate the playhead with increased sensitivity and frame accurately.

Following options are supported:
Use the slider to zoom in & out
The timeline ruler auto-adjusts and scrollbar is displayed
Auto scroll when moving playhead in zoomed in state to right or left edge
Double click on the lens icon to zoom out completely
Show More menu
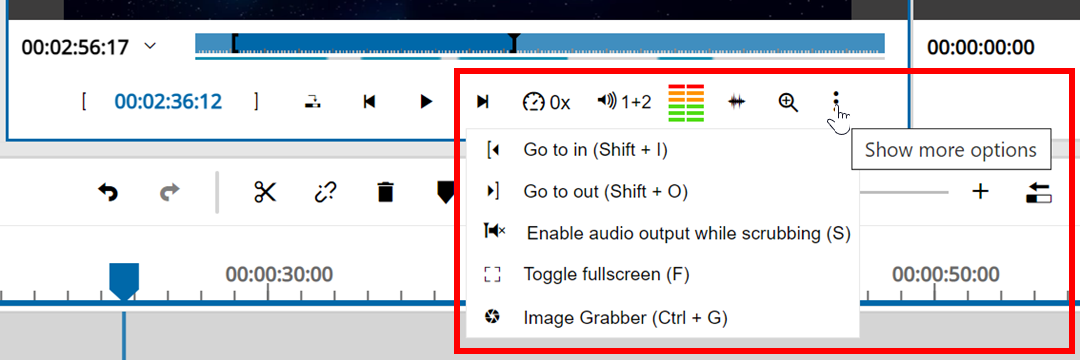
You will see a “Show More…” menu icon illustrated by three dots in case the resolution or space is not sufficient to show all VidiEditor player controls below the video. If you click on this icon, you see a menu containing all the hidden player controls. The controls will work exactly the same way like if they are shown below the player.
Show Subtitle
If a media item is loaded to the source player having metadata groups defined for subtitling (see Subtitles [VE OG]) the source player will display a control for selecting one of the available subtitles or to hide subtitles completely. If no suitable data exists, the control will be blend out. Selecting on of the presented lists will display the subtitle text in the video player on top of the video display. The appearance or formatting of the text will depend on appearance settings set on the metadata groups list. So VidiEditor tries to do display the text as close as possible to appearance settings set in the metadata group. Anyway this will not be exact as only a subset of formatting options can be supported and an auto line wrapping is implemented to show th text as good as possible on screen. In case no appearance settings are set the formatting will fall back to settings defined in ConfigPortal as described in: Subtitles [VE OG].

