Workflow Designer (new version)
The VidiFlow Workflow Designer is the central web UI for designing and maintaining BPMN workflows which are executed in VidiFlow.
Overview
The main layout of the Workflow Monitor consists of the following parts:
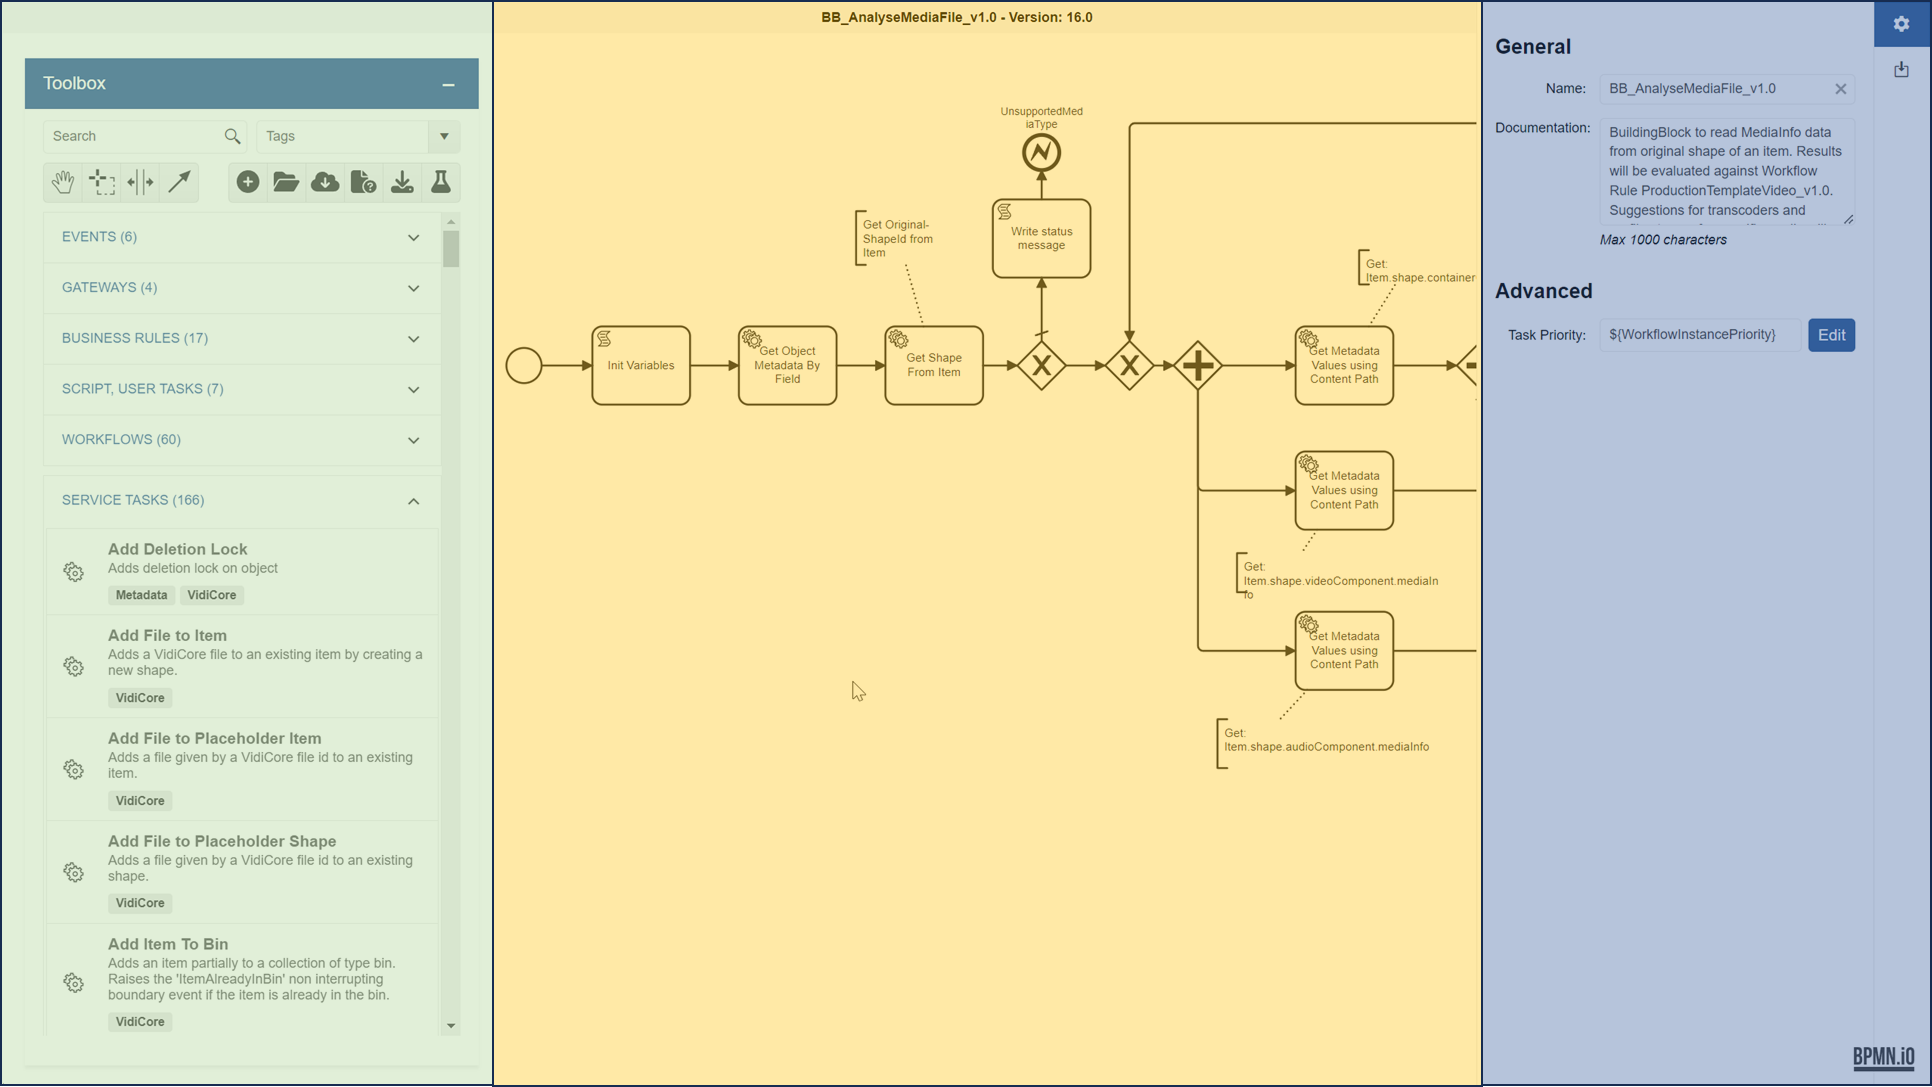
Workflow Designer: Overview of different areas
Color | Name | Section |
|---|---|---|
Green | Toolbox | Allows one to select any BPMN objects and drag them to the canvas. Also offers buttons to create, deploy or download workflows. |
Yellow | BPMN canvas | Shows the whole BPMN workflow. Objects can be dropped here, connected to others, selected and commented. |
Blue | Properties panel | Check and modify properties of the selected object or the workflow itself. |
Toolbox
The toolbox is the central place to find entities/objects needed for the workflow.
The toolbox can be shown or hidden via the button in the title bar.
Selection Area
The main area of the toolbox shows different categories, which can be opened and closed via the arrow on the right side:
Section | Description |
|---|---|
Events | BPMN standard events to start and end workflows or receive boundary or error events. |
Gateways | Gateways to control the flow of the workflow. |
Business Rules | VidiFlow Business Rules available in the system. |
Script, Users Tasks | Script tasks, user tasks etc. |
Workflows | VidiFlow Workflows available in the system, to be possibly executed as sub-workflows. |
Service Tasks | All VidiFlow service tasks available in the system. This can include product tasks as well as customer specific tasks. |
Others | Other BPMN entities. |
Filtering Area
The filtering area is located under the toolbox.
The search text box filters for the names of any BPMN entities in the selection area. While typing, the categories of the selection area are filled with the matching entries.
Alternatively, one or multiple tags can be chosen from the dropdown for filtering. This is currently only supported for service tasks.
It is possible to combine the filter for names and tags.
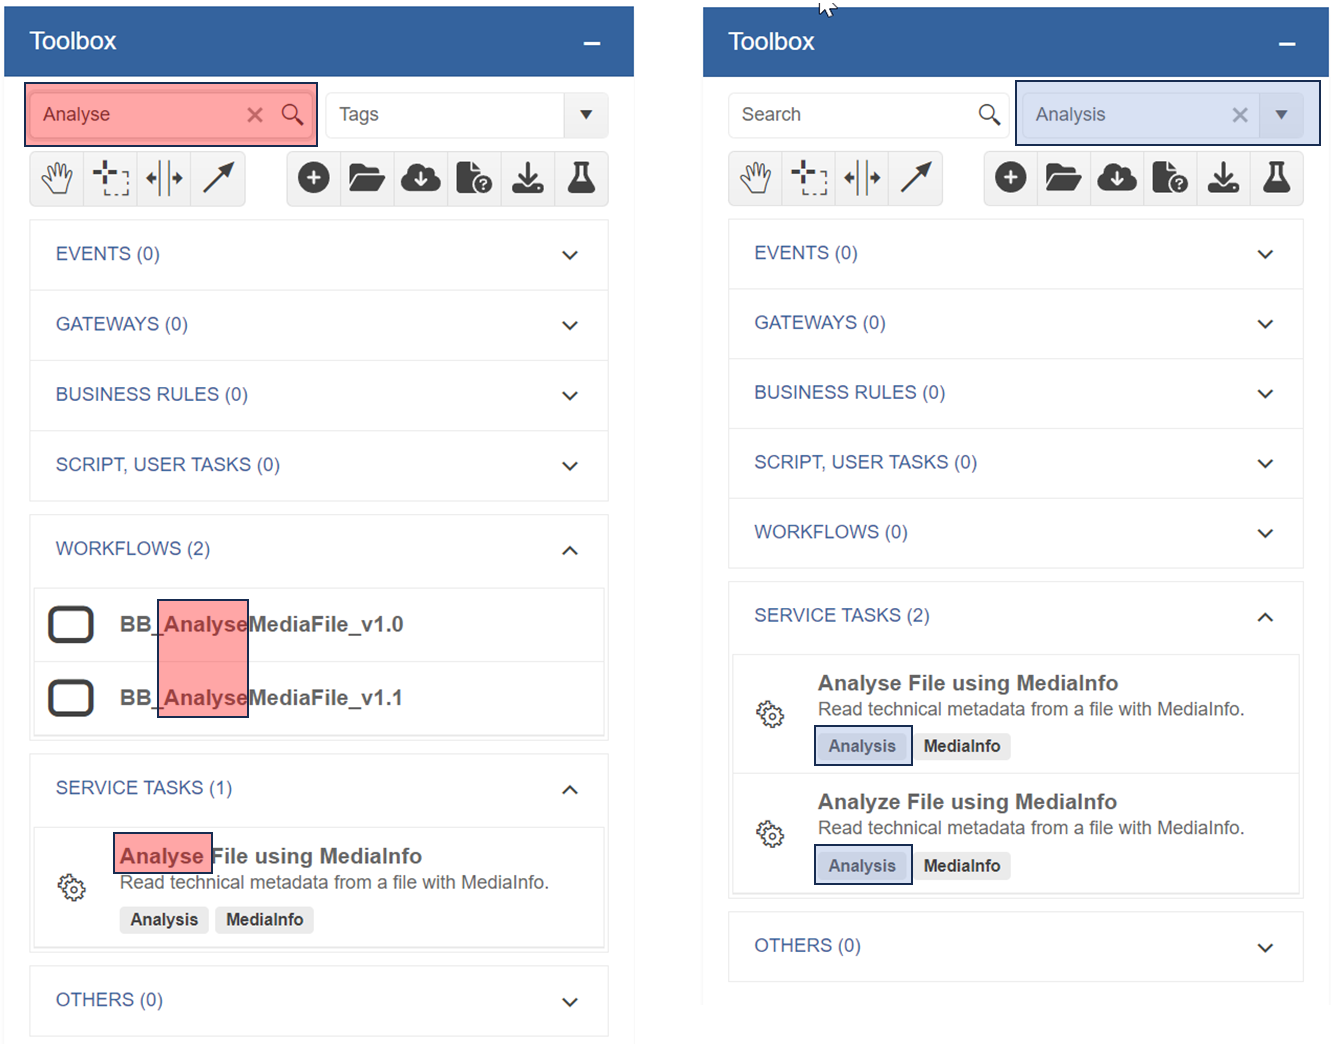
Filter BPMN entities by name (left image, red marking) or tags (right image, blue marking)
Button Area
The button area below the filtering area provides the following options:
Button | Description |
|---|---|
Canvas tools | |
 | Activate the hand tool: Select and move BPMN entities. |
 | Active the lasso tool: Draw a rectangle to select all BPMN entities in the area. |
 | Activate the create/remove space tool: Create or remove space by move all entities besides or below the mouse cursor vertically or horizontally. |
 | Activate the global connect tool: Connect different entities. |
File and deployment operations | |
 | Create new workflow: Clean the canvas to start from scratch. |
 | Open workflow from local file system: Load an existing BPMN file to the Designer. |
 | Deploy workflow into system: Stores the workflow with a new minor or major version to ConfigPortal and triggers the deployment to the VidiFlow backend. |
 | Deploy workflow for major version: Same as above, but forces to create a new major version. |
 | Download workflow in XML: Save BPMN file to local file system. |
 | Check workflow: Verifies if all mandatory parameters have been set for all entities in the workflow. |
BPMN Canvas
The canvas is the central area of the Workflow Designer. It contains all entities of a workflow in a graphical representation.
General Features
The following is a list of the general features of the canvas:
On top of the canvas, the name and version of the current workflow are shown.
With the hand tool activated, the canvas can be moved by clicking and holding the mouse in an empty area and moving around. Alternatively, the mouse wheel scrolls vertically and shift + mouse wheel horizontally.
Zoom is possible via ctrl + mouse wheel while the move cursor is over the canvas.
It is possible to change the names of entities with a double-click on it.
If an entity is marked with a red color, then not all mandatory parameters are set.
Searching for entities is possible based on the names. Press Strg + F and type parts of the name. Select the correct entry if multiple matches are available
Dropping and connecting entities
Any entity from the toolbox can be put on the canvas by using drag & drop. There are different ways to connect these entities:
Drop an entity to the canvas without any connection.
Move an entity from the toolbox over an existing one, press and hold the shift key, move the entity to the destination location, and drop it. The result is that the new element (successor) succeeds the other where the shift key was pressed on (predecessor).
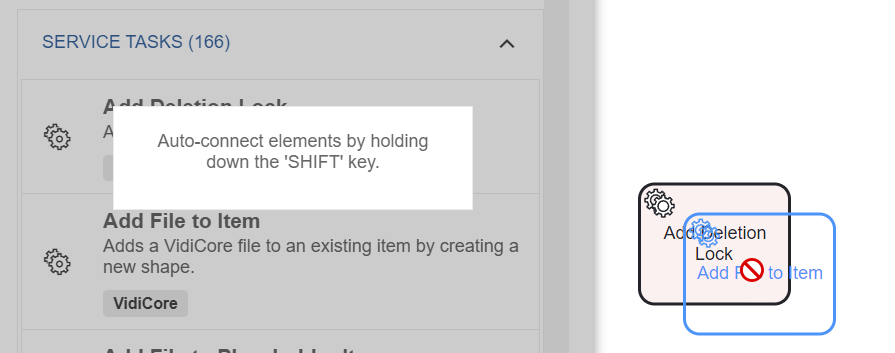
Select an entity, select the arrow symbol, and click on another entity. The first entity is now the predecessor of the second.

Activate the global connect tool and connect different entities to each other.
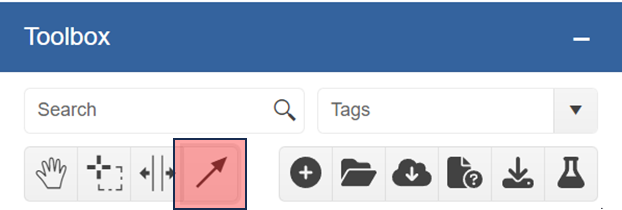
Properties Panel
The properties panel shows the properties and attributes of the currently selected entity in the canvas. If no element is selected, then the properties of the workflow itself are shown.
With the button on the top-right area of the properties panel, different area of properties can be switched:

Select area of properties
Workflow Properties
This section describes the various properties of the workflow itself. These can be checked and changed if no entity is selected in the workflow canvas.
General Properties
The general properties are:
Property | Description |
|---|---|
Name | Name of the workflow. |
Documentation | A text field to add any documentation of the workflow. |
Task priority | For advanced users: Change the default priority of VidiFlow tasks. |
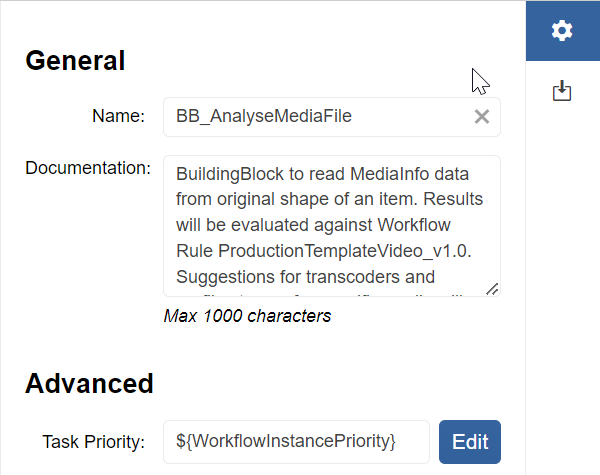
General workflow properties
Global Workflow Parameters
The area “global workflow parameters” shows a list of input and output parameters of the workflow. Additionally, some special parameters can be chosen.
Property | Description |
|---|---|
List of workflow parameters | This list shows all defined workflow parameters. Input parameters are marked with an arrow down symbol, output parameters with an arrow up. |
Description | Shows the description of the currently selected parameter. |
Examples | Shows examples of the currently selected parameter. |
Workflow Object ID | Choose the main parameter of the workflow: One object of sub-type Platform URI can be selected here. The value of this parameters will be shown as a dedicated column in the VidiFlow Workflow Monitor and derive additional information from it. |
Status Message | One output parameter of type String is selectable to be shown as a clear text status message in the Workflow Monitor. |
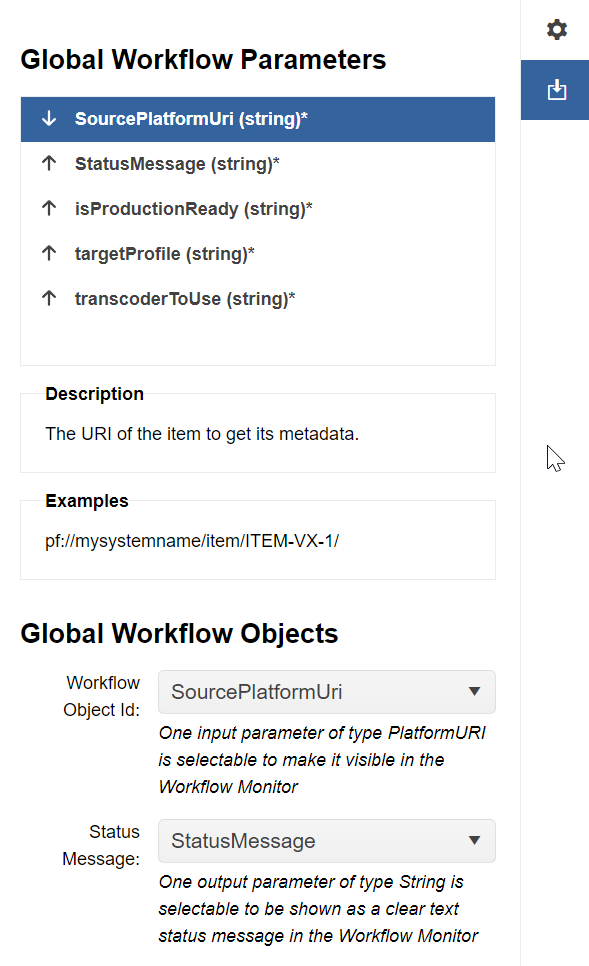
Global workflow parameters
Workflow Entity Parameters
Different types of BPMN objects require different attributes. In the following, the General area is described for the most relevant objects. Additionally, the advanced section and the parameters area are described in one step, as it may not be available for all entity types, but if so, it looks the same for all.
Service Tasks
Property | Description |
|---|---|
Name | Name of the canvas element. |
Service task | Name of the VidiFlow service task to be executed. |
Service Task Version | Version of the service task. Suggestion: If not better known, always use the latest available version. |
Description | Description of the service task. |
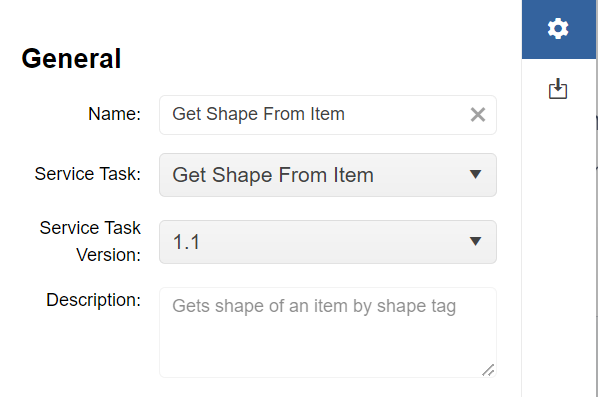
General properties for service tasks
Workflows / Call Activities
Sub-workflows can be executed in so-called call activities.
Property | Description |
|---|---|
Name | Name of the canvas element. |
Workflow | Name of the workflow to be executed. |
Workflow Version | Version of the workflow. It is possible to select a specific version. Alternatively, selecting x.Latest will cause the latest minor version of the workflow major version x to be executed. |
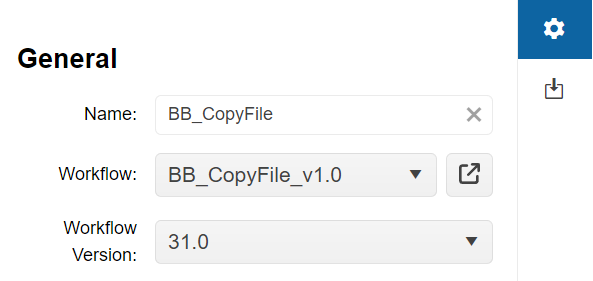
General properties for call activities
Business Rules
The following general parameters are supported for business rules:
Property | Description |
|---|---|
Name | Name of the canvas element. |
Business Rule | Business Rule to be executed. |
Business Rule Version | Version of the Business Rule. It is possible to select a specific version. Alternatively, selecting x.Latest will cause the latest minor version of the rule major version x to be executed. |
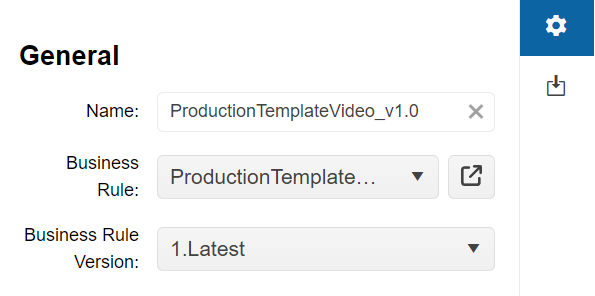
General properties for business rules
Script Tasks
The following general parameters are supported for Script Tasks.
Property | Description |
|---|---|
Name | Name of the canvas element. |
Script Format | Used script language. Example: “JavaScript” |
Script type | Choose between “Inline Script” (default selection) and “External Resource” |
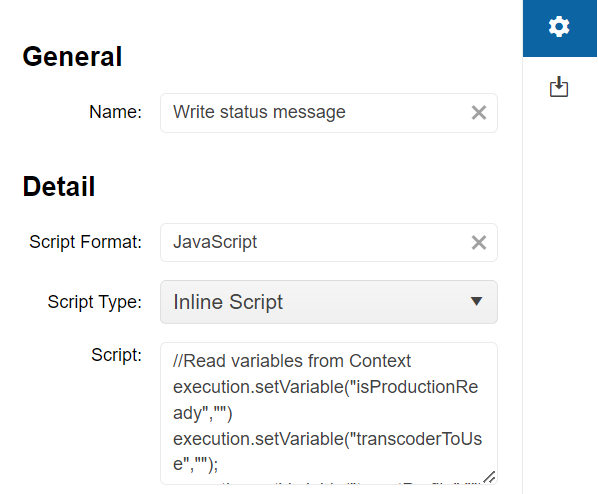
General properties for script tasks
Advanced Section
For the settings Asynchronous Before / After please refer to Camunda documentation about Asynchronous Continuations.
Parameter Area
The Parameters area is available for service tasks, business rules, or workflows. It shows all parameters of the selected workflow entities. For each parameter, it is possible to set a hard-coded value. Alternatively, there is the option to create new workflow input or output parameters based on a tasks', workflows' or rules' parameter.
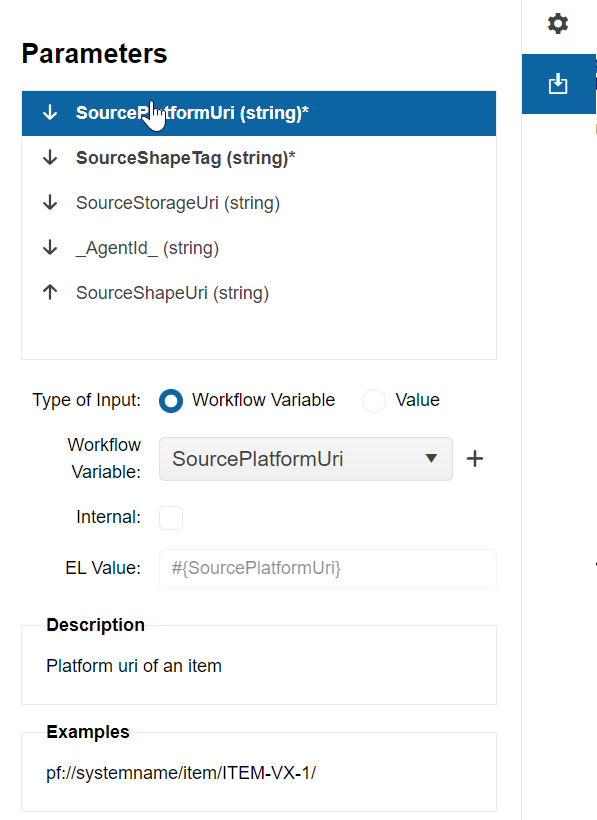
Parameters are for service tasks, business rules and workflows
Property | Description |
|---|---|
List of workflow parameters | The list on top of the area shows all parameters that are declined in the object to be called. Input parameters are marked with an arrow down symbol, and output parameters with an arrow up. |
Type of input | Selection between “Workflow Variable” and “Value”. |
Value (if “value” is selected) | Hard-coded value. |
Workflow Variable (if “workflow variable” is selected) | Dropdown to select an existing workflow variable to be mapped on. |
Button + | Opens a dialog to create a new workflow parameter based on the entities parameter (see screenshot below). Most values will be preset based on the parameter of the entity, but can be changed or overwritten. Is is also supported to create a workflow parameter as optional. |
EL Value | Readonly field showing the value in the expression language. |
Description | Description of the parameter. |
Examples | Examples for possible values of the parameter. |
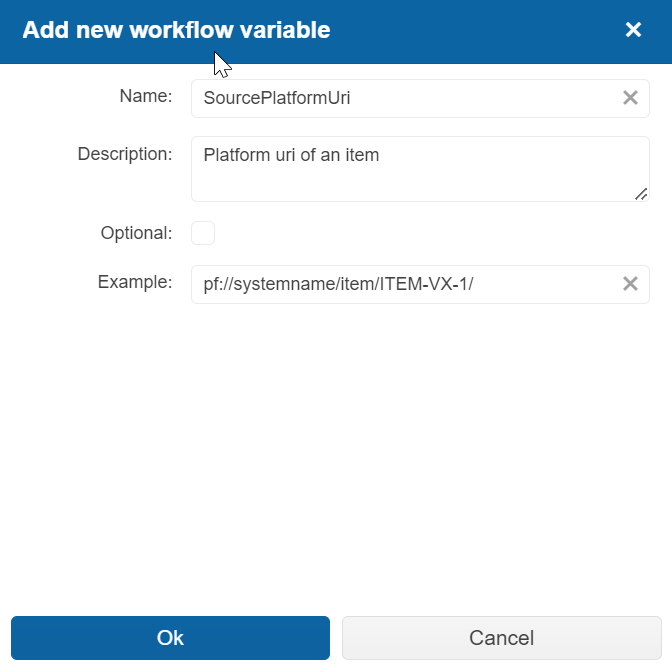
Dialogue to create a new workflow variable
