
The Bitmovin Transcoding service in Vidinet can be used for files stored on AWS S3 buckets. In order for Bitmovin to securely access your S3 storage, you need to grant Bitmovin explicit bucket access rights using AWS Roles and AWS S3 Bucket Policies. This is a guide on the creation of a role that has a trust relationship with Bitmovin's AWS service account together with a policy that uses your S3 storage.
A: Create the IAM Policy
In the AWS Console, go to IAM service and click Policy in main menu, then click Create policy. Go to the JSON tab and add the policy outlined below. You need to insert your own S3 Bucket names. Give the policy a good name, you will be asked to attach the policy to an IAM Role in the next step of this guide.
{
    "Version": "2012-10-17",
    "Statement": [
        {
        "Effect": "Allow",
        "Action": [
            "s3:PutObject",
            "s3:PutObjectAcl",
            "s3:GetObject",
            "s3:ListBucket",
            "s3:GetBucketLocation"
        ],
            "Resource": [
                "arn:aws:s3:::{s3-bucket-name}",
                "arn:aws:s3:::{s3-bucket-name}/*"
            ]
        }
    ]
}
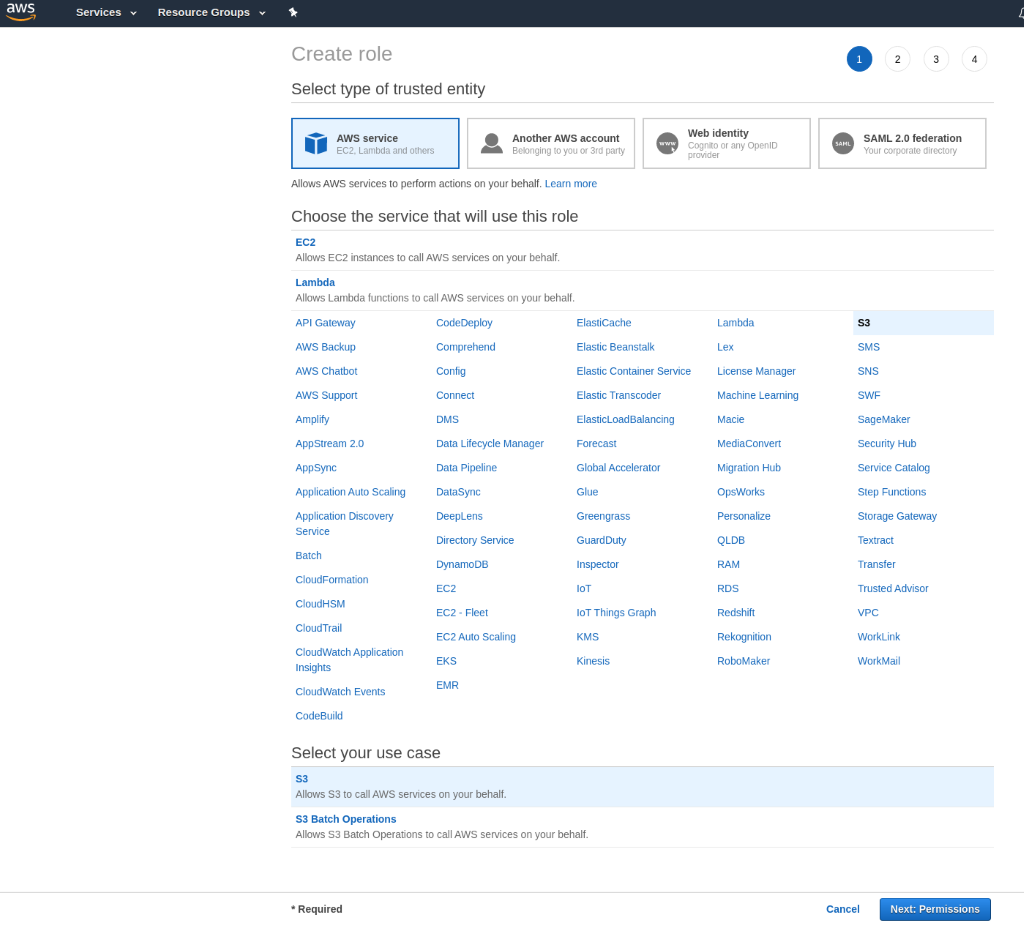
B: Create the IAM Role
Go to IAM services and choose Role, then click Create. In the first step of creation choose AWS Service, EC2, and S3 and go to the next step.
Now, attach the IAM Policy you created earlier. Complete the guide by adding Tags (optional) and give the role a name.
When you have successfully created the role, make a note of the Role ARN as you will be asked to enter it when launching your Bitmovin Transcodng encoding service in the Vidinet Dashboard.
C: Enable IAM Role Trust Relationship
Go to IAM services and choose Role. Find the created role in IAM service role list and enter it, then go to the tab Trust relationships and click "Edit trust relationship". Add the policy document outlined below to your Trust Relationship. (This will allow Bitmovin to assume the IAM role you created in B).
NOTE: you must replace the {any generated UUID} with a unique value. This can be any string you like but we recommend using a UUID (generated with tools like https://www.uuidgenerator.net/). Make a note of your UUID as you will be asked to enter it in the Vidinet dashboard when you launch your Bitmovin Transcodng encoding service. Don't forget to save your new trust relationship.
{
  "Version": "2012-10-17",
  "Statement": [
    {
      "Effect": "Allow",
      "Principal": {
        "AWS": "arn:aws:iam::630681592166:user/bitmovinCustomerS3Access"
      },
      "Action": "sts:AssumeRole",
      "Condition": {
        "StringEquals": {
          "sts:ExternalId": "{any generated UUID}"
        }
      }
    }
  ]
}
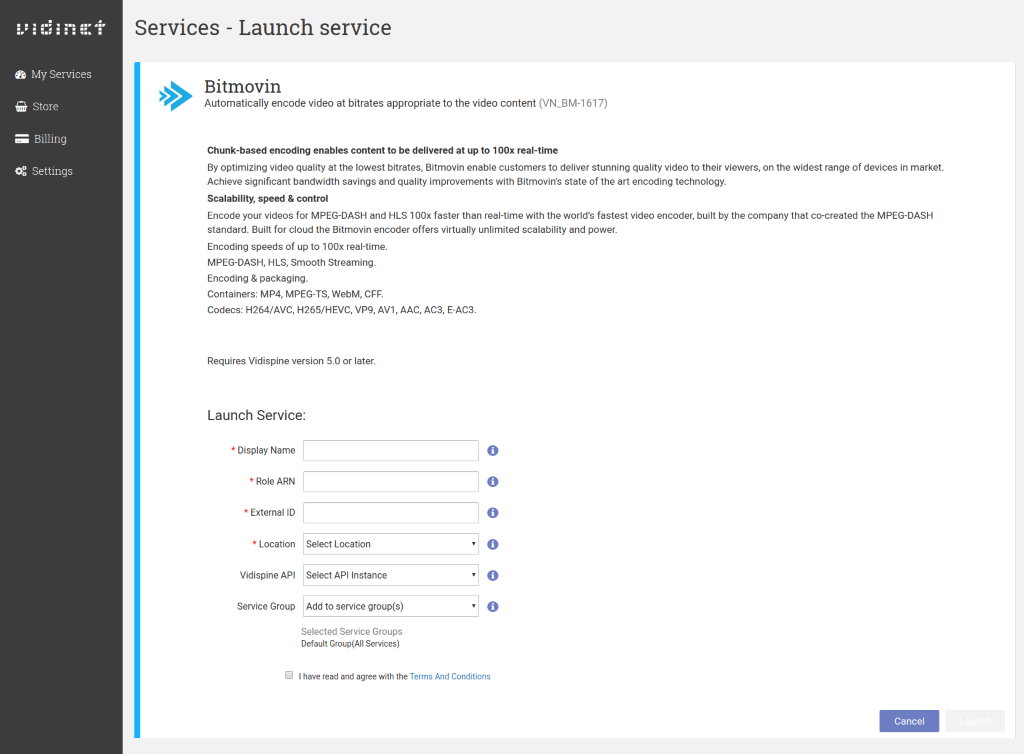
D: Launch the Service from Vidinet Dashboard
Launch the service from the Vdiinet Dashboard. Use the Role ARN from step B in the "Role ARN" field. Use the UUID from step C in the "External ID" field. Choose a Location as close to your S3 Bucket region as possible.
After completing the Launch Guide you have successfully configured the Bitmovin Transcoding service to be used with your VidiCore instance.