
Launching VidiCore API Editions with VidiNet
The following page describes how to get started with VidiNet Starter Edition
1. Marketplace
When you first reach VidiNet, you will have no services. In order create a system you need to start off by choosing one the Core Services: VidiCore API Starter or Team Edition. Only once one of these has been set, can one go through the other marketplace categories to add additional services or applications.
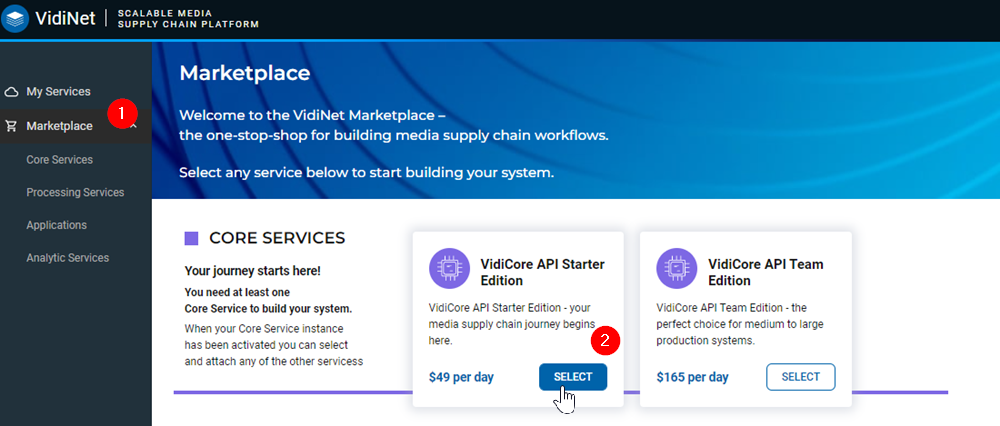
In this case we are picking out the Starter Edition. This option is meant to try out VidiCore and not meant for productive systems. If you want to go want to create a productive system please make sure to choose the Team Edition.
When Choosing the Team Edition: Storage
When setting up the VidiCore API Editions, the launch guide differs when specifying storage. The Starter Edition offers free storage while the Team Edition requires one to specify the storage using the VidiCore API.
If you want to choose the Team Edition, you should already have an Amazon S3 storage. You will then have to specify the storage as indicated here: Storages — Vidispine REST documentation .
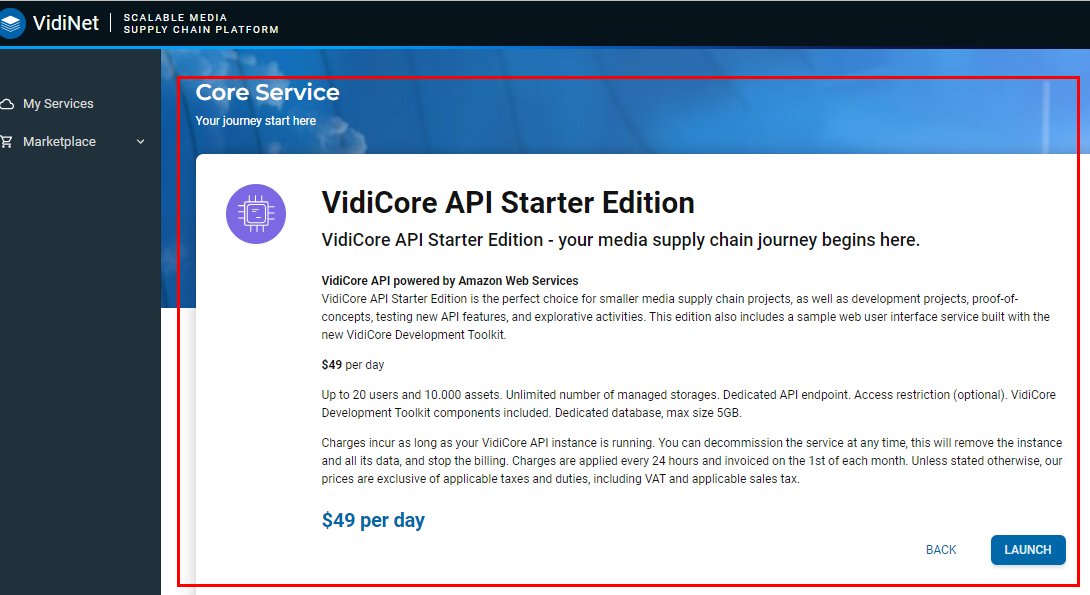
2. VidiCore API Core Service Launch
Selecting the Starter Edition, or any option, will open a page containing relevant information about the service before proceeding with the setup by selecting the launch option.
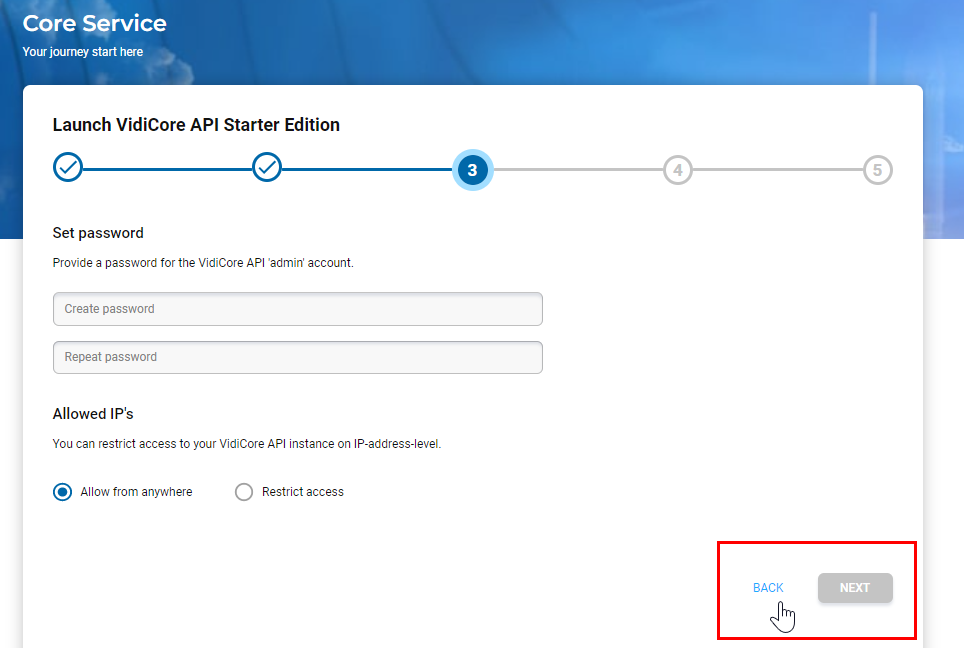
3. The Launch Guide
The setup phases are broken as timeline with a clear overview of the necessary fields for each phase. While several of these are self-explanatory, those which require additional attention are accompanied with an info icon. Hovering over the icon will offer relevant information that should be viewed before entering a value or choosing an option.
As long as the launch has not been completed, users can go back between phases.
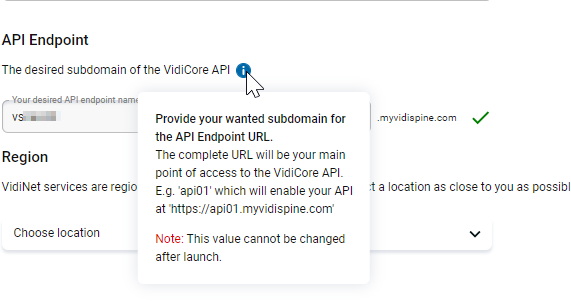
4. Display Name, API Endpint, Region
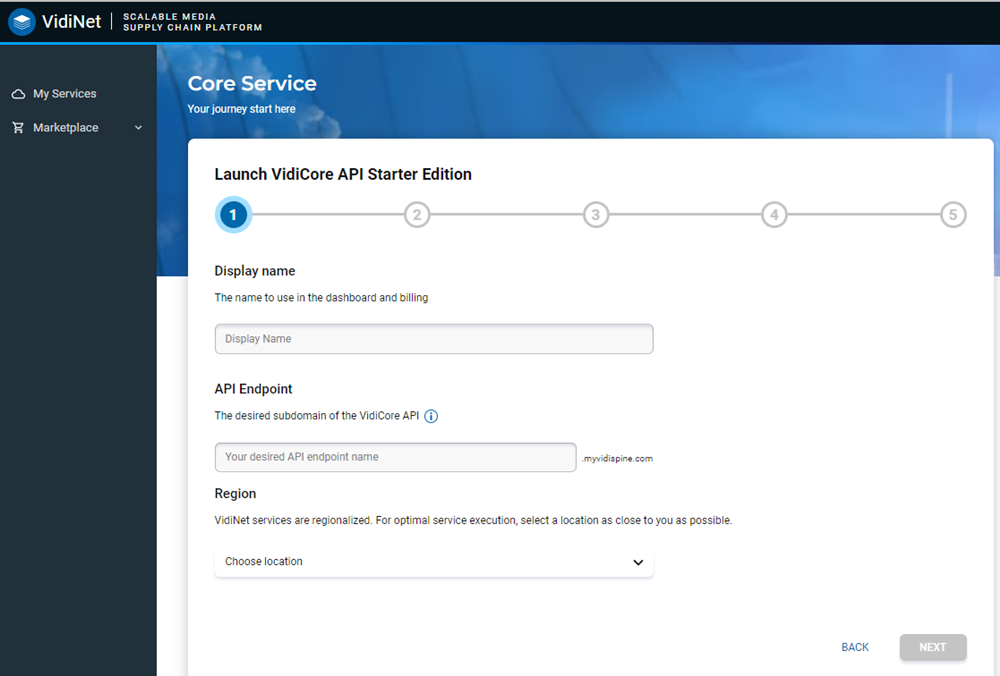
In the case the API Endpoint, one should be aware that this cannot be changed once the launch guide and process have been completed.
5. API Version
The next phase in the launch guide offers one the choice of which version of VidiCore you want to start with and how updates are managed.
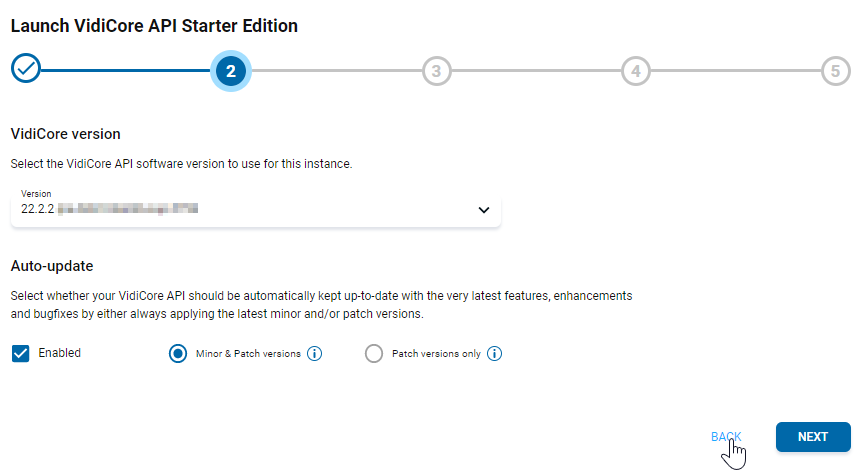
Minor & Patch versions offers feature and fix updates.
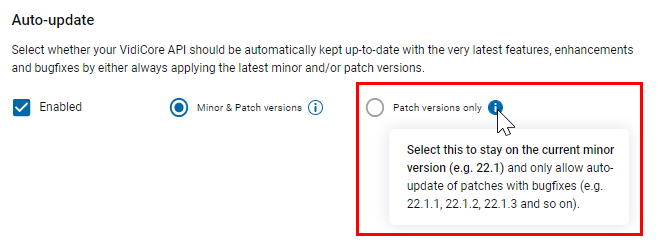
If you want to remain in the current version and only want receive bug fixes, select the Patch versions only option.
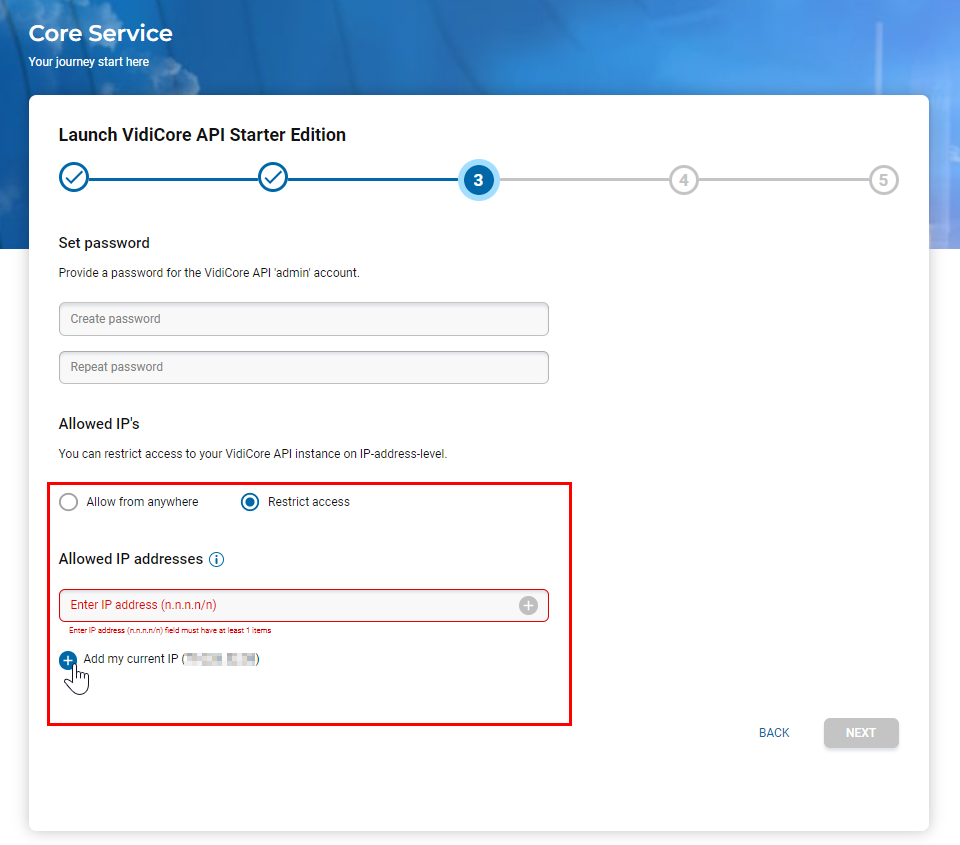
6. Set Admin Password and Allowed IPs
The next phase of the launch allows one to set the admin password as well as to choose whether to restrict access based on an IP address.
The admin password will be necessary to enter the web interface as well. The link to which is provided the email notifying you that the system has been spun up.
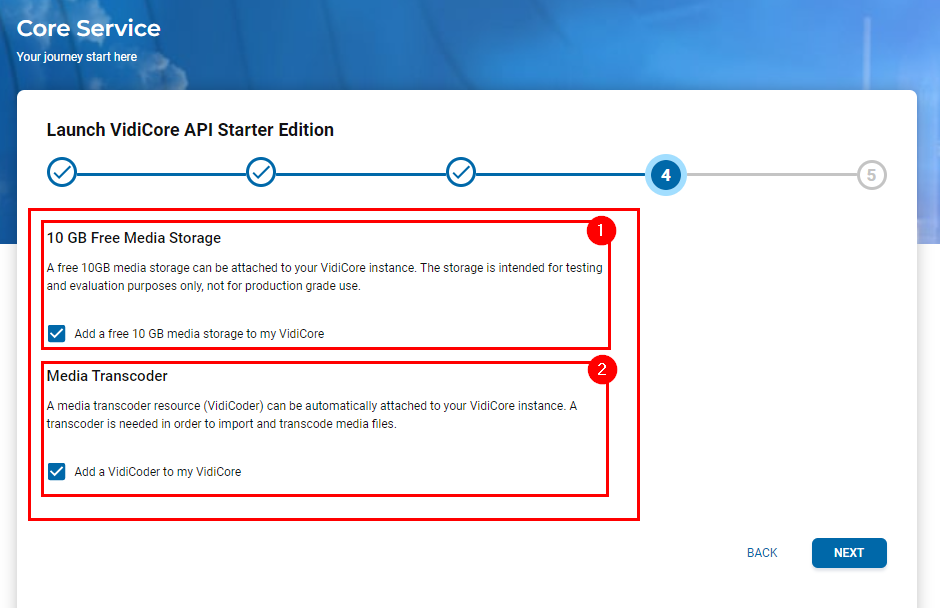
7. Free Storage and Transcoding with VidiCoder
The next phase of the launch guide allows one to choose whether to include free storage and a media transcoder.
The free storage (1) is ideal for the starter edition. The team edition would require one to setup up their own storage.
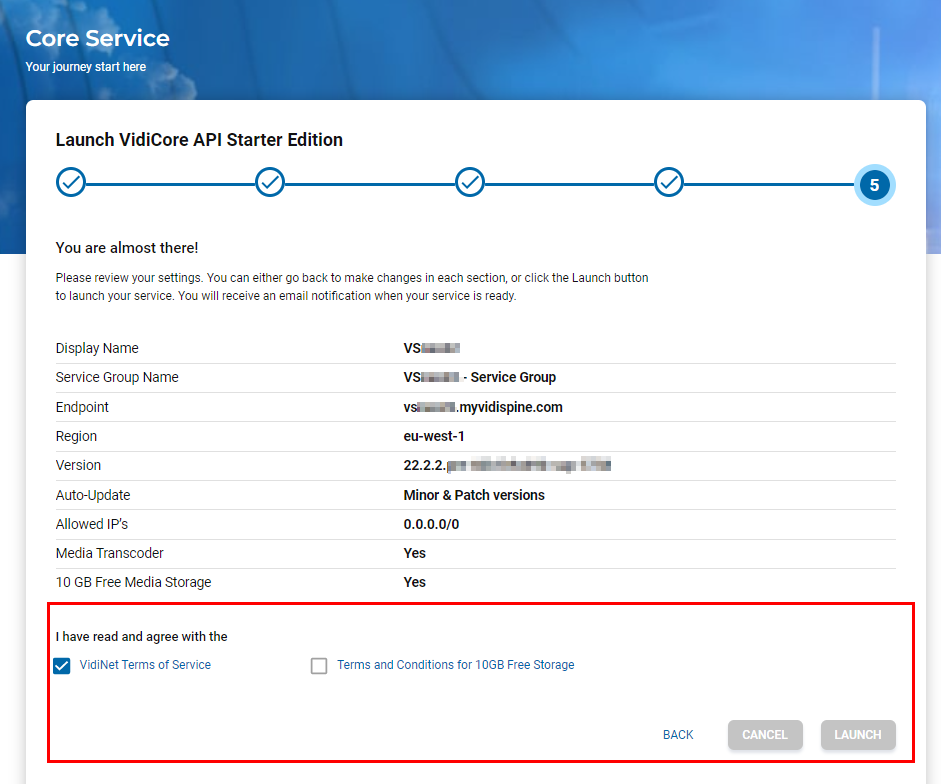
8. Almost There!
The last phase of the launch guide offers one an overview of all the choices made throughout the process. If one wishes to change anything, you can always go back to the different phases.
Only by confirming the terms (1) will the launch button become available - allowing one to complete the process.
9. Email Confirmation for Launch the Service
Shortly after selecting launch, you will receive an email confirming that that you service up. But still have to wait for the Vidispine API instance to be available.
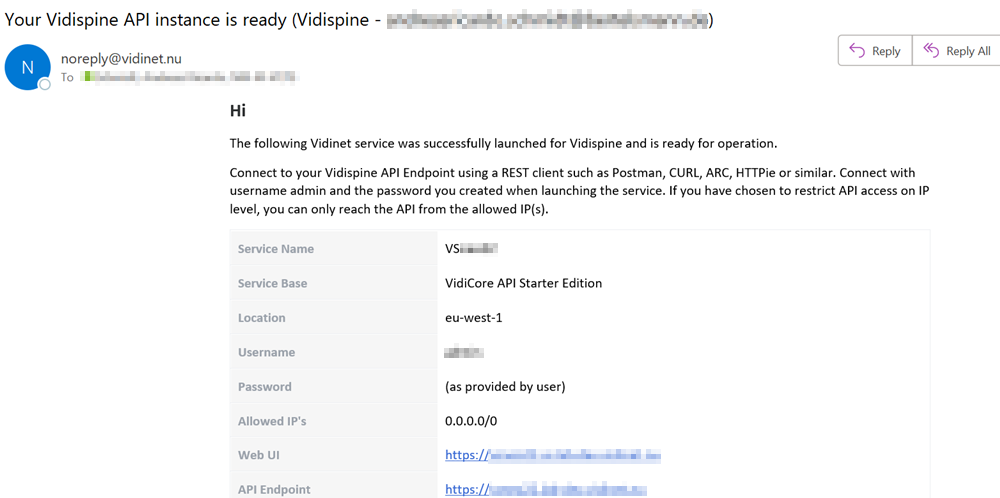
10. Email Confirmation and Access to Vidispine API Instance
Once your Vidispine API Instance is up you will receive an email confirmation as well as the access links to the Web UI and API endpoints. The user are and password for which were specified in step 6.
11. Web UI
You can then check the system with the trial Web UI (see user and password step 6). This is a basic trial web UI for testing of VidiCore. If you are looking for a full supported MAM UI for search, upload, preview and media management in general you can use our powerful Vidispine MediaPortal. And if you want to build your own UI we recommend you read our documentation:
12. Adding Items to Your System using the trial UI
No assets? Upload your local media by selecting the Upload option (1):
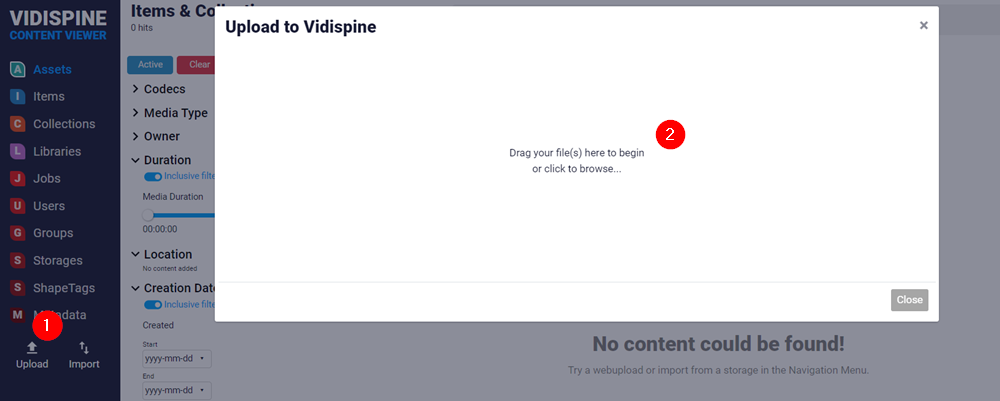
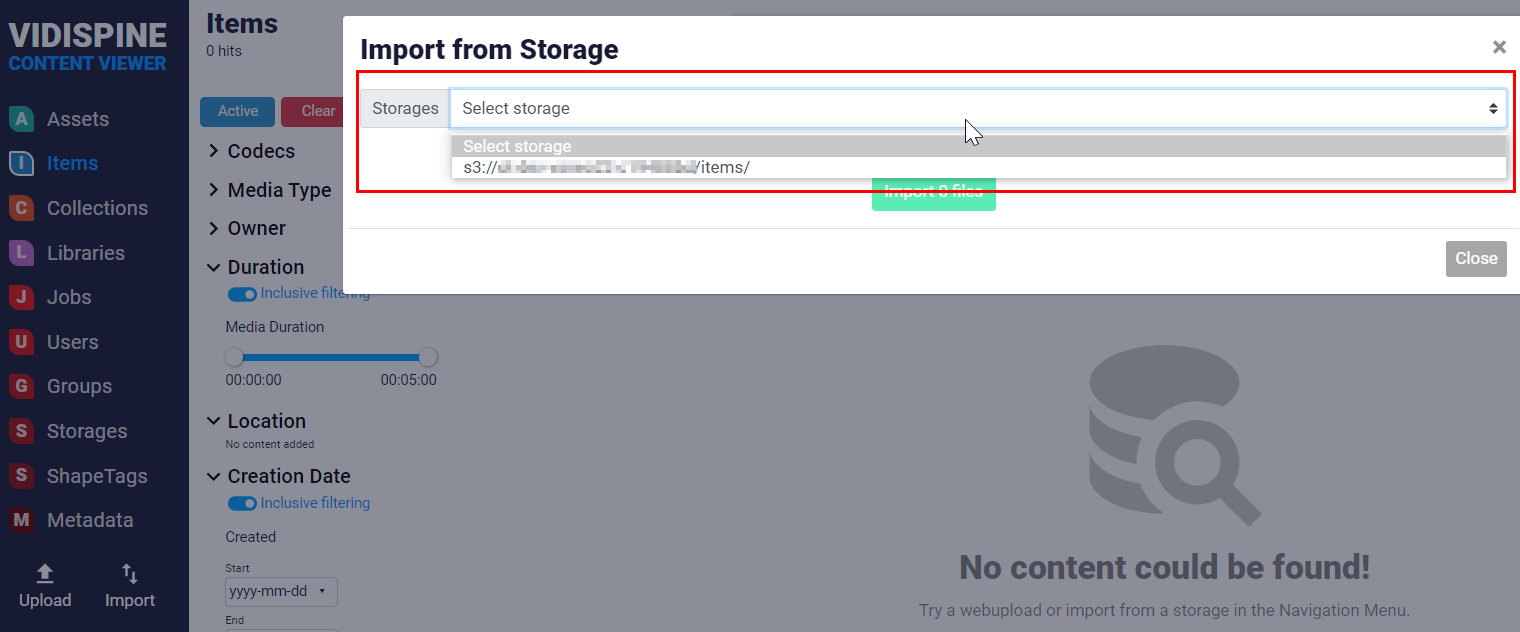
Alternatively you can import media from any of your specified storages.
After the Launch: What Now?
After completing the launch, you might want to familiarize yourself with VidiCore’s API. The following article was designed to get you started: Getting Started With the VidiCore API (Starter/Team Editions)
The entirety of the API doc can be seen here: API Reference — Vidispine REST API documentation.