Overview
The Authorization Service (AS) integrates seamlessly with OKTA, working similarly to LDAP and Entra ID. Using Keycloak, AS efficiently synchronizes users and groups with OKTA, ensuring they are also automatically created in VidiCore.
Configuration is handled via the ConfigPortal under Identity Provider settings, where administrators can define all necessary parameters. This ensures Keycloak is properly configured for seamless operation with OKTA.
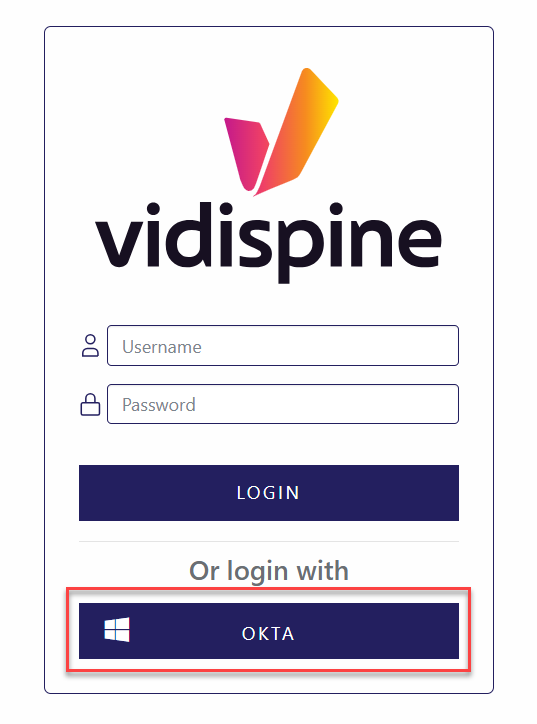
The AS login screen has been enhanced to include an OKTA login button, which appears when OKTA integration is enabled. Clicking the button redirects users to the OKTA login page, fully supporting multi-factor authentication (MFA) if configured in OKTA.
Configuration
Configuration in OKTA
Get Redirect URI in Keycloak
This section outlines the steps for obtaining “Redirect URI” in Keycloak.
-
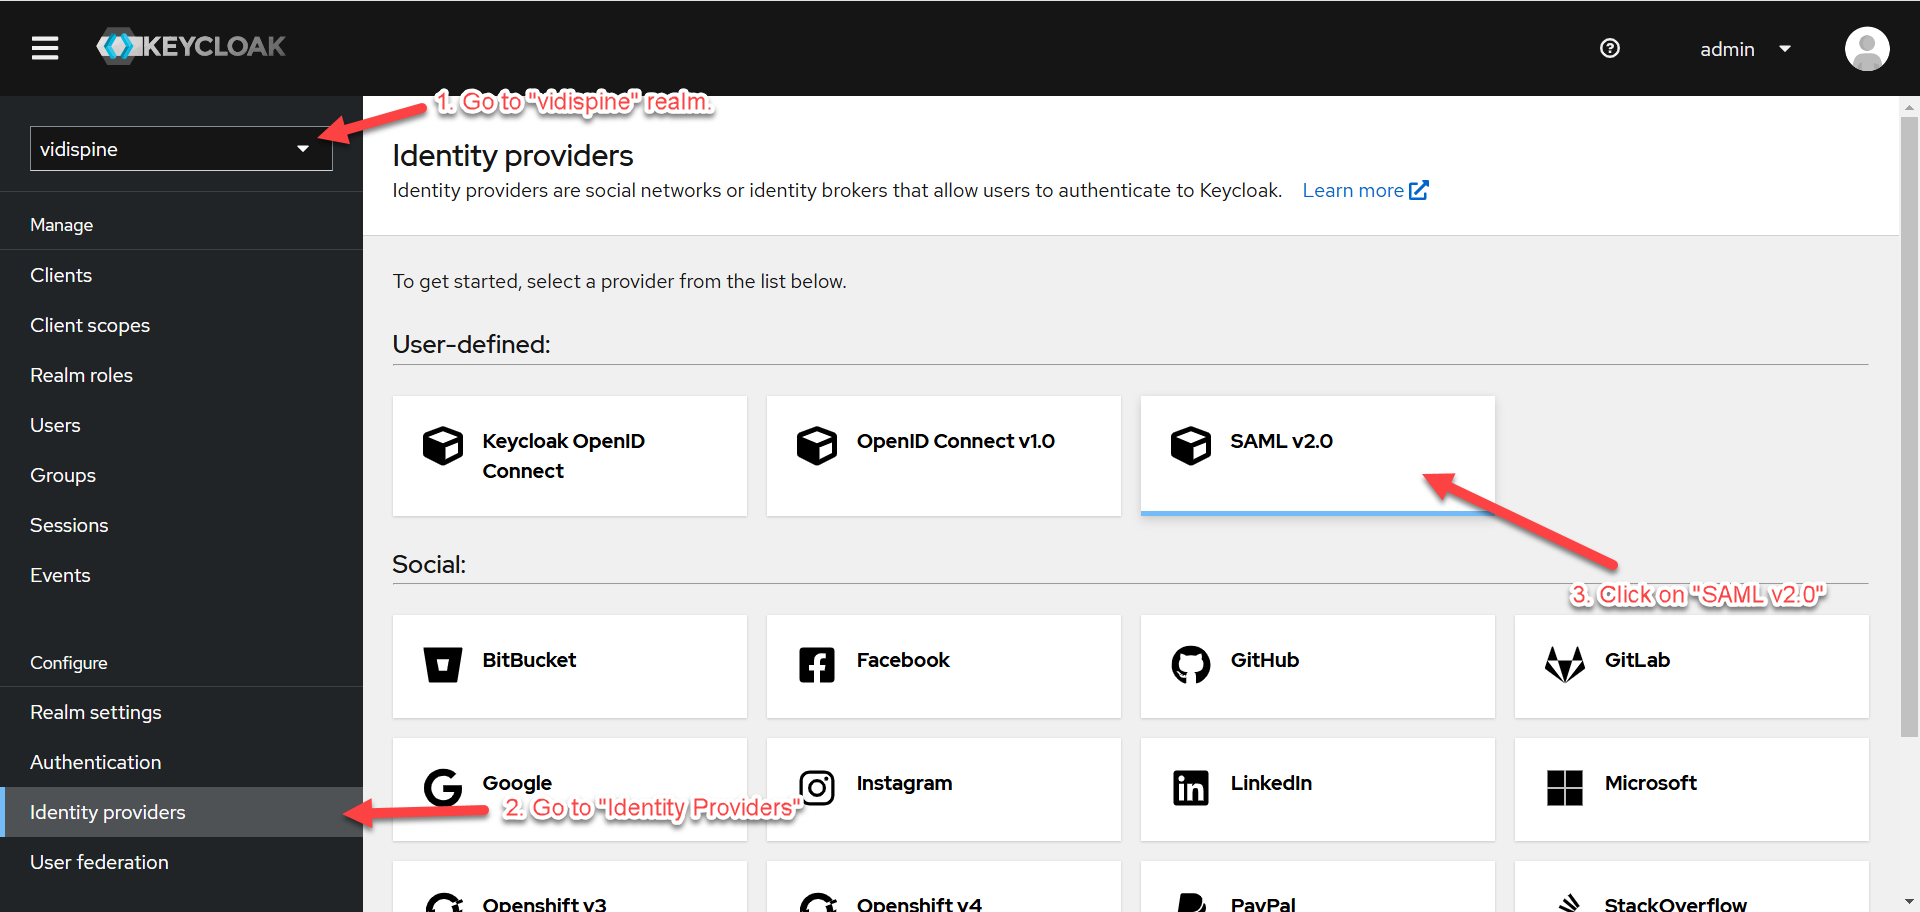
Go to “Identity Providers” under the “vidispine” realm and click on “SAML v2.0”.
-
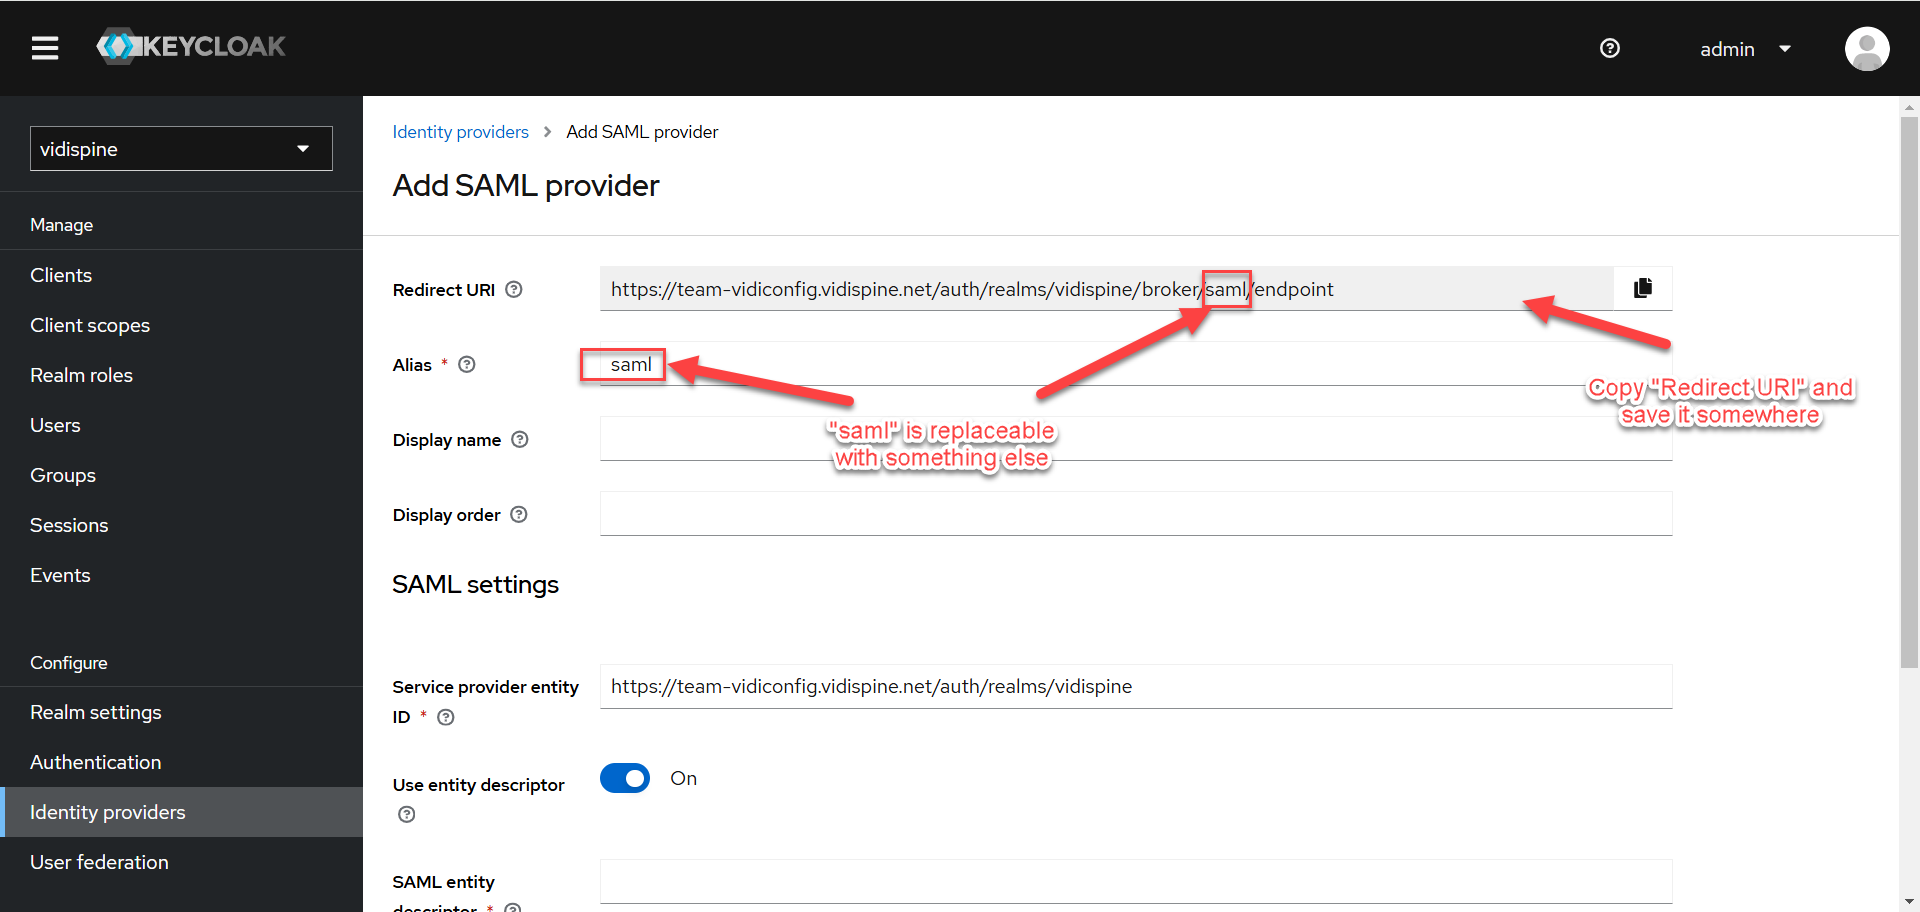
Copy the “Redirect URI” and save it somewhere else for later usage when configuring “New App Integration” in OKTA.
You can replace "saml" with any alias name of your choice. However, it's essential to ensure that the chosen alias matches the configuration set in ConfigPortal/Keycloak.
Create New App Integration
This section outlines the steps for creating an application for integration in OKTA.
-
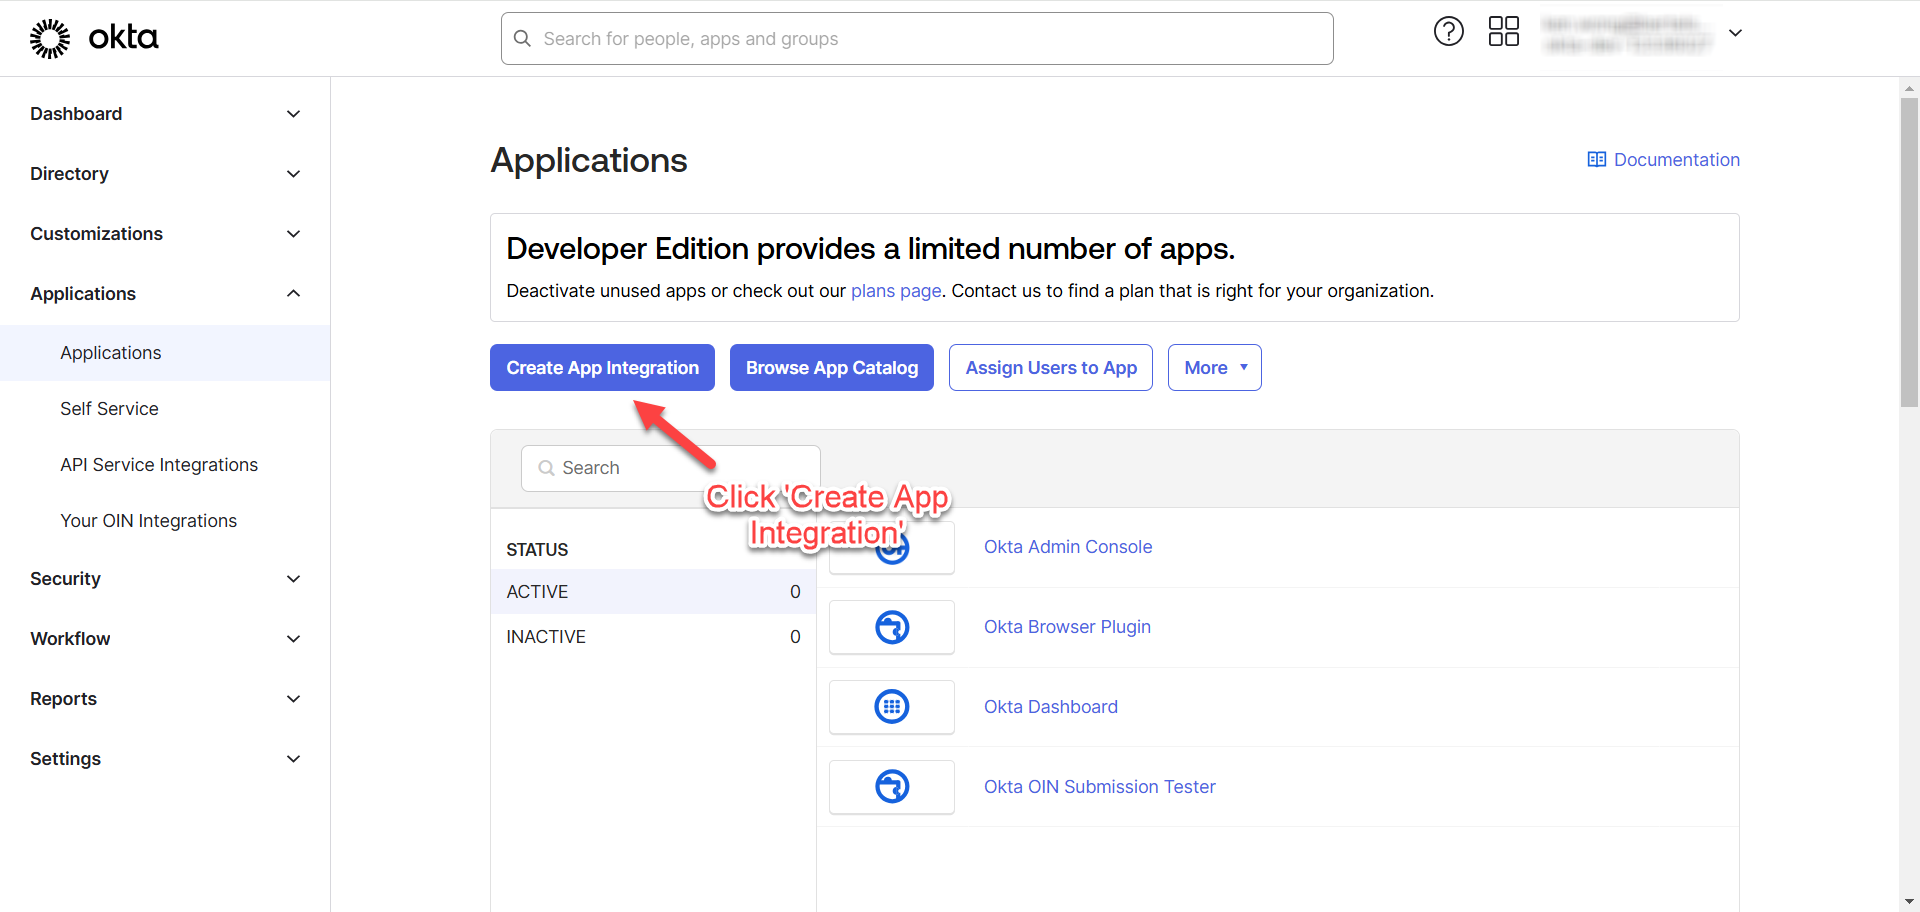
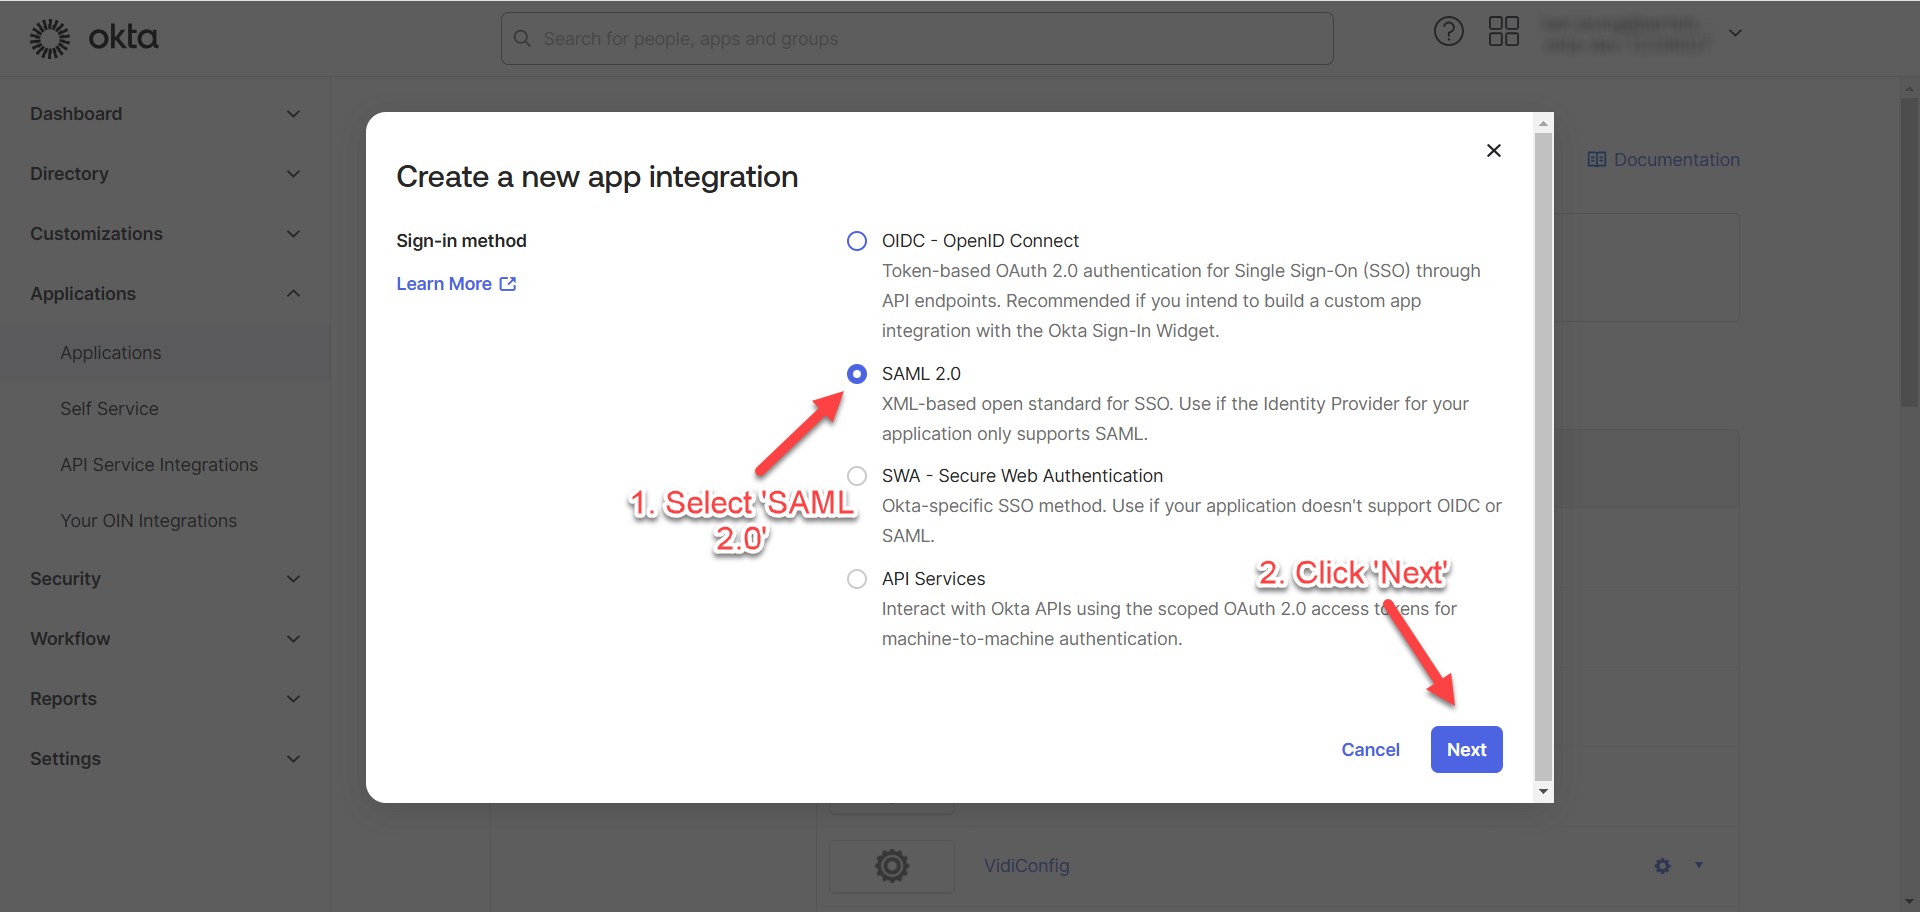
Go to “Applications” and click on “Create App Integration”.
-
Select “SAML 2.0” and click “Next”.
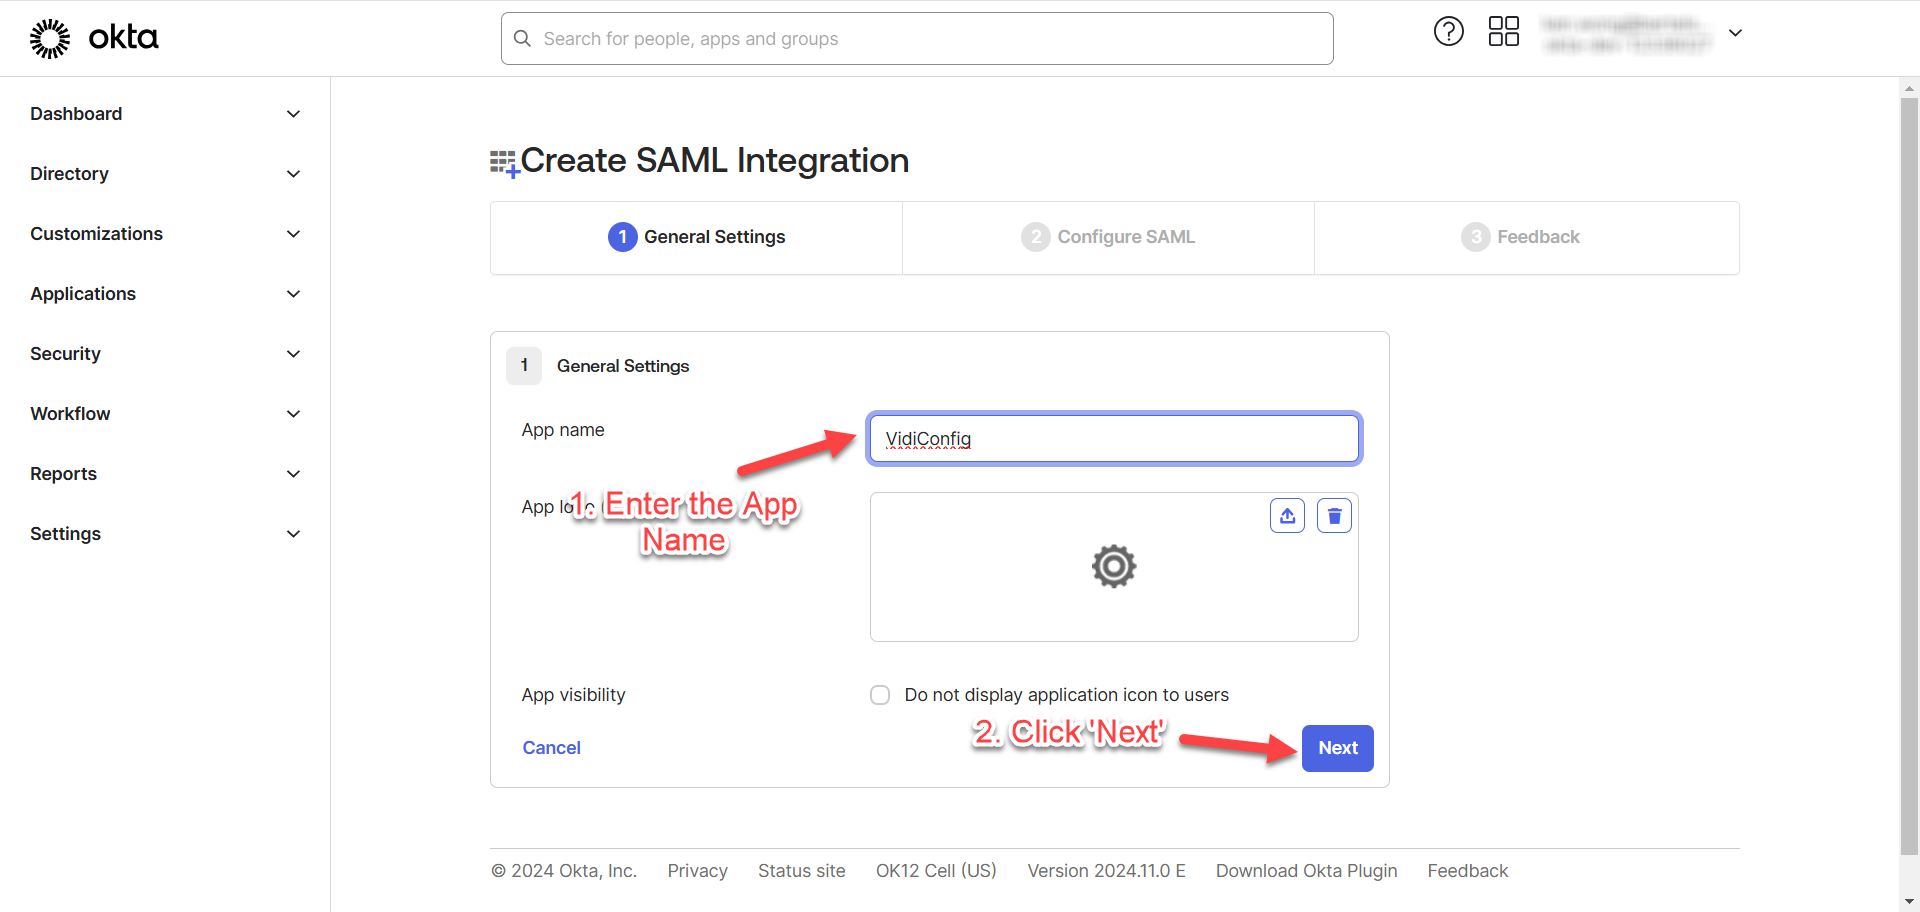
-
Enter the “App Name” of your choice and click “Next”.
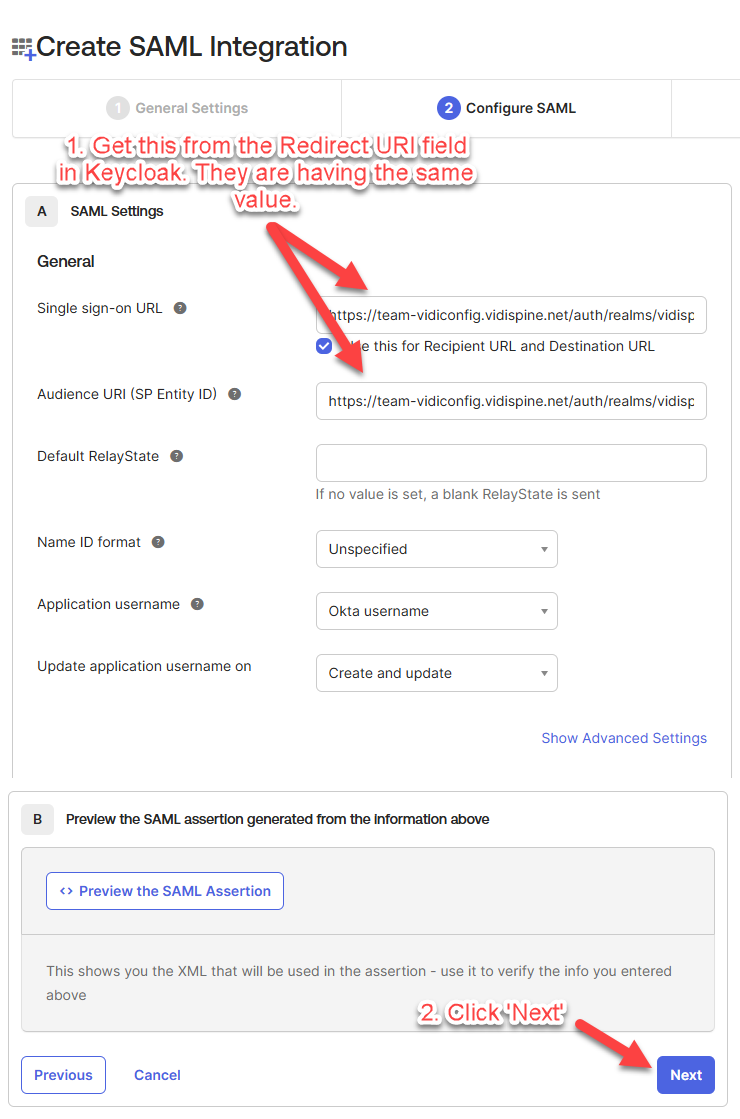
-
Fill in the “Single sign-on URL” and “Audience URI” and click “Next”.
You can get the “Redirect URI” in Keycloak. Refer to Get Redirect URI in Keycloak.
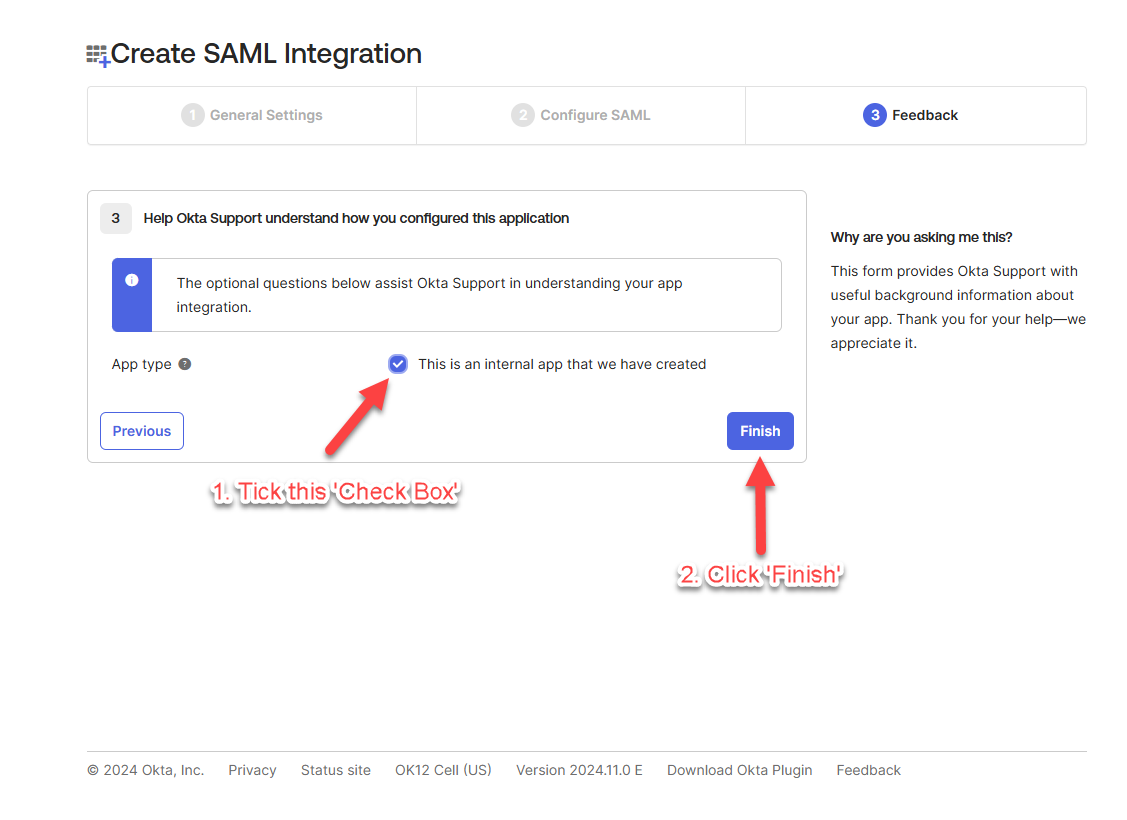
-
Tick the check box for “This is an internal app….” and click “Finish”.
-
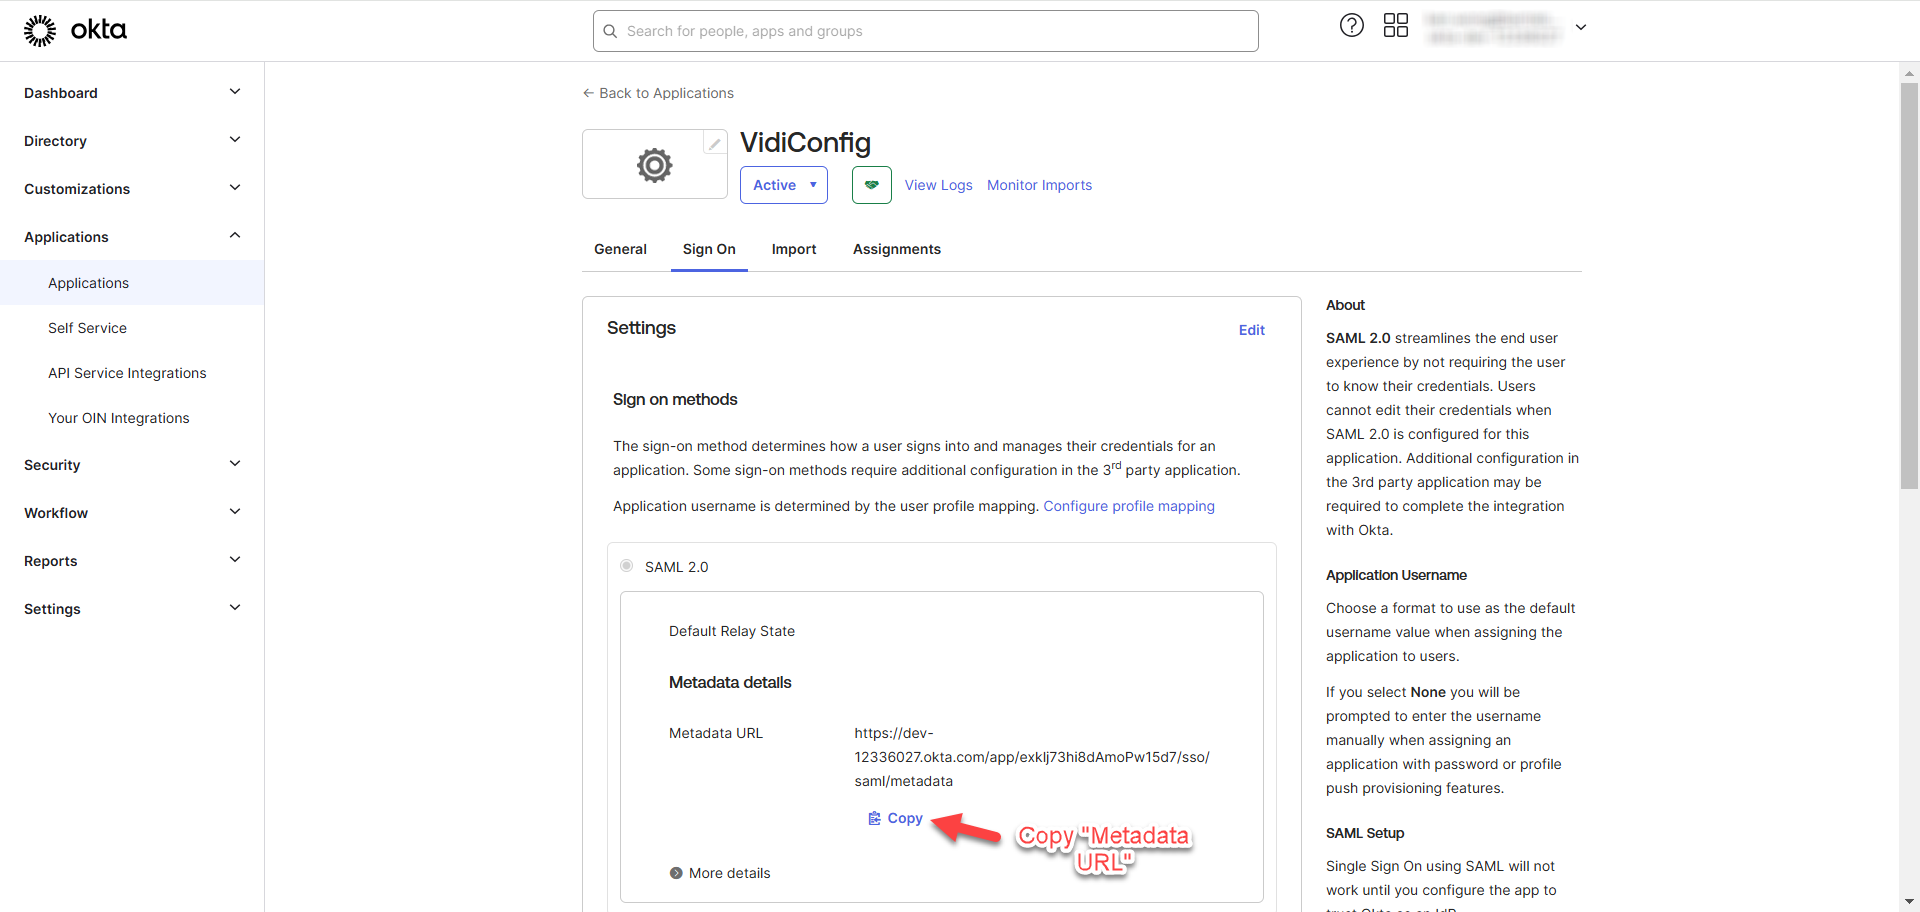
You will now be redirected to the “Sign On” tab of the created application. Copy the “Metadata URL” and save it somewhere else for the later usage in ConfigPortal/Keycloak Configuration.
Create Users
This section outlines the steps for creating users in OKTA.
-
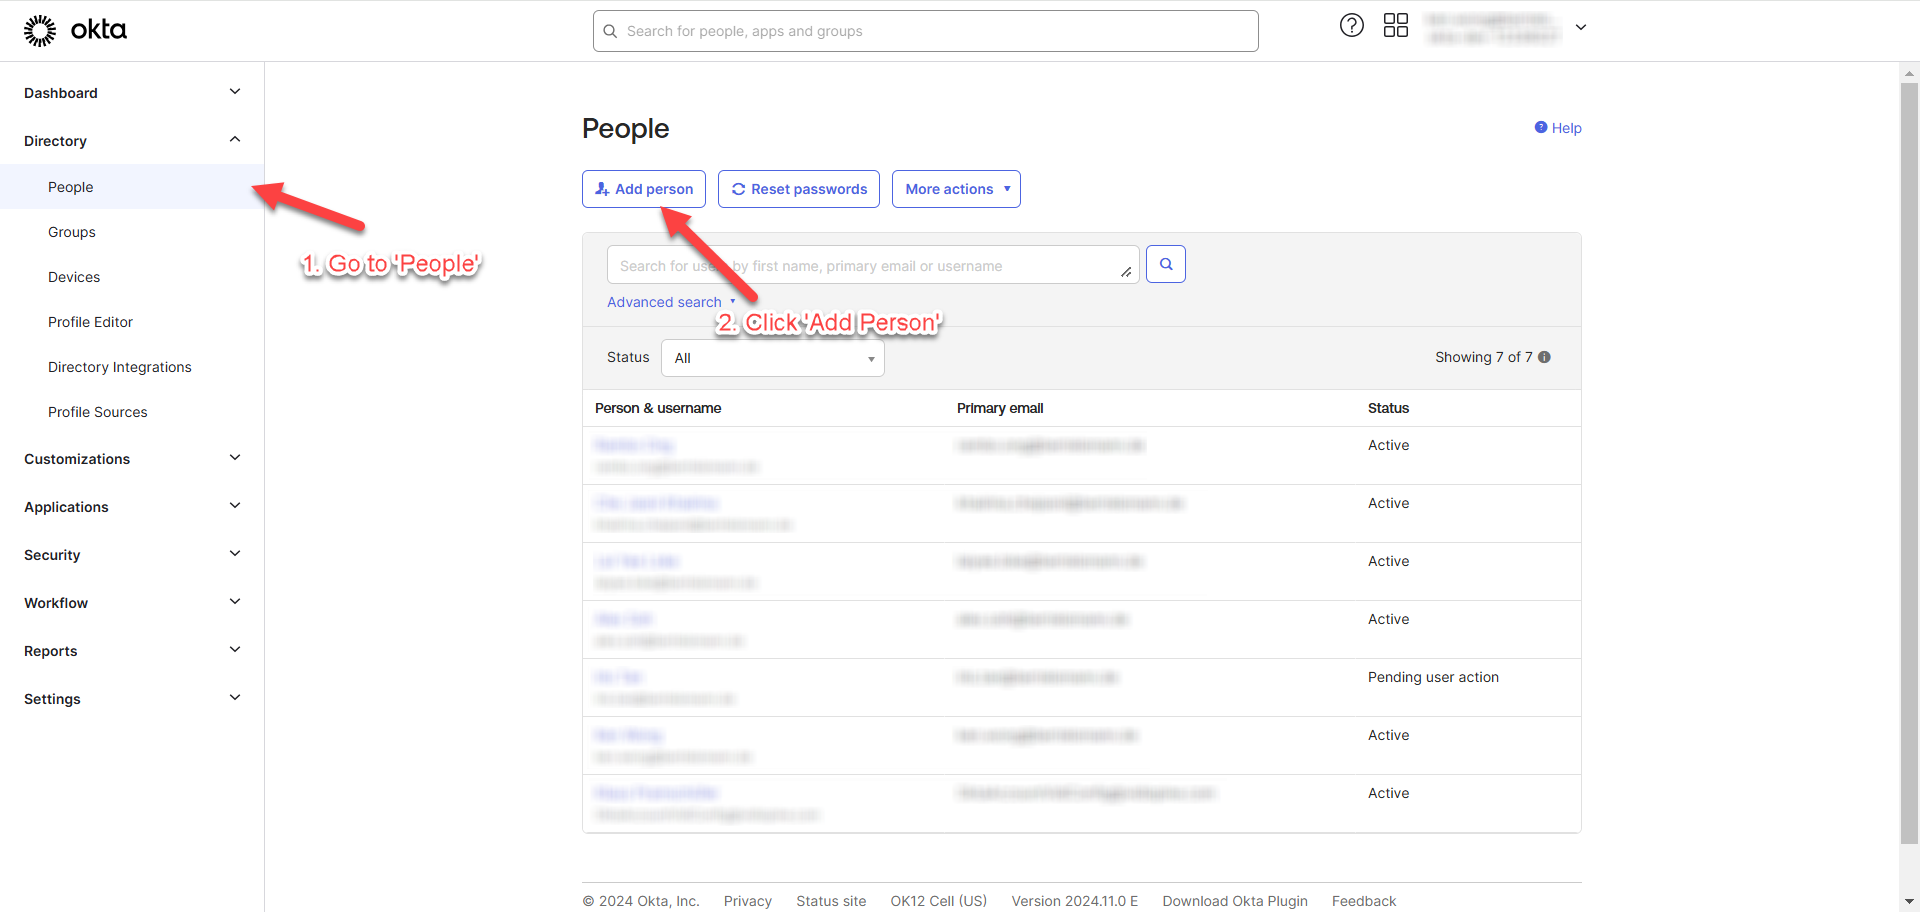
Go to “People” under “Directory” and click “Add person”.
-
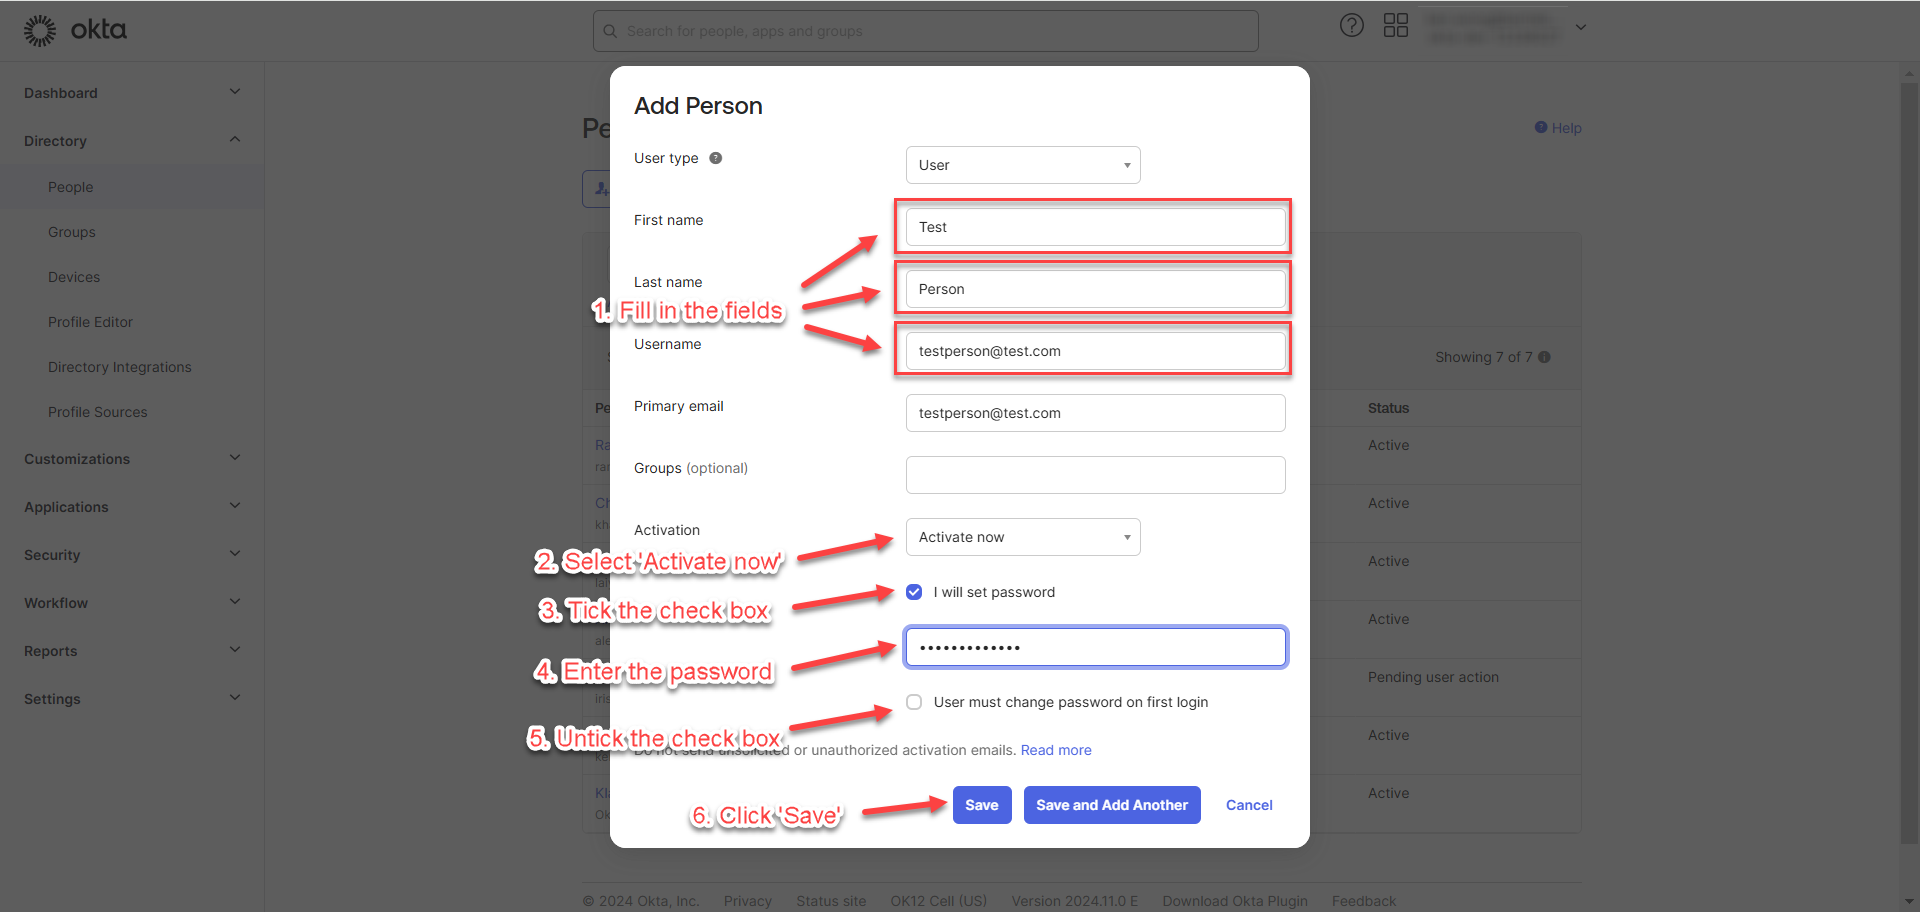
Follow the steps provided in the image below.
-
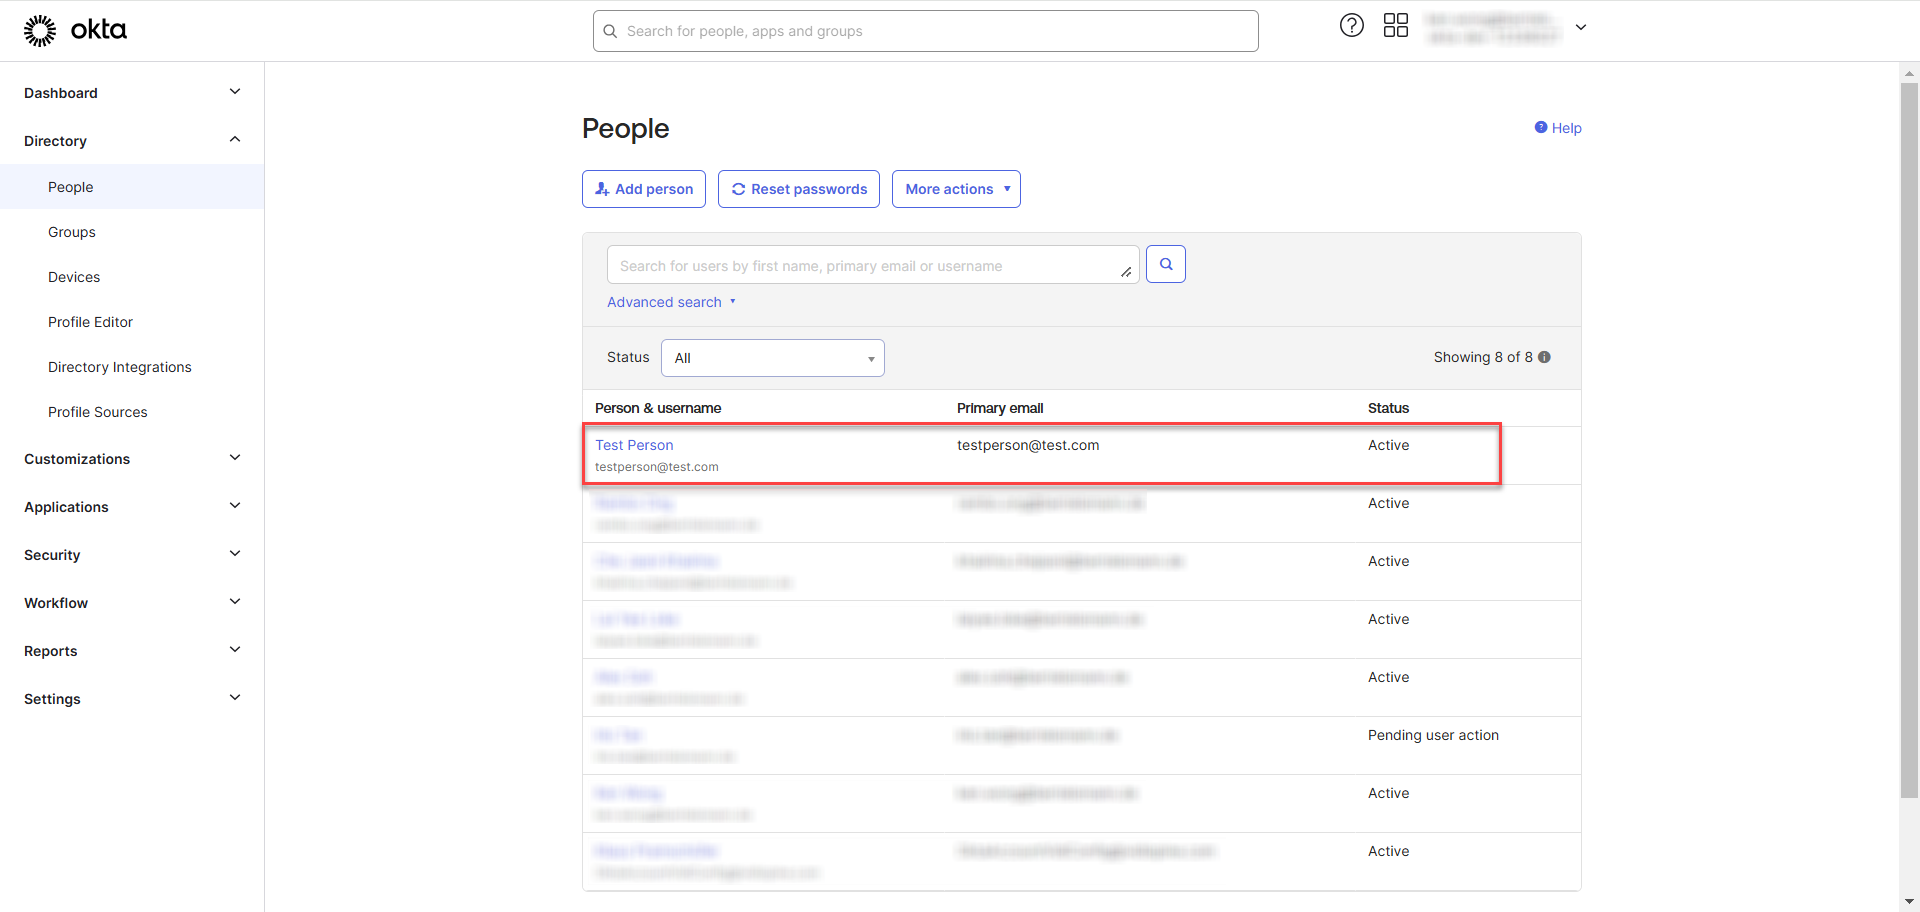
After creating the user, you will be redirected to the listing page, where the newly created user will appear in the list.
-
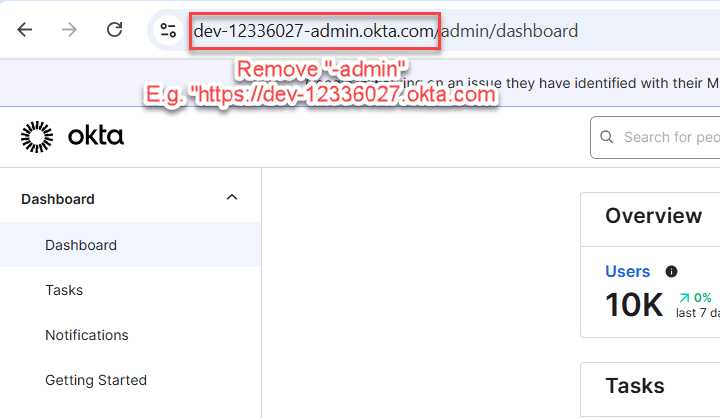
To verify that the created user can log in, navigate to the okta domain link, e.g:
dev-[okta instance].okta.com. This will redirect the user to the login page shown in the image below. Proceed to log in.
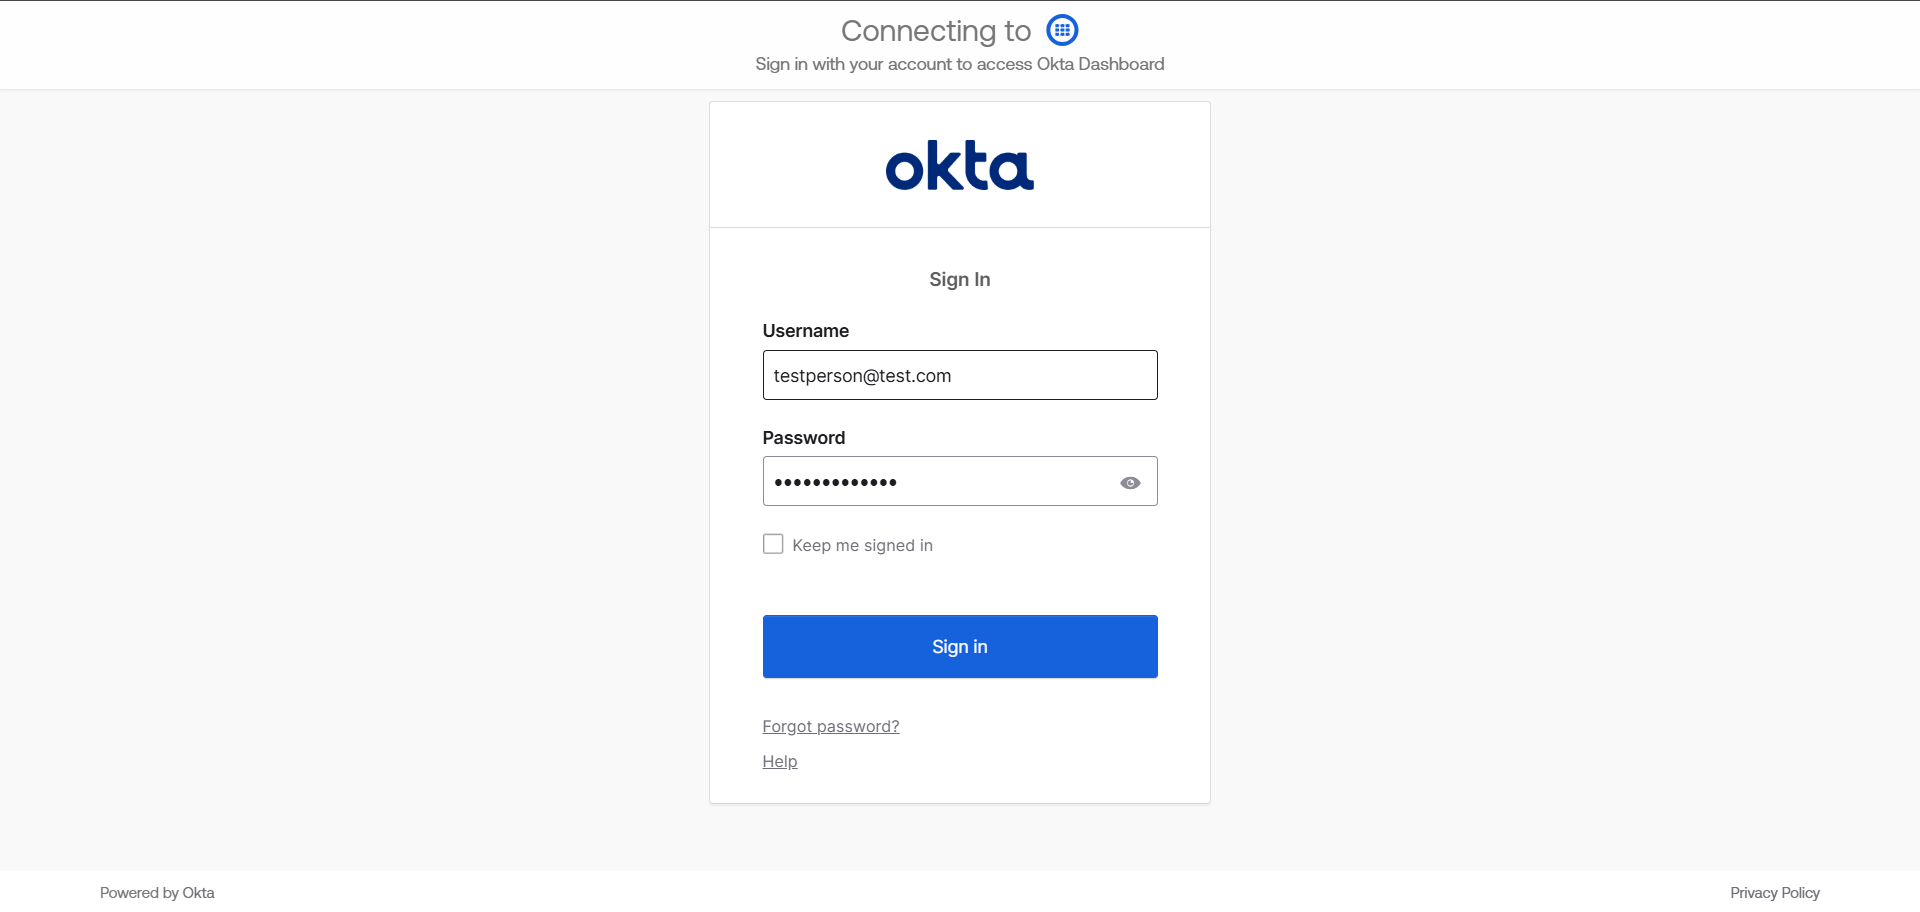
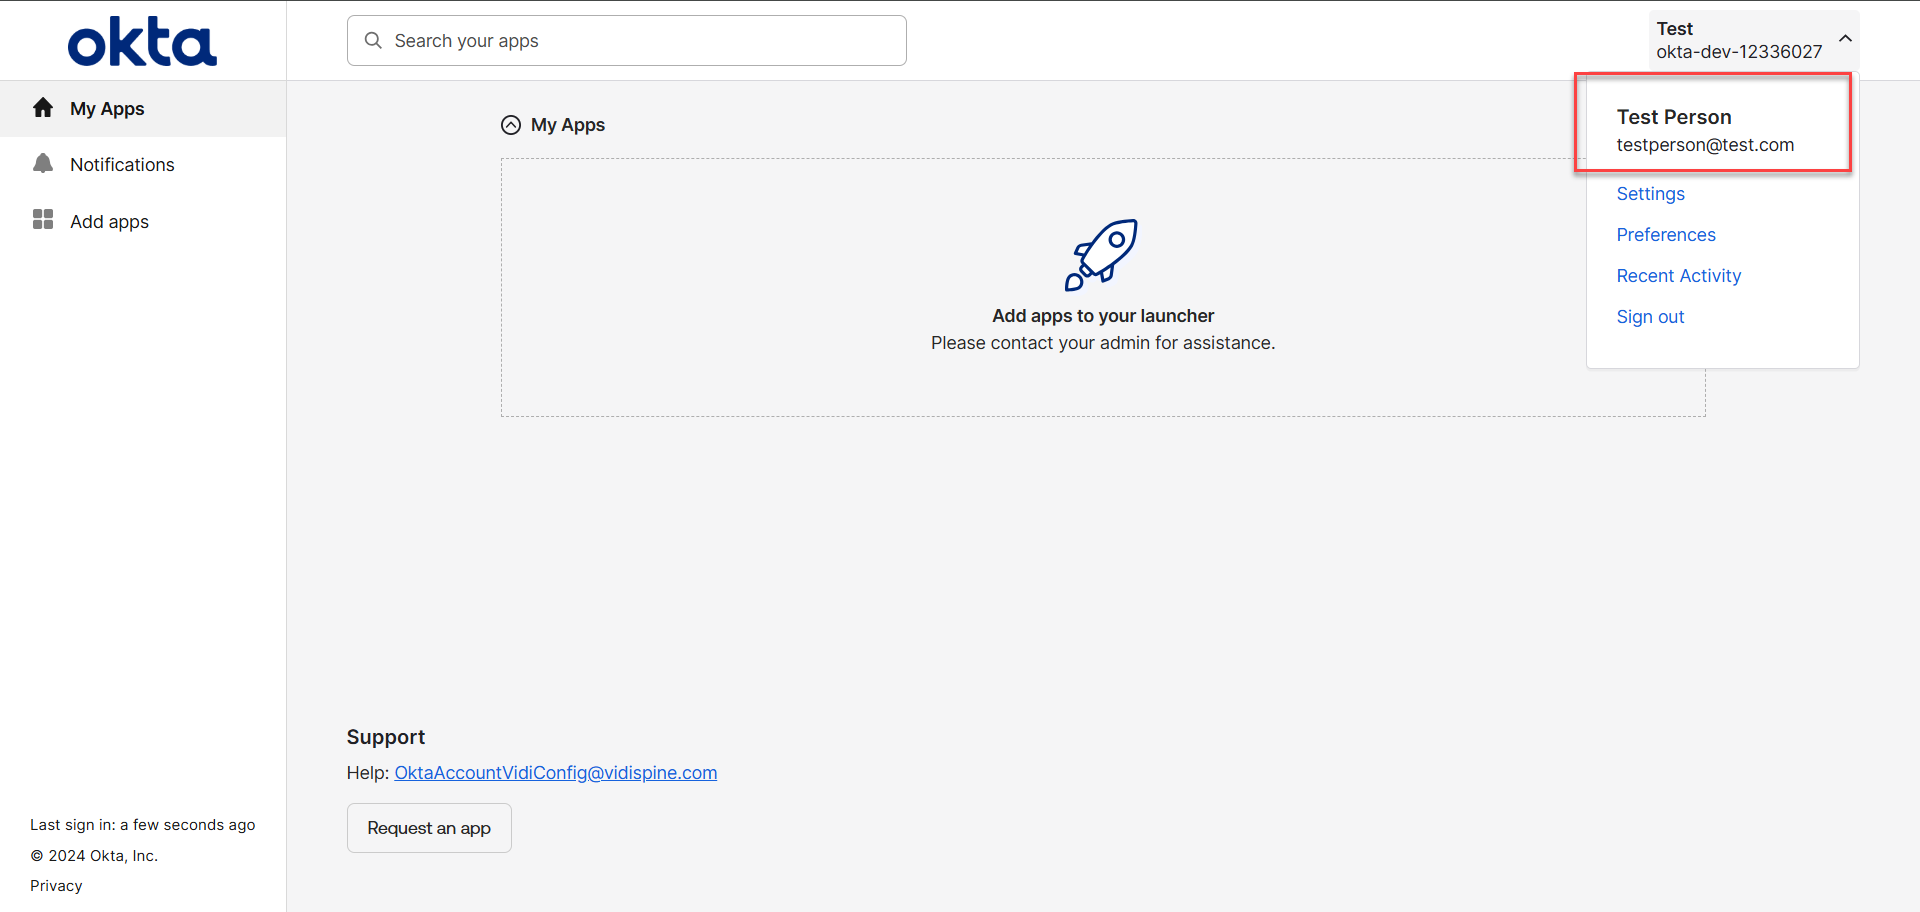
-
Upon a successful login, the user will be redirected to the page displayed in the image below.
API Token
API tokens are used to authenticate requests to the Okta API. An API token is issued for a specific user. All requests made with the token act on behalf of the user.
API tokens are generated with the permissions of the user that created the token. If a user's permissions changes, then so do the tokens. Super admins, org admins, group admins, group membership admins, and read-only admins may create tokens.
Tokens are valid only if the user who created them is active. Tokens issued by deactivated users are rejected. To avoid service interruptions, generate API tokens using a service account that won't be deactivated and that has super admin permissions that won't change.
Creating a Read-Only Admin User in Okta
Creating a Read-Only Admin is intended to simulate a scenario where access to the Okta API is restricted to the minimal read-only capabilities.
This section outlines the steps to assign Read-Only Admin role to a user.
-
Login as Super Administrator user, go to Security > Administrators > Add administrator
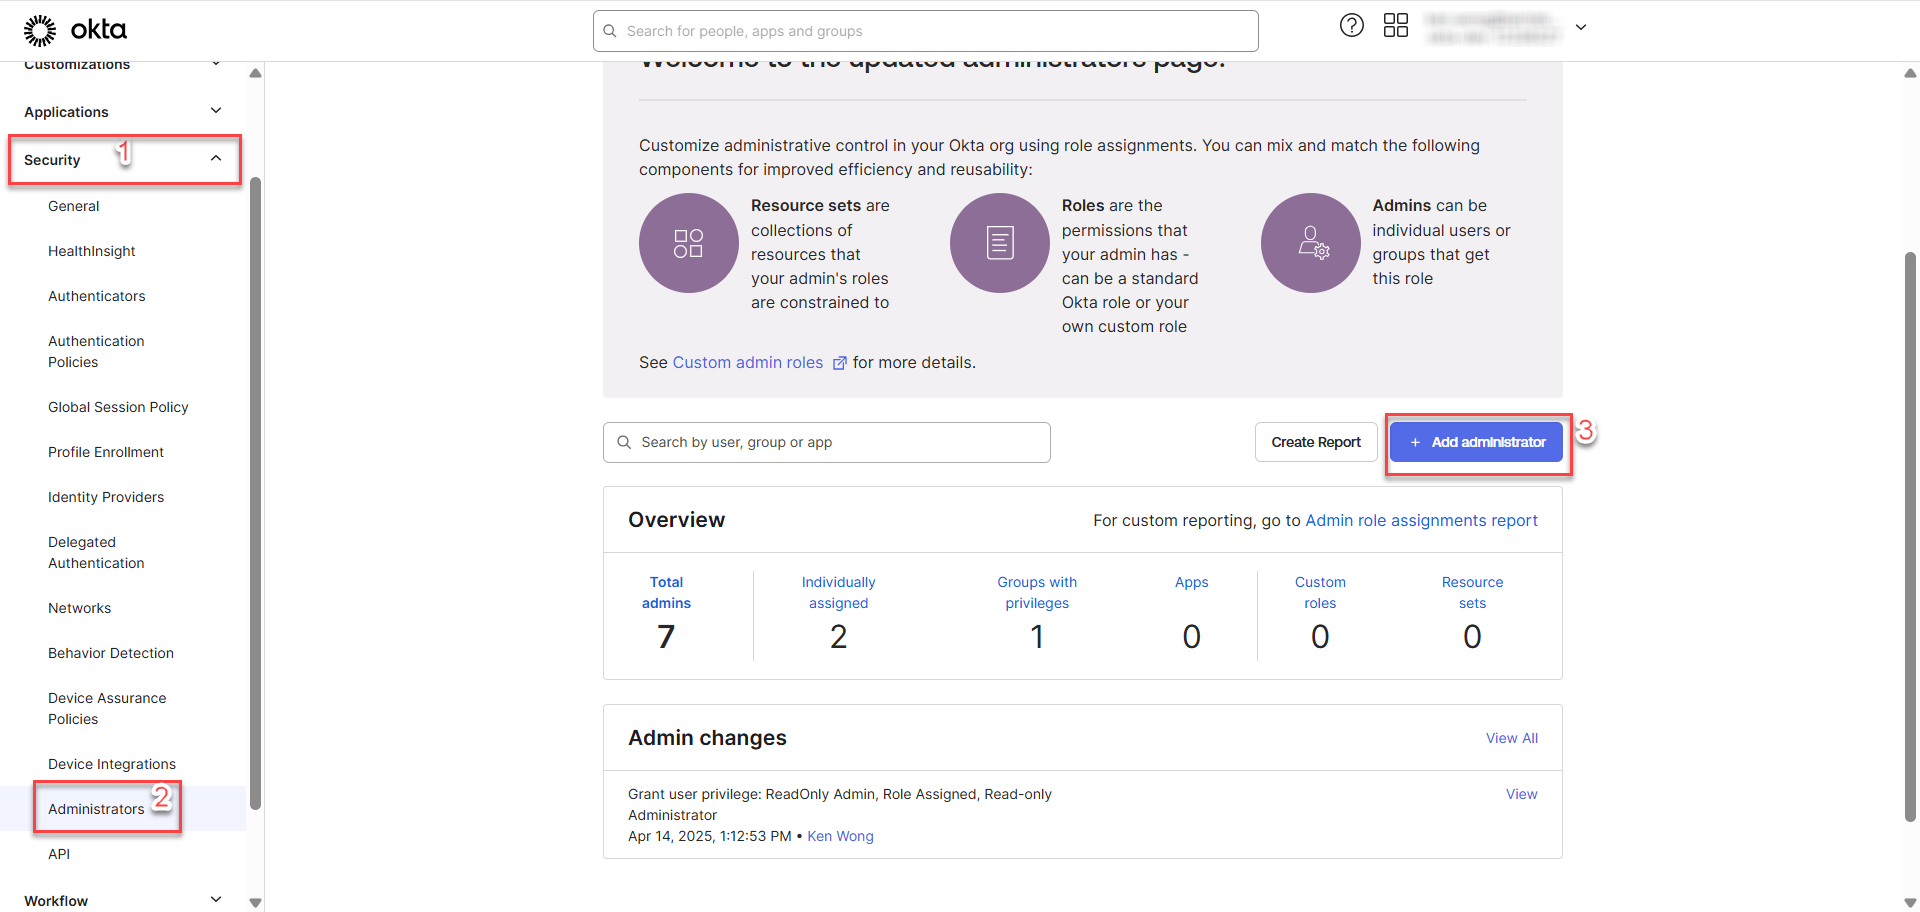
-
Proceed with the following steps:
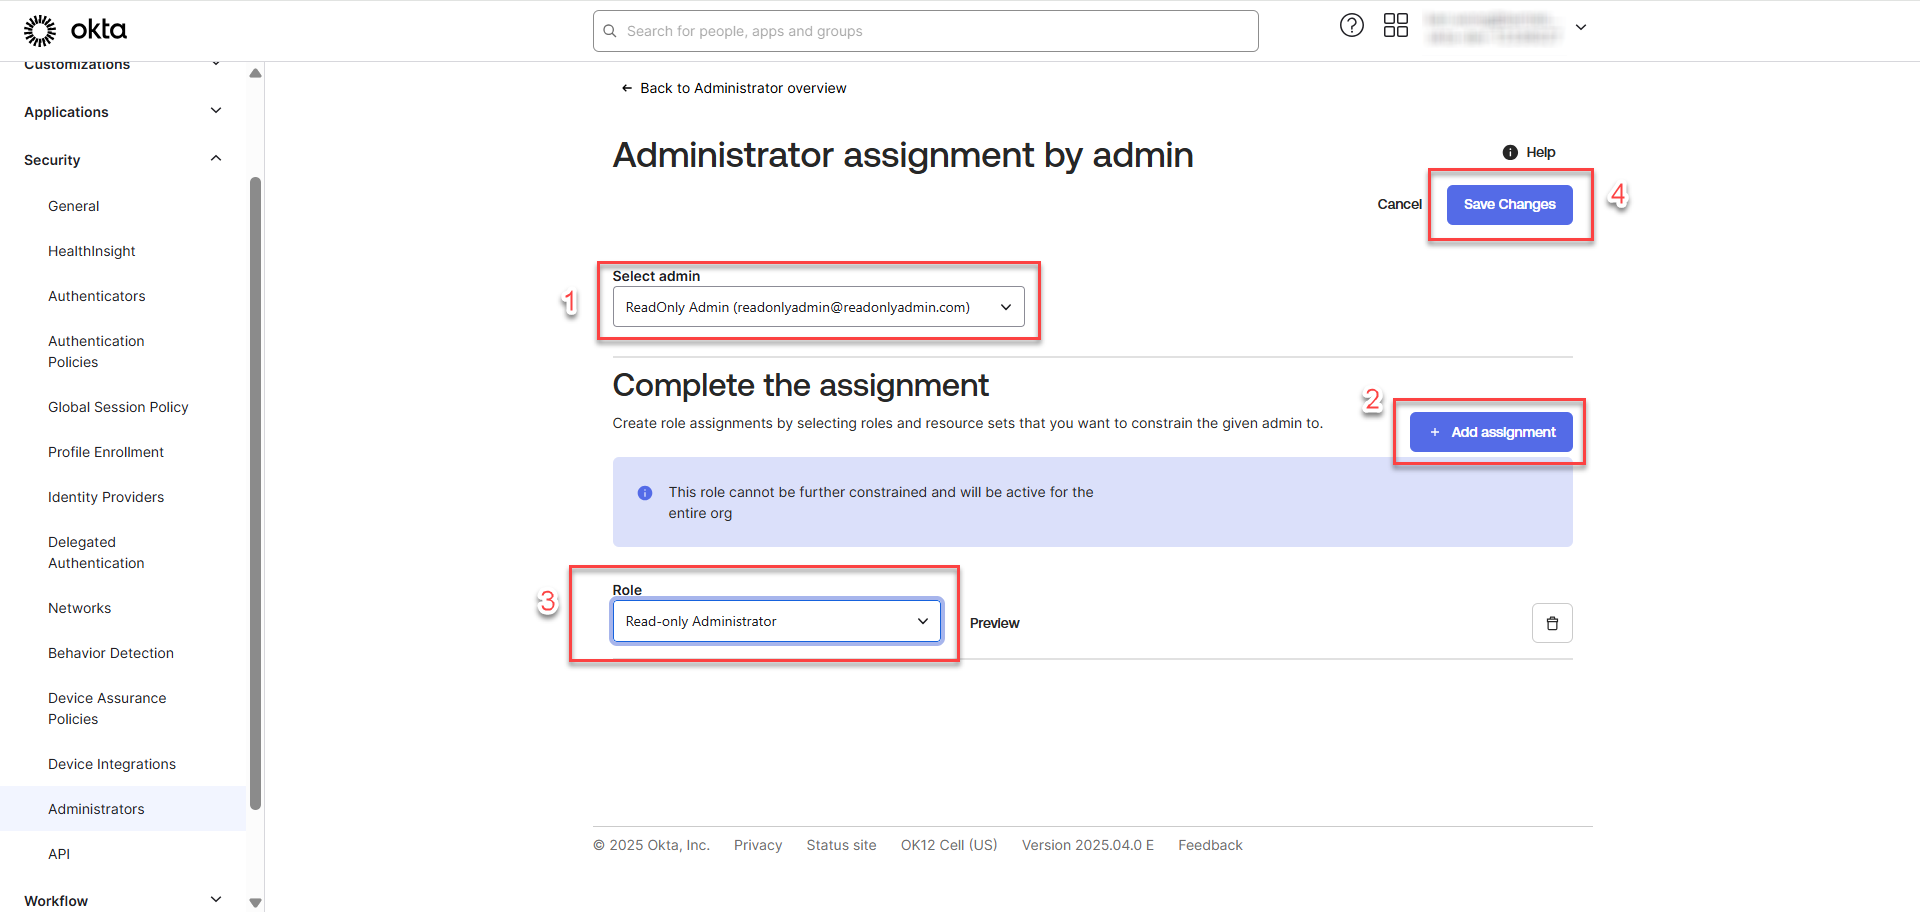
-
To ensure that the Read-Only Admin role is assigned to the user successfully, go to Admins tab and check for the assigned role.

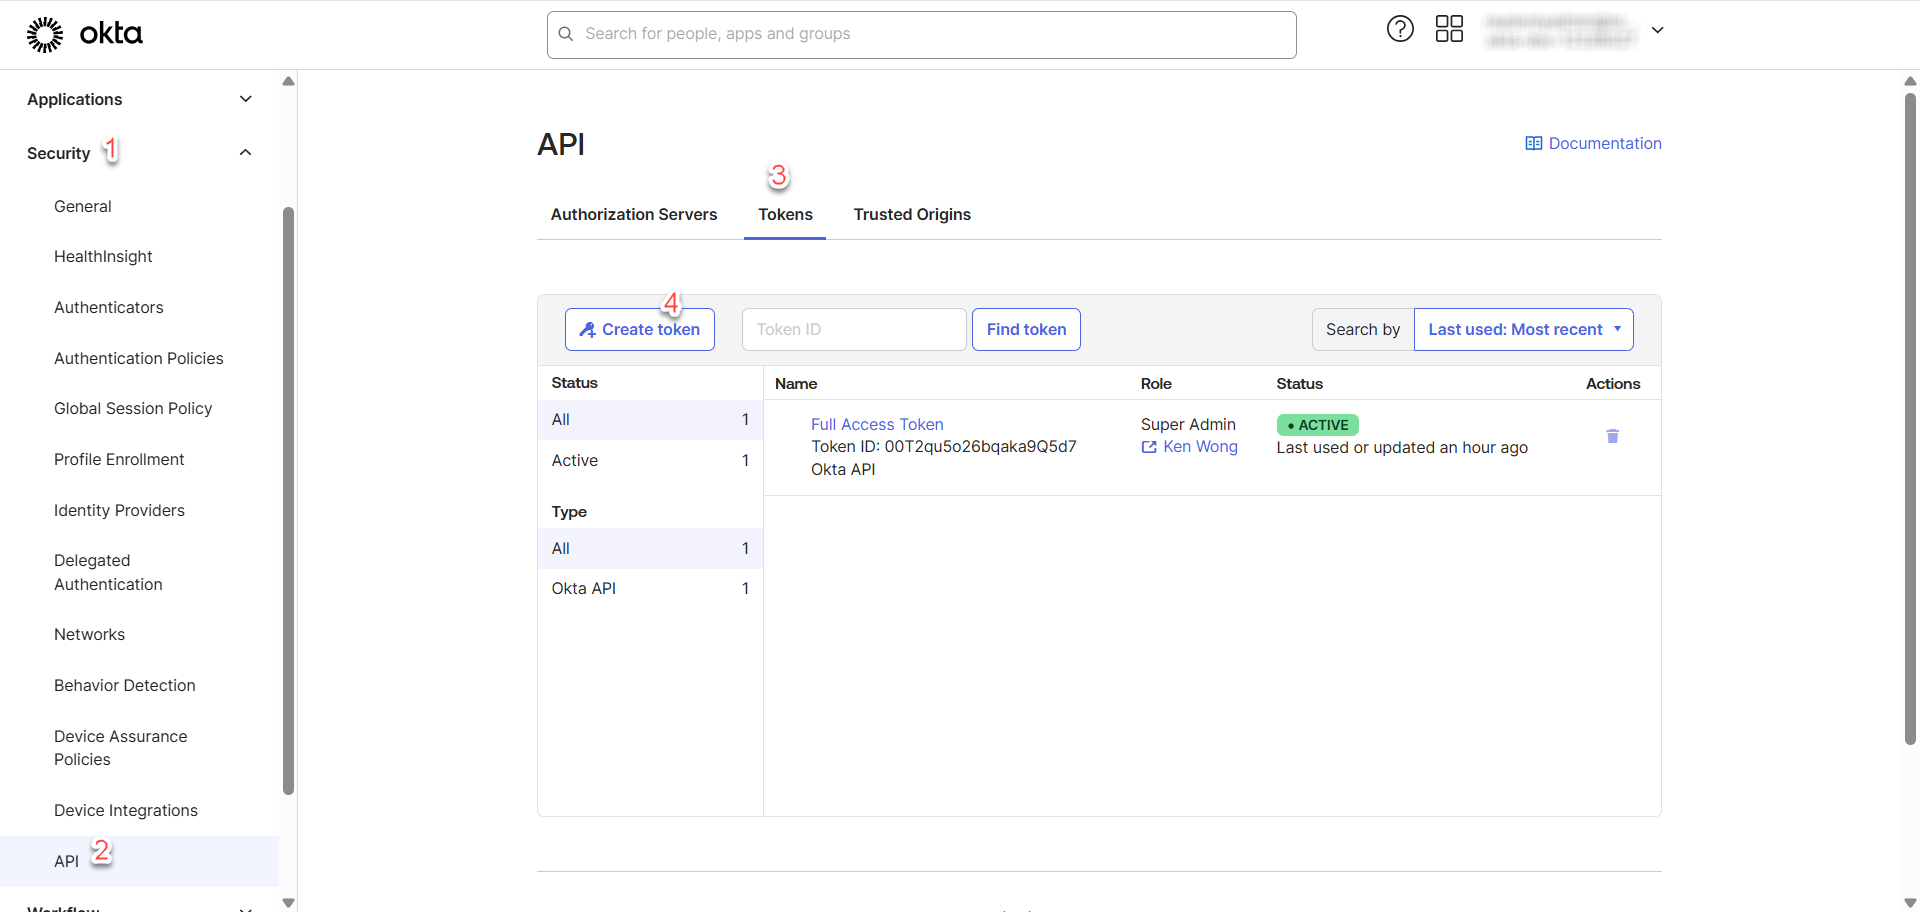
Create API Token
This section outlines the steps for creating API token in OKTA.
-
Go to Security > API > Tokens > Create Token
-
Proceed with the following steps:
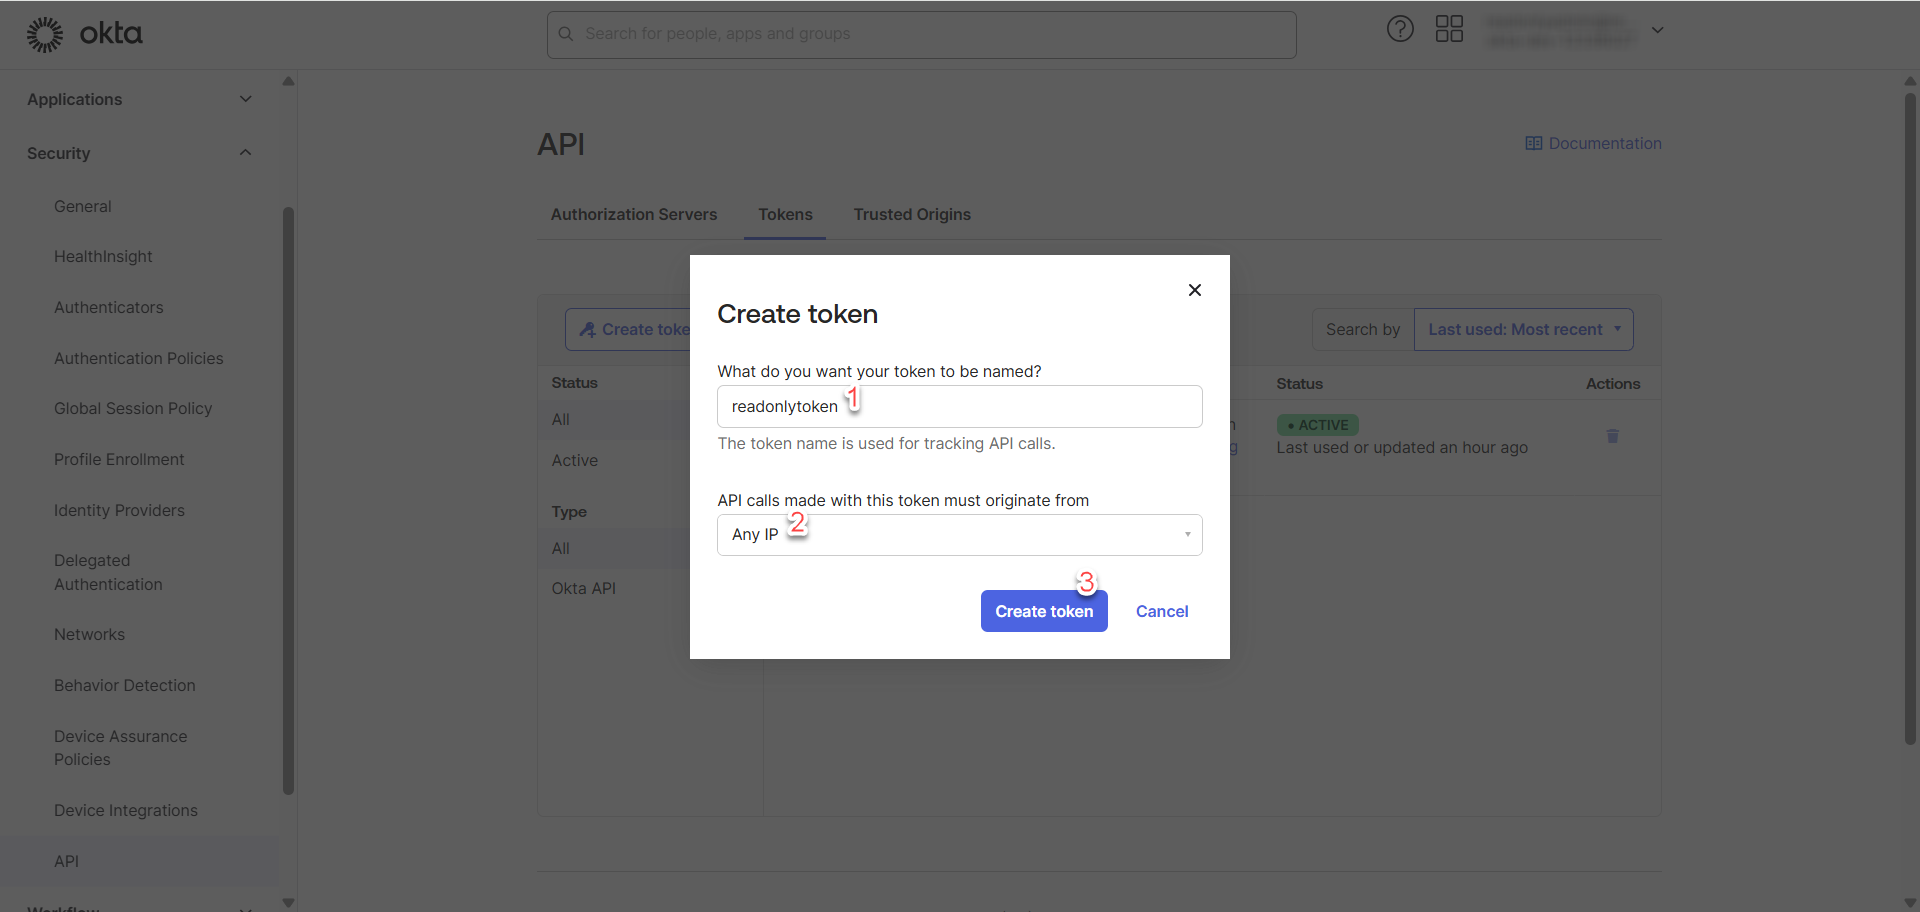
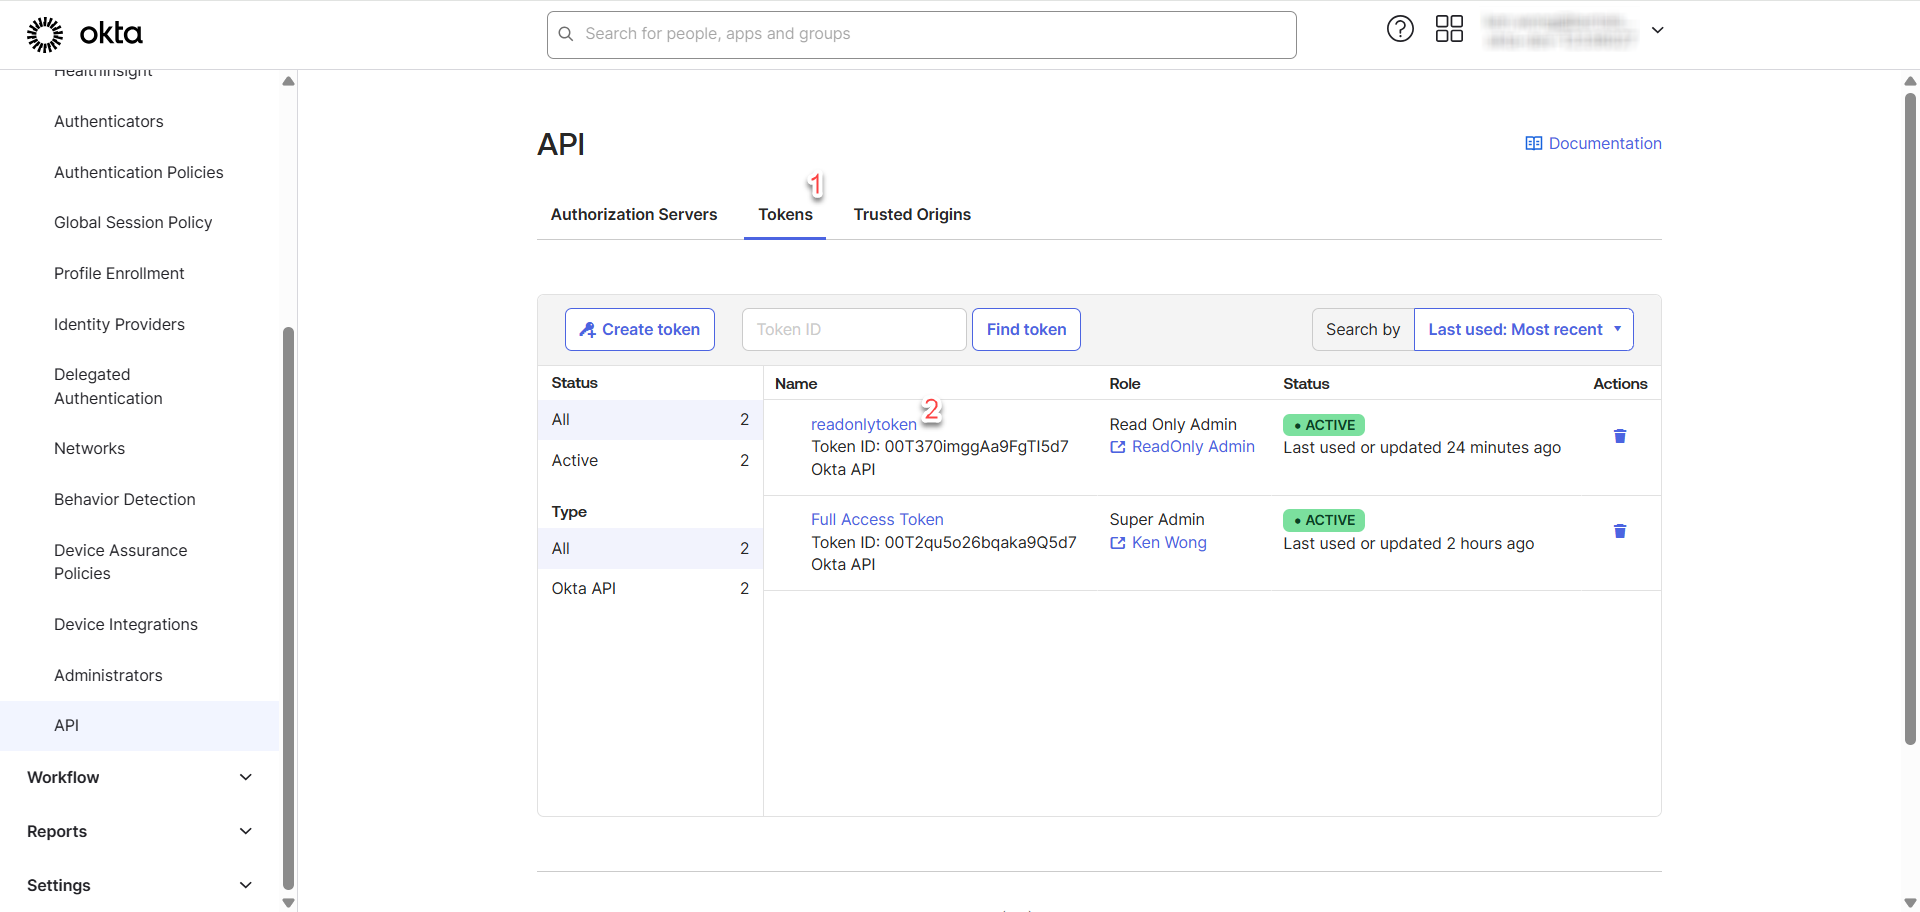
-
Once completed, copy and save the token at somewhere that is safe and secured.

The token value is only visible once at the time of creation. If it's lost, you will need to generate a new token.
OKTA Token Rate Limiting
Okta enforces rate limits on API tokens to protect the platform from abuse and ensure fair usage across tenants. If an API token exceeds the allowed number of requests within a specific time window, Okta will return a 429 Too Many Requests response.
The percentage of each API's rate limit to be allocated to this token can be adjusted with the following steps:
Login to Super Administrator user to edit the rate limit.
-
API > Tokens > [Click on specific token].
-
Click on Edit and you can now adjust the slider and Save.
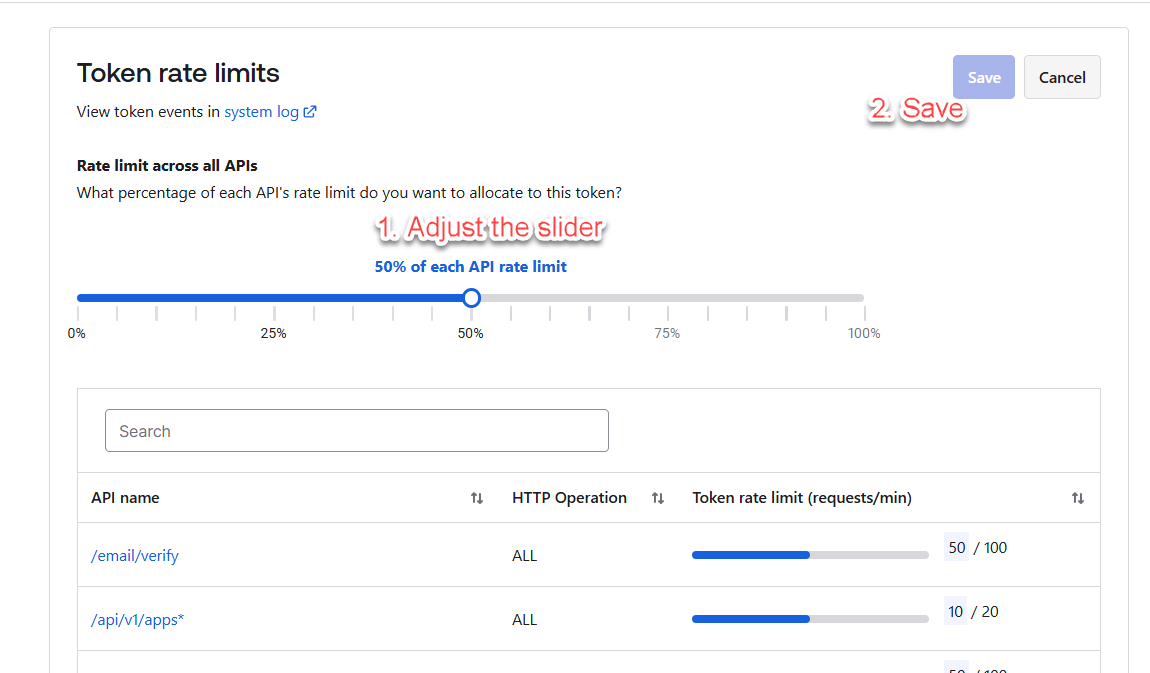
By default, Okta assigns 50% of an API endpoint's rate limit capacity to each API token or OAuth 2.0 application.
By assigning a too large percentage of the rate limit to a single token or app, you risk this token or app using up the majority or even the entirety of the endpoint’s rate limit. This could prevent other tokens or apps from making requests, leading to rate-limit violations for others in your organization.
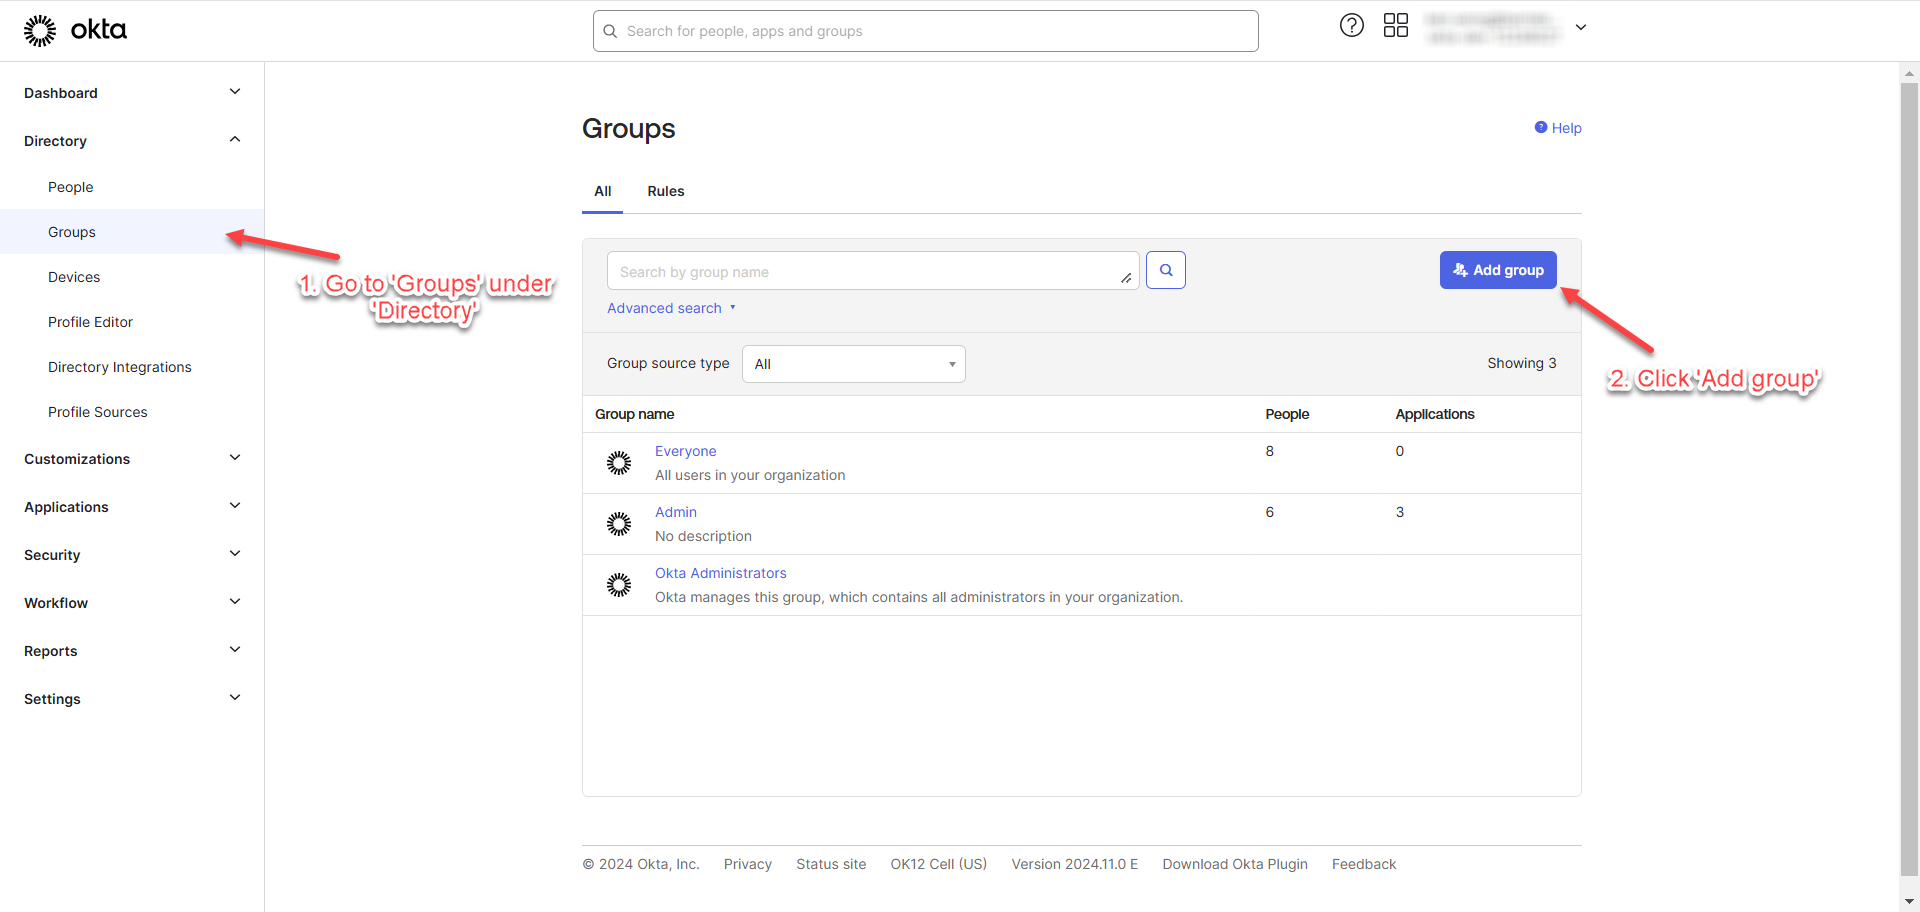
Create Groups
This section outlines the steps for creating groups and assigning users to the groups.
-
Go to “Groups” under “Directory” and click “Add group”.
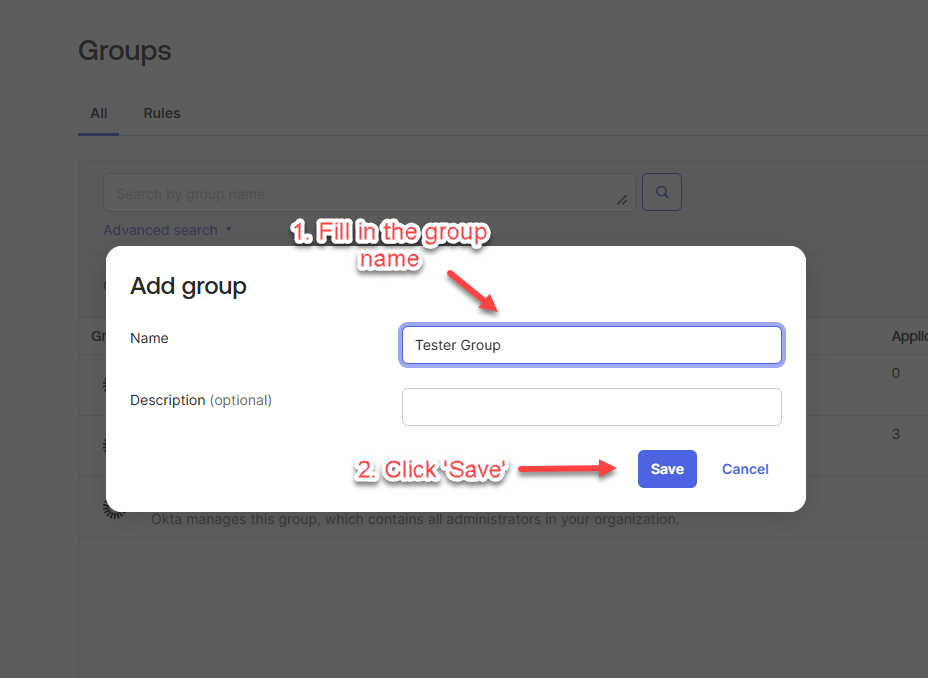
-
Fill in the group name and click “save”.
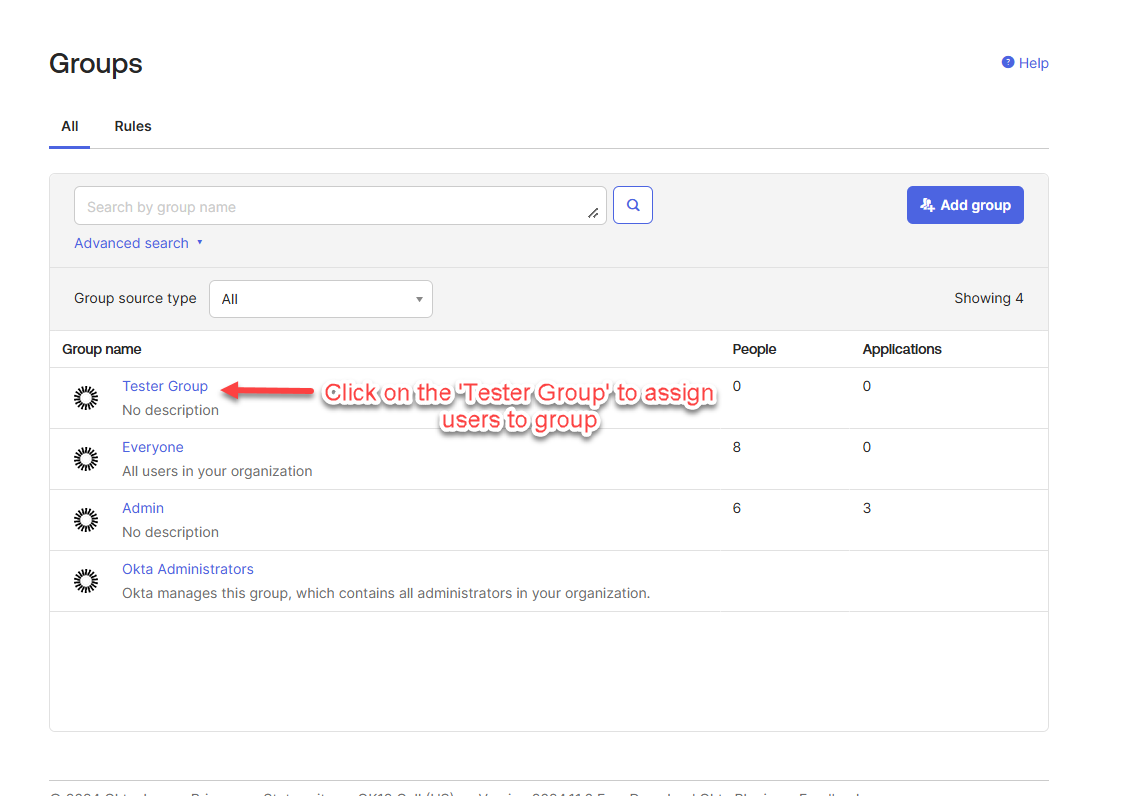
-
After creating the group, you will be redirected to the listing page, where the new group will be displayed. Click on the group to assign users to it.
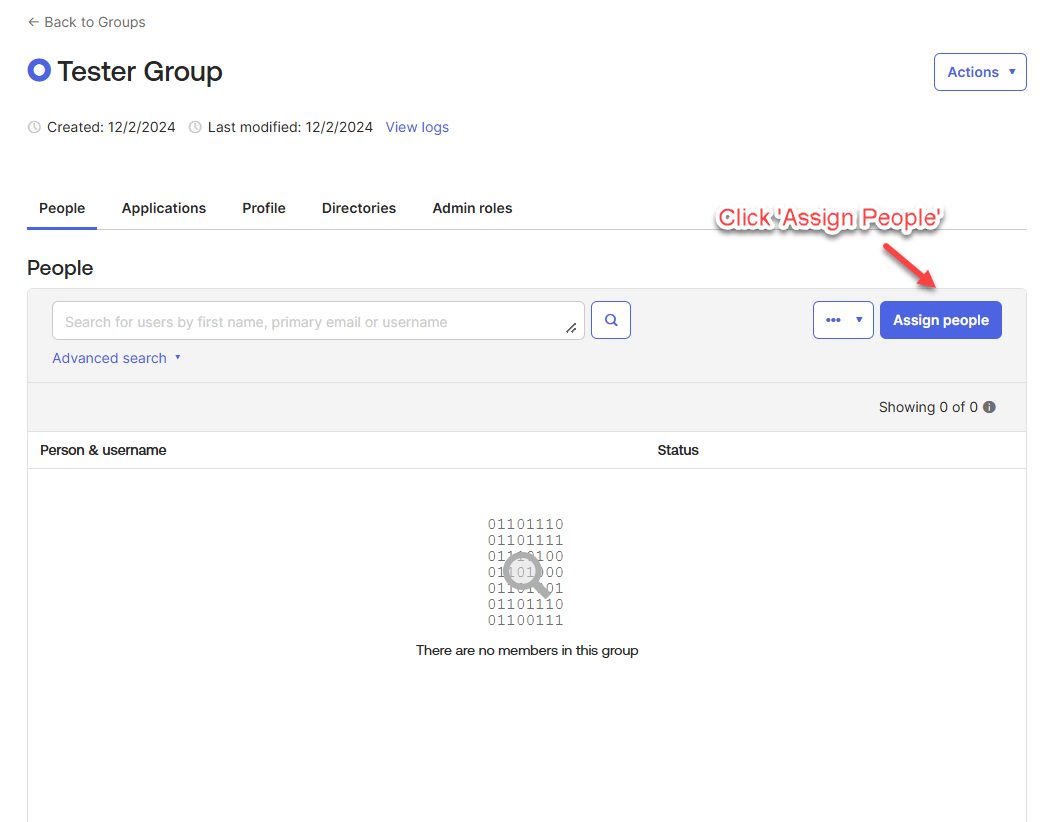
-
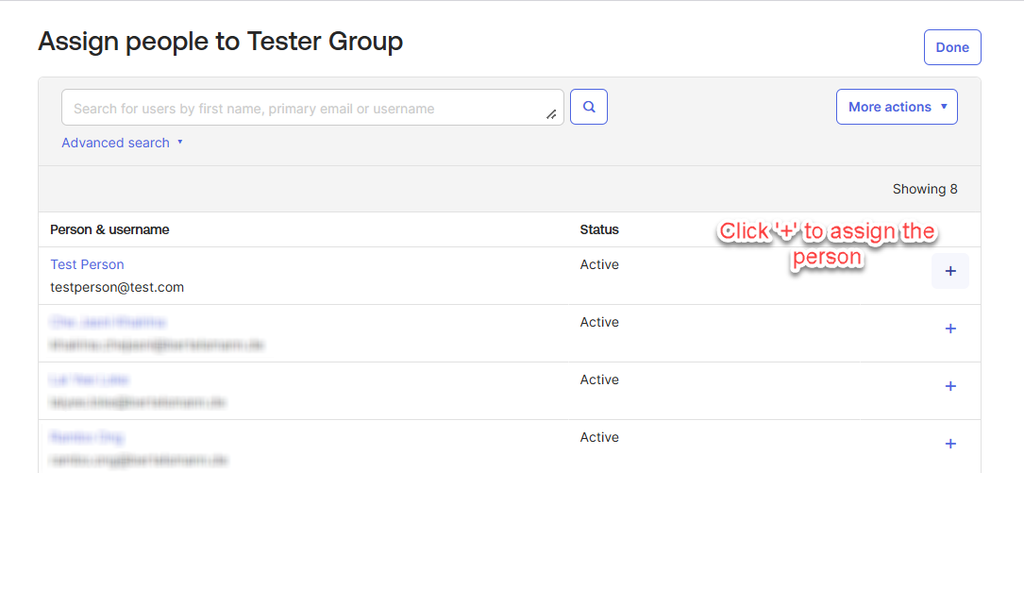
Click “Assign People”.
-
Click the “+” button to assign the specific people to the group.
-
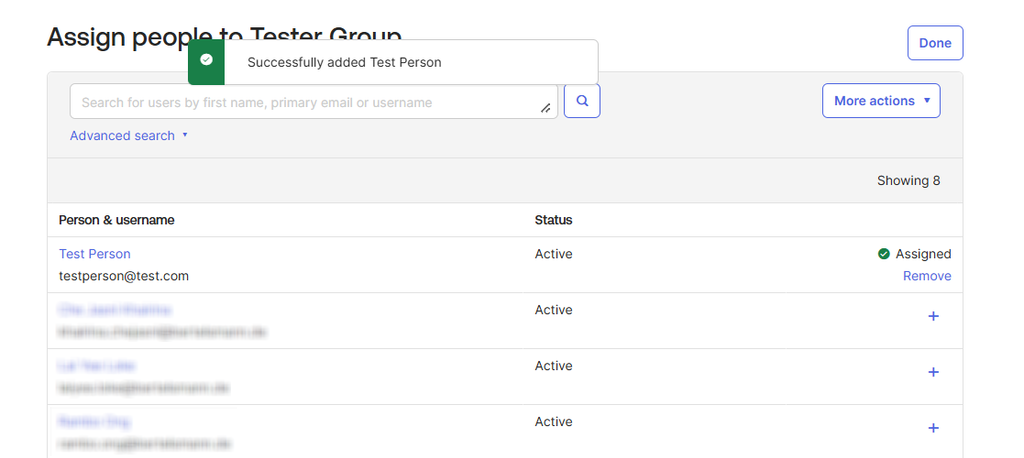
The following image displays the successful assignment screen.
Assign Users and Groups to New App Integration
Assign Users
This section outlines the steps for assigning users to the newly created application in OKTA.
-
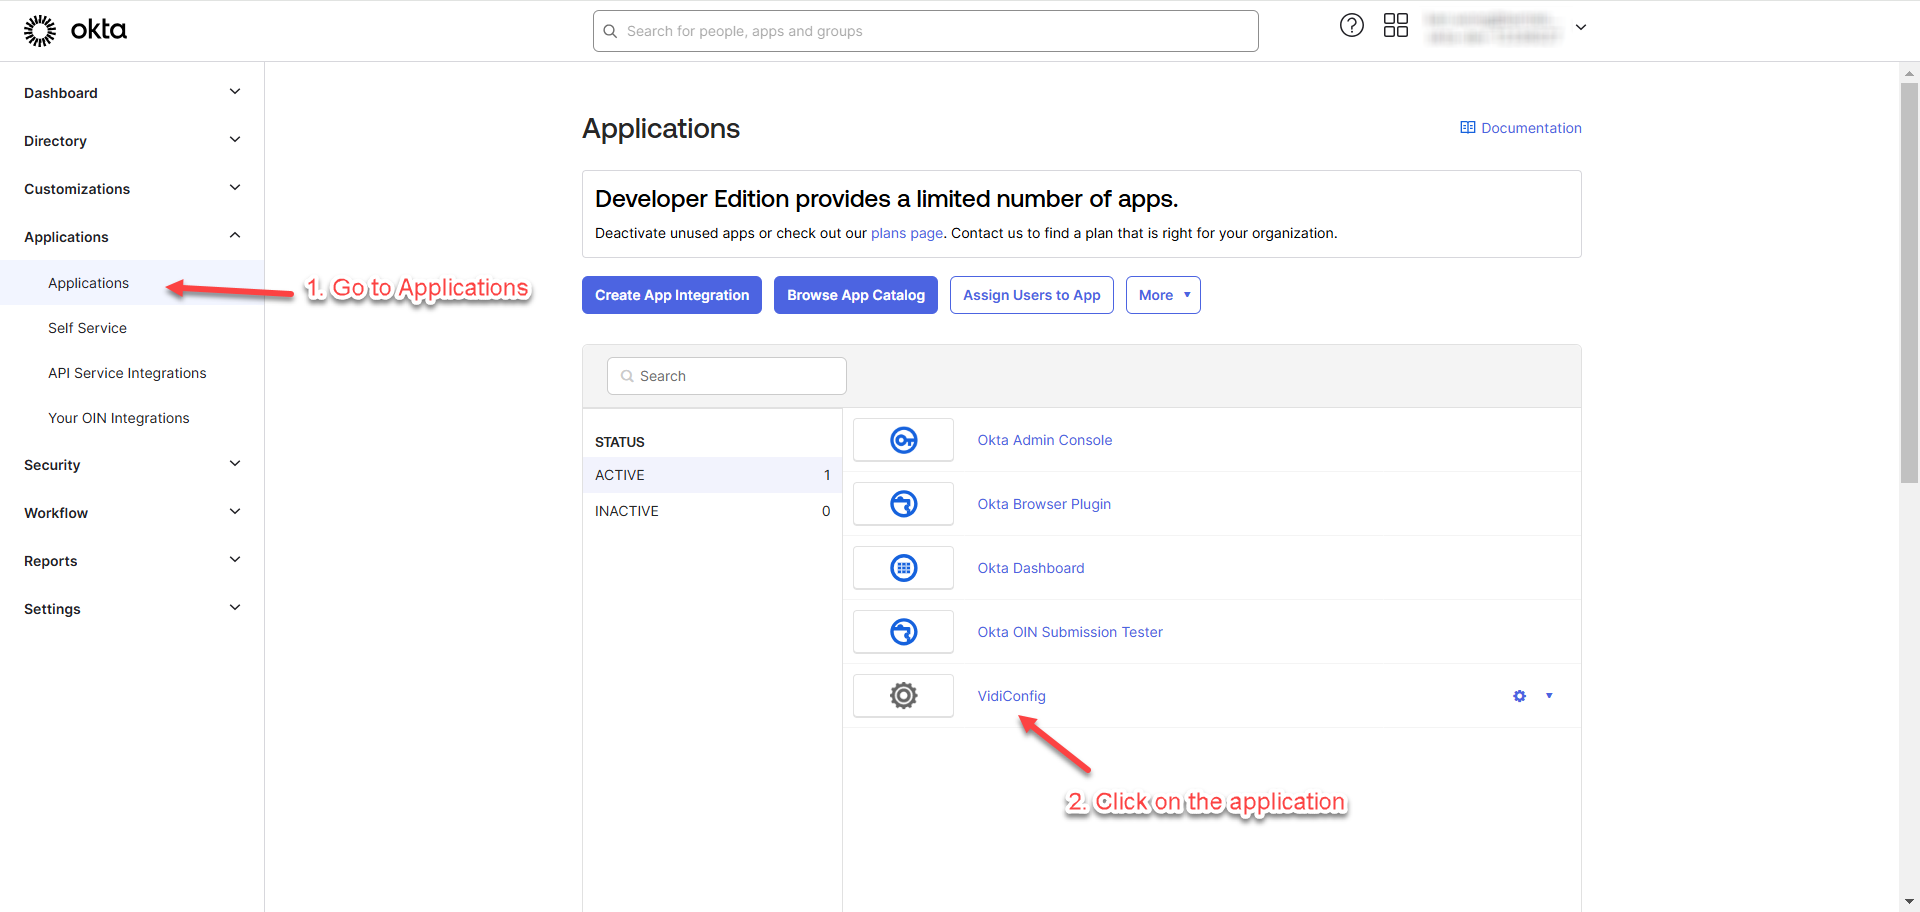
Go to “Applications” and click on the newly created application”.
-
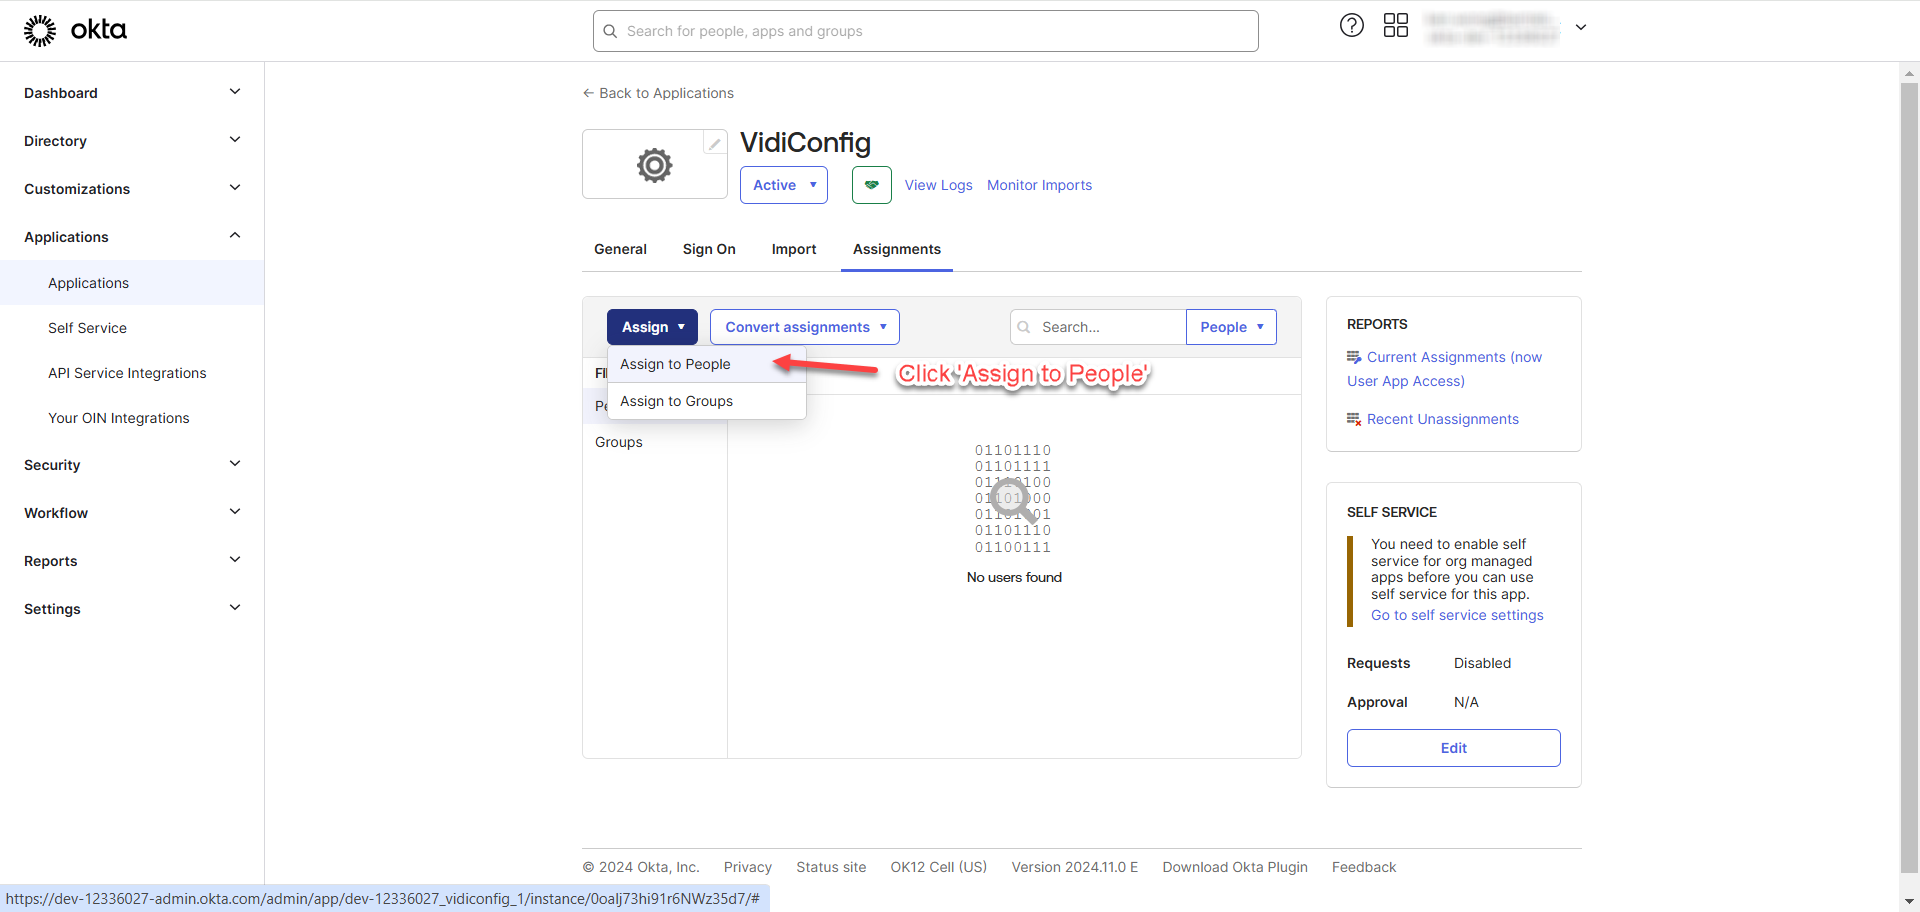
Click “Assign to People” to assign users to the application.
-
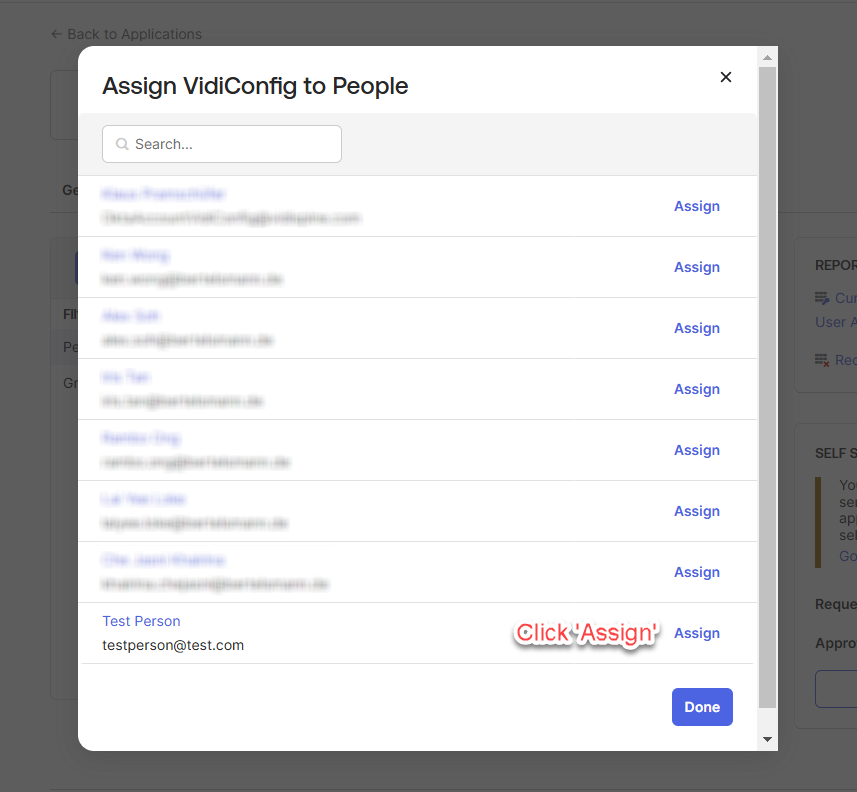
Find the person you want to assign and click “Assign”.
-
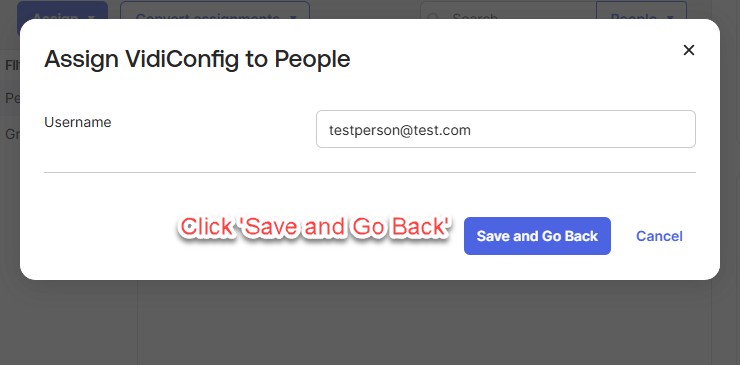
Click “Save and Go Back” once ensuring the username is pointed to the right person.
-
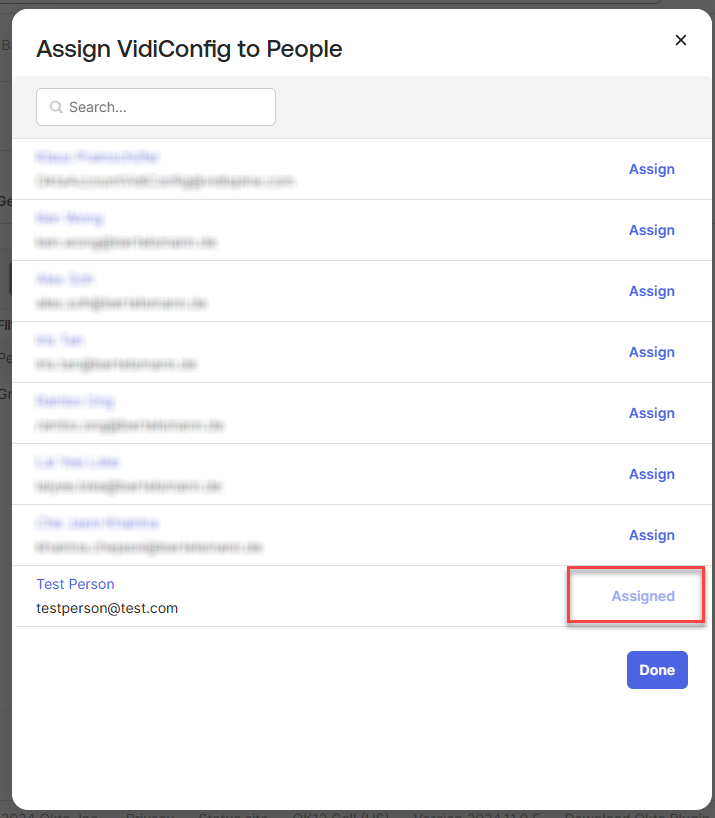
Upon successful assignment, you will see that the person is marked as "Assigned." Click “Done”.
-
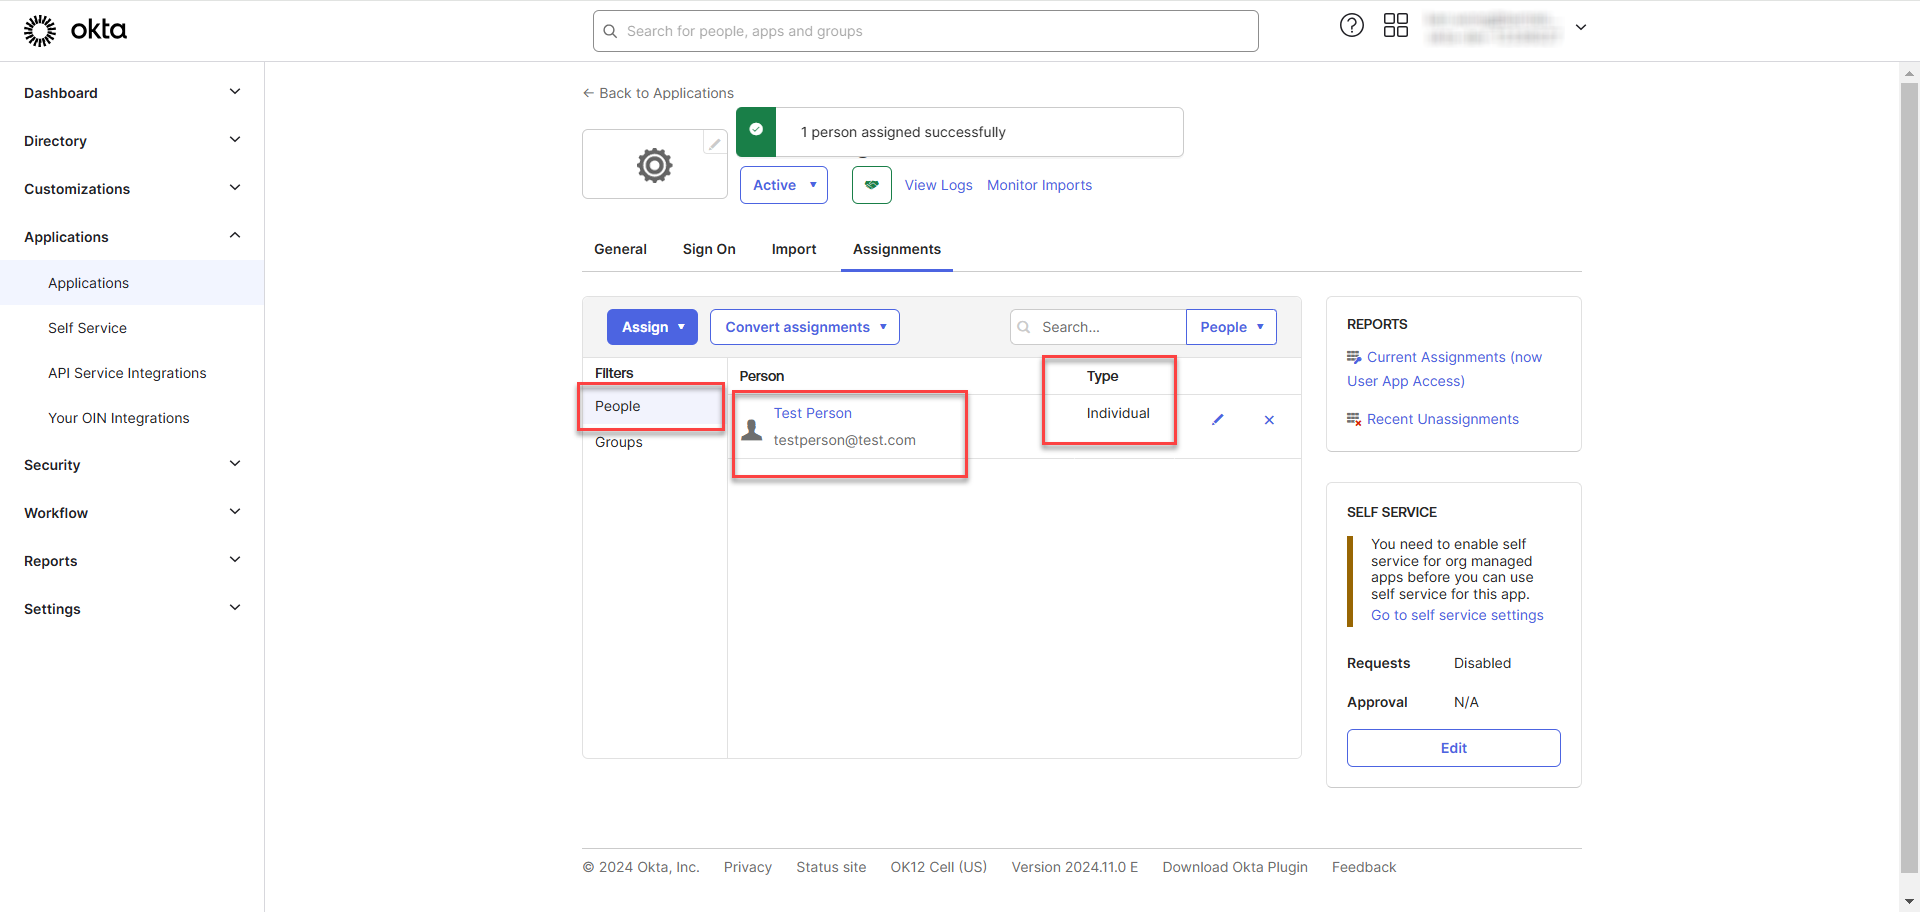
After clicking "Done," you will be redirected back to the listing page, where the assigned person will appear in the list. The type will be displayed as "Individual," indicating that the person is assigned individually rather than through a group.
Assign Groups
This section outlines the steps for assigning groups to the newly created application in OKTA.
-
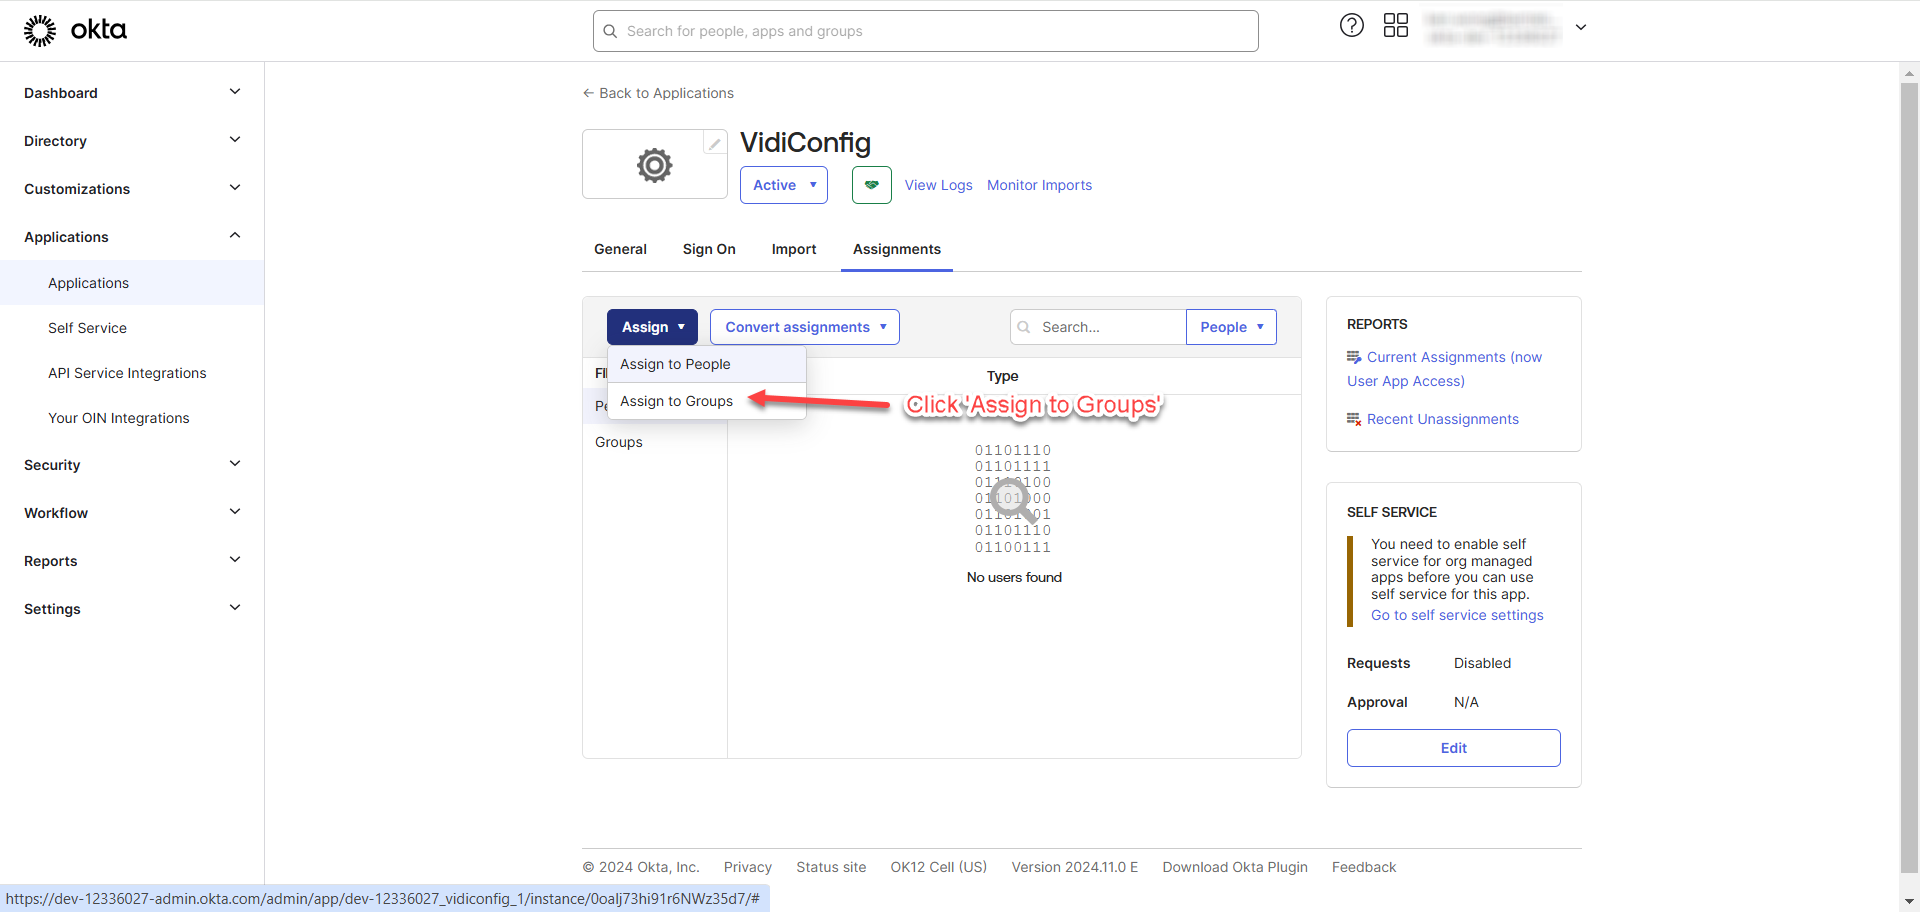
Click “Assign to Groups” to assign groups to the application.
-
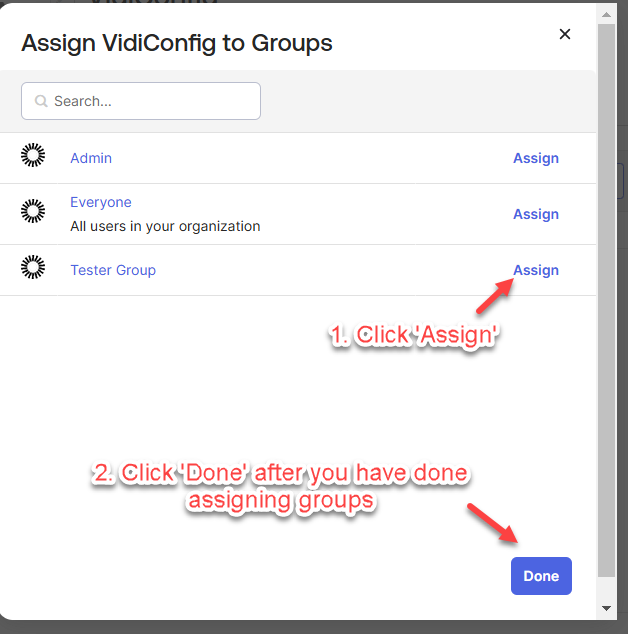
Find the group you want to assign to the application and click “Assign”. Click “Done” after you have done assigning the groups.
-
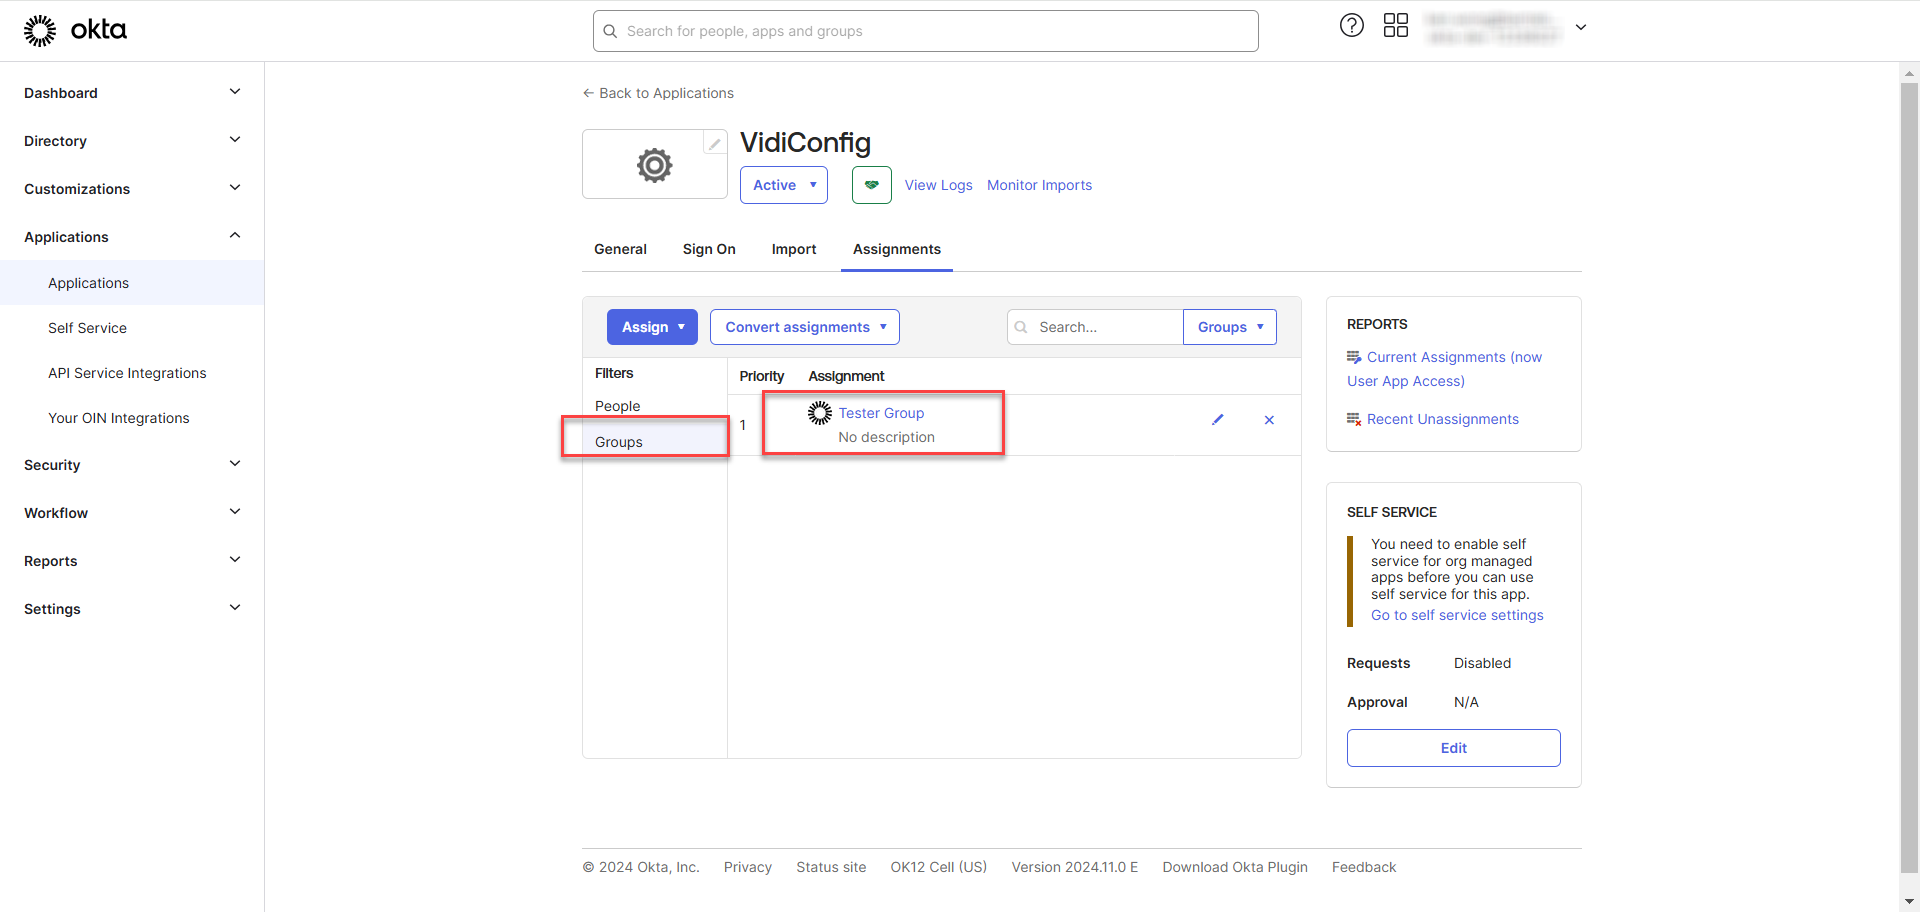
After clicking "Done," you will be redirected back to the listing page, where the assigned groups will appear in the list.
-
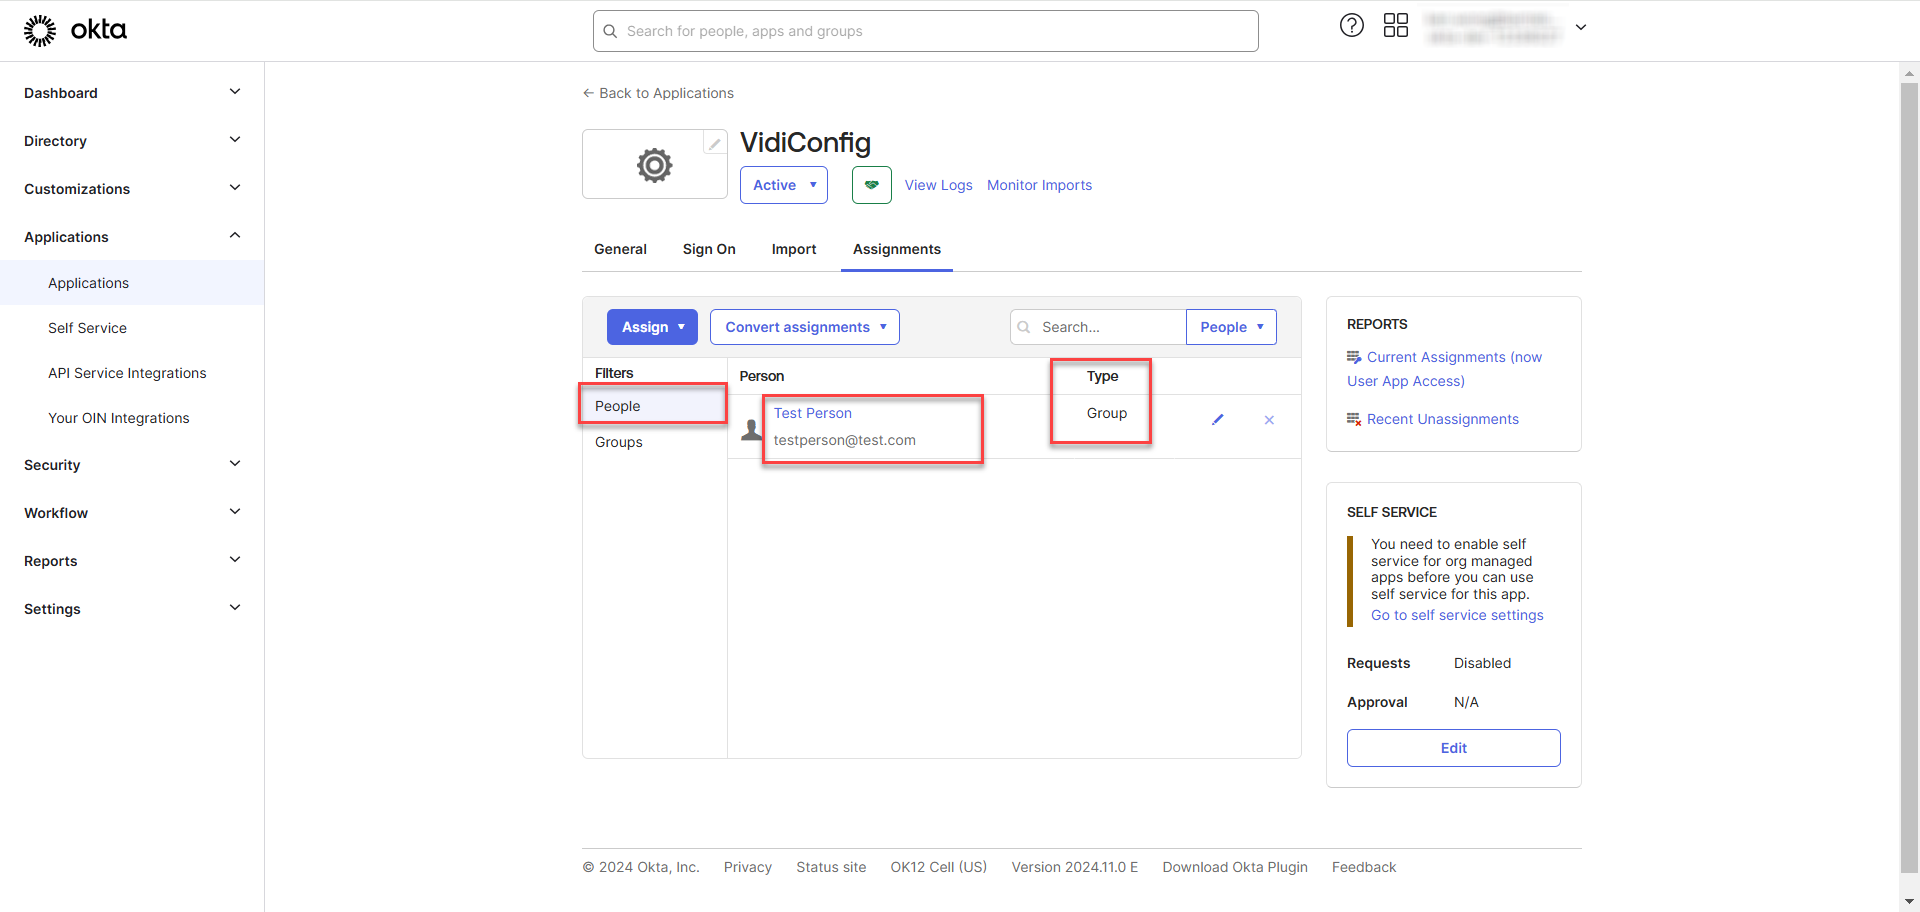
Go to the “People” under the “Filters”. You will see the person under the group automatically being assigned to the application. The type will be displayed as "Group," indicating that the person is assigned through a group rather than individually.
Test OKTA Login in Keycloak
It is required to create an Identity Provider in Keycloak to test the login.
-
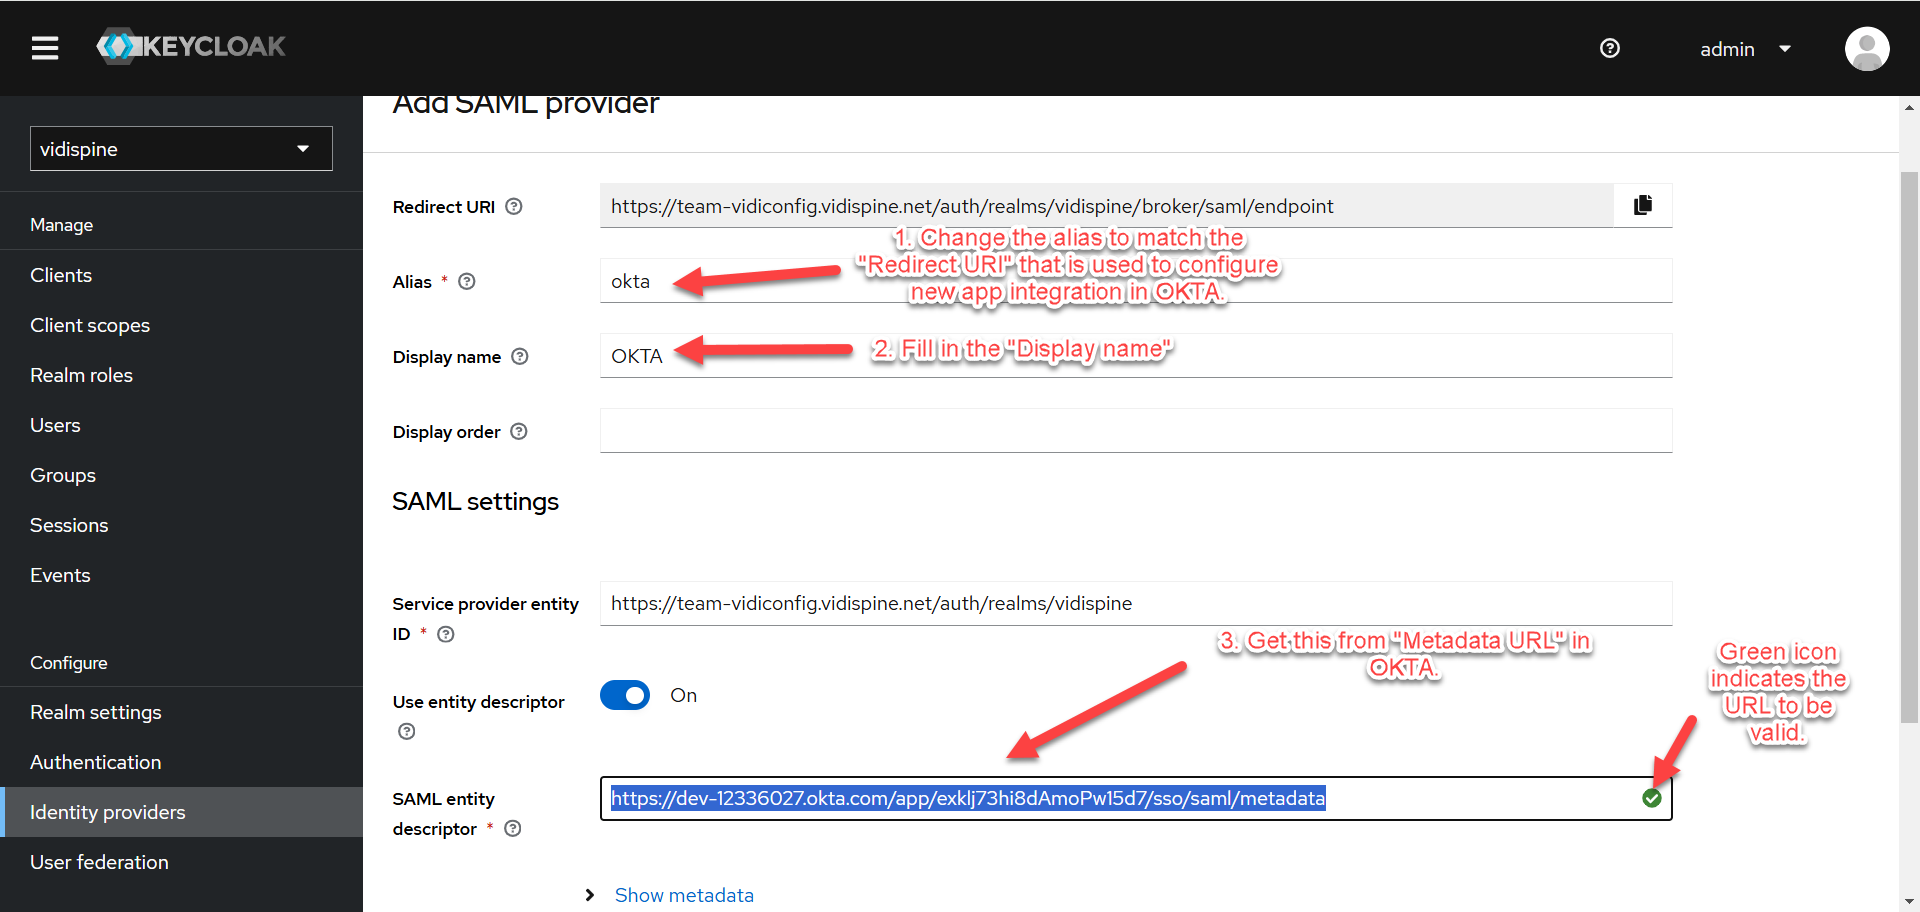
Go to “Identity Providers” under the “vidispine” realm and click on “SAML v2.0”.
-
Follow the steps provided in the image below. Click “Add” at the bottom of the page.
“Metadata URL” can be obtained in OKTA. Refer to Create New App Integration.
-
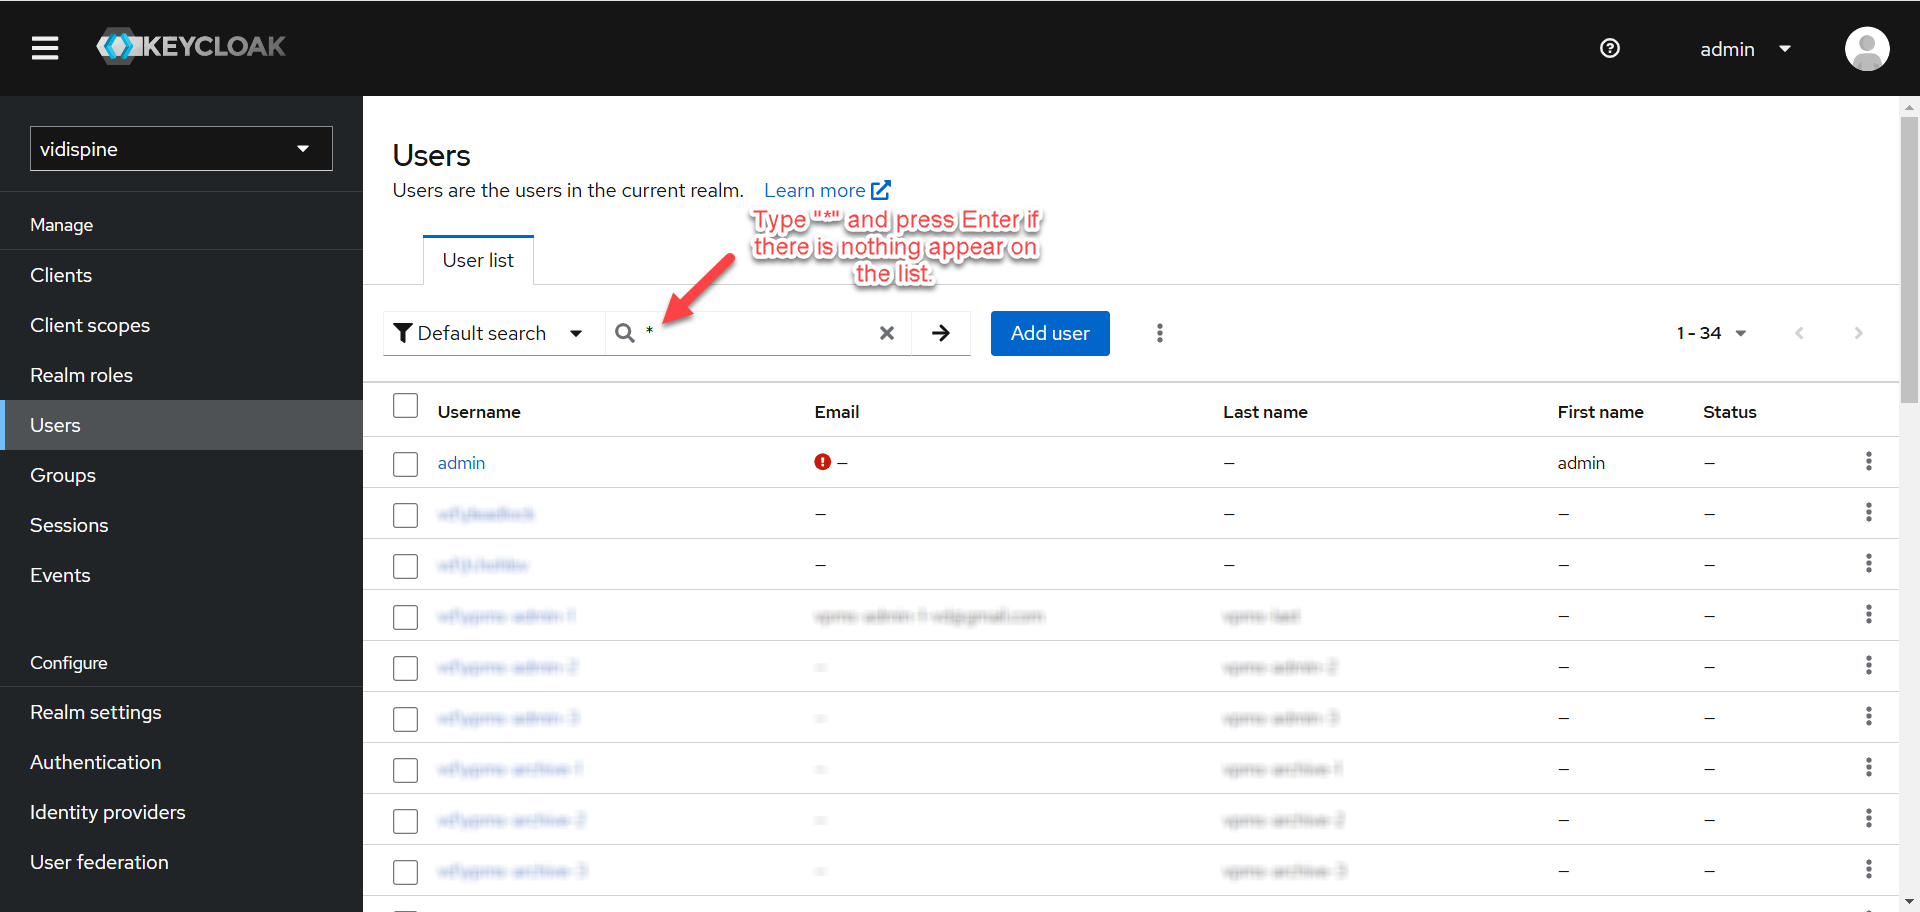
Go to “Users” and click on any user.
You can type “*” to search for all users or search for specific user if there are too many users.
-
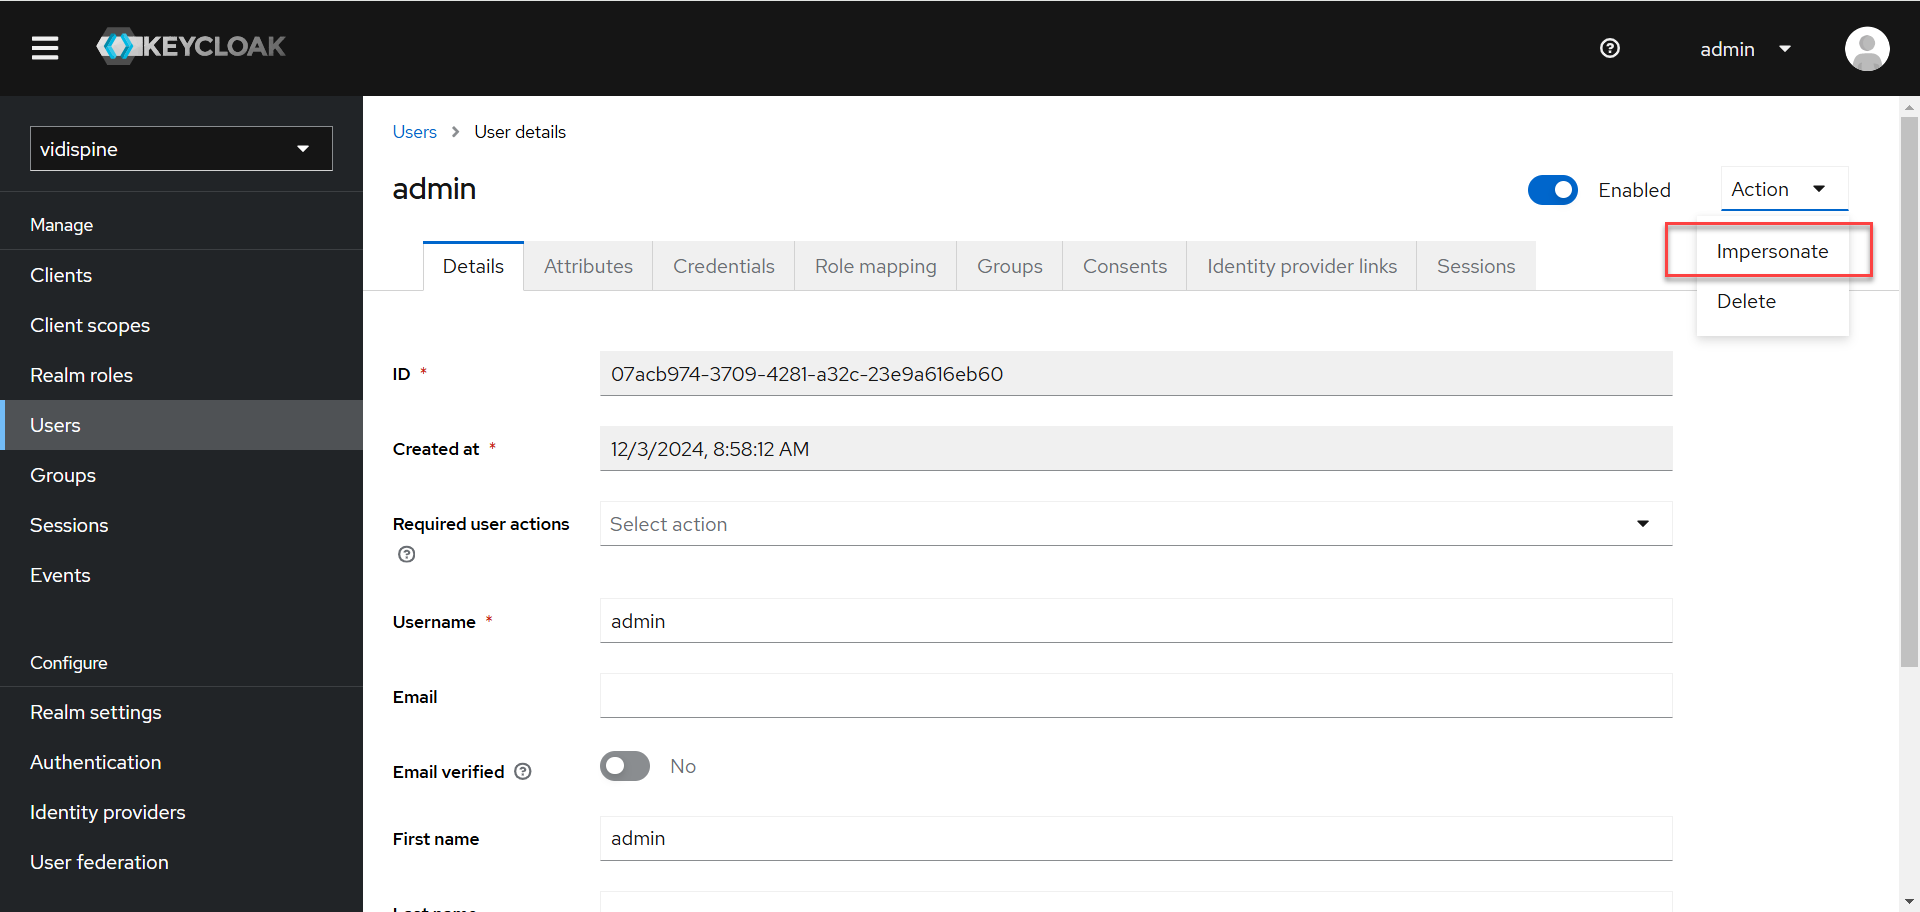
After clicking the user, click on “Impersonate” under the “Actions”.
It is recommended to use another browser or Incognito to use the impersonate user as your main browser would already have another login session with your own OKTA user.
-
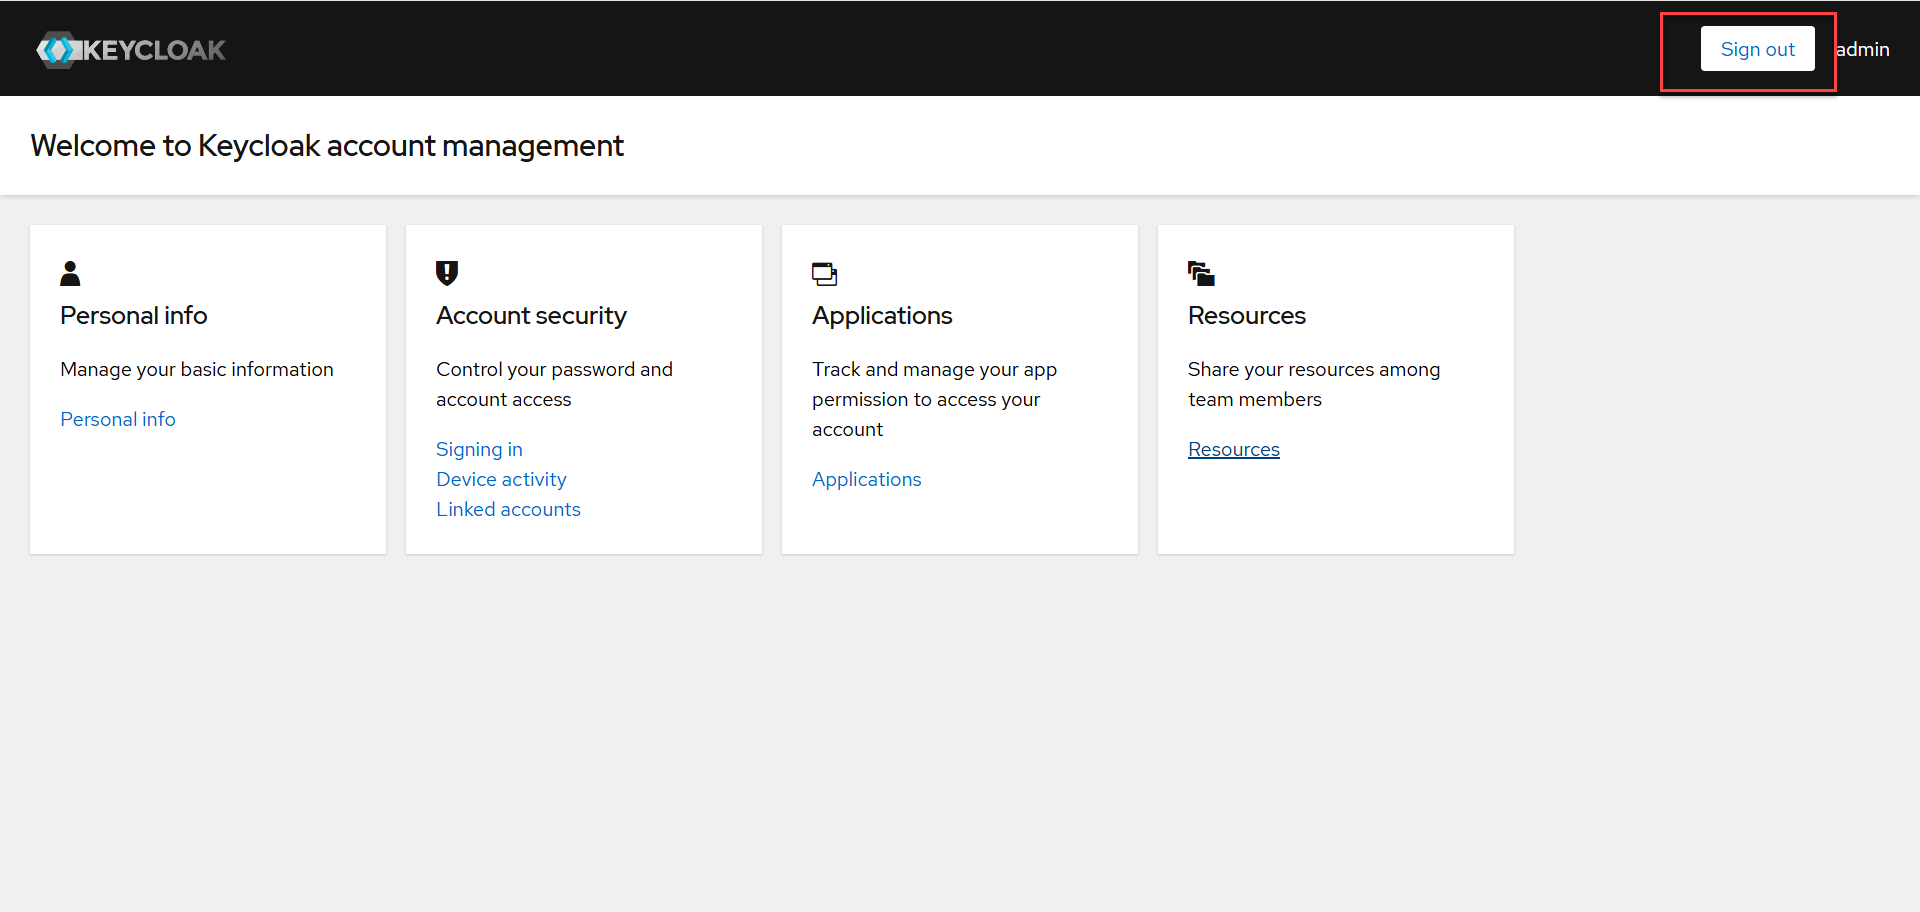
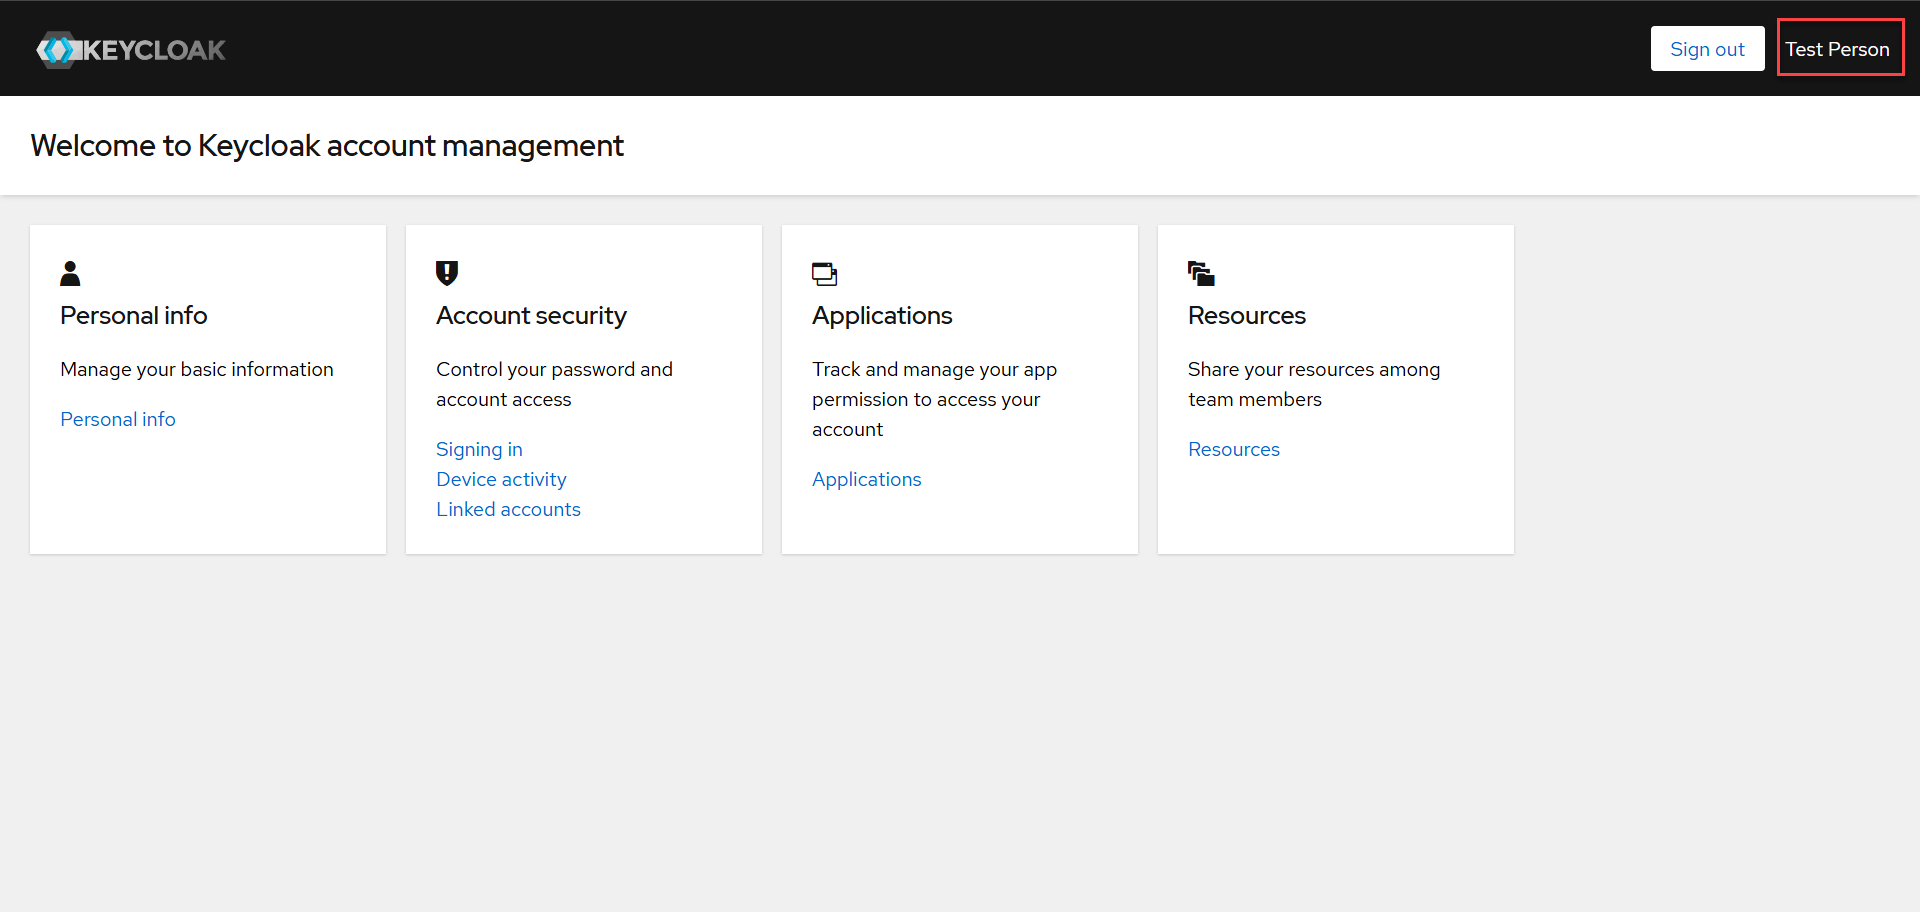
You will now be redirected to the Keycloak Account Management page with the impersonated user. Click “Sign out” and “Sign in” again with the OKTA user this time.
-
You will now be redirected to the “Login Screen” with a new button for you to login as integrated OKTA user. Click the new button.
The button name is the “Display Name” that you filled to create the Identity Provider.
-
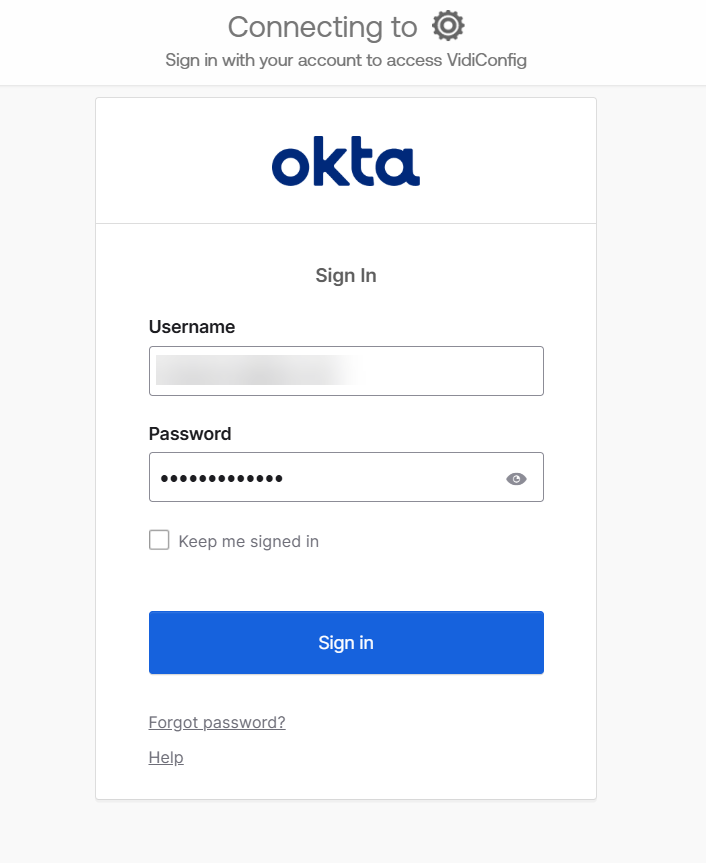
You will now be redirected to OKTA login page. Proceed to login.
You might be asked to setup OKTA Verify for multi-factor authentication. Please proceed to do so.
-
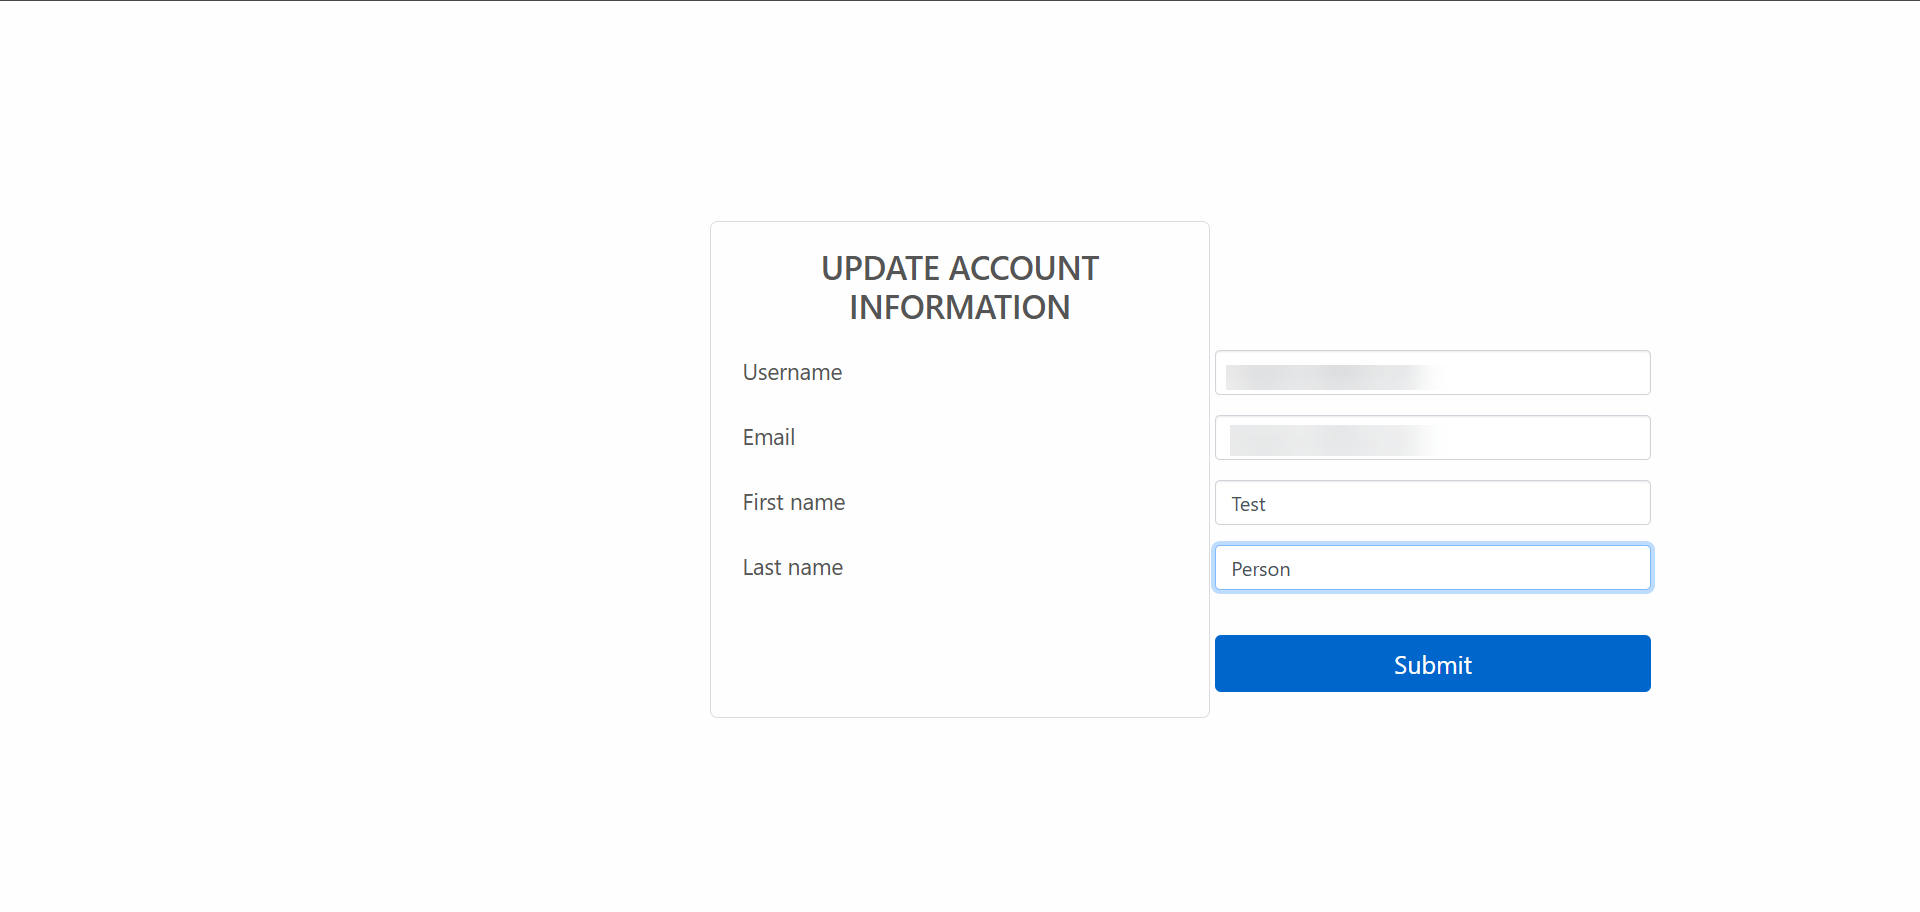
Upon successful login, you will be redirected to a page to update your account information. Fill in all the information and click “Submit”.
-
You are now successfully logged in with your OKTA user.
Configuration in ConfigPortal
Now you will have to configure OKTA as identity provider in ConfigPortal as follows:
-
Open ConfigPortal on corresponding system
-
Select
-
“Settings”
-
“Identity Provider”
-
Add button
-
“Add Okta Configuration”
-

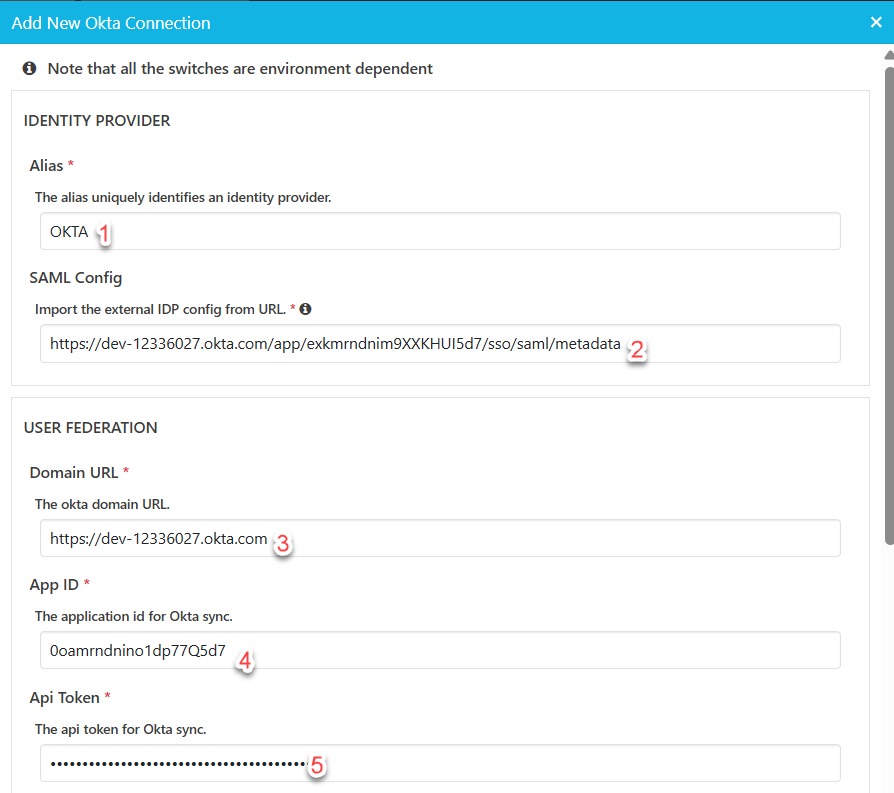
Configuration Parameters
Provide following parameters
-
Alias
-
SAML Config can be retrieved as follow:
Go to Applications > Click on the application > Look for Metadata URL > Click Copy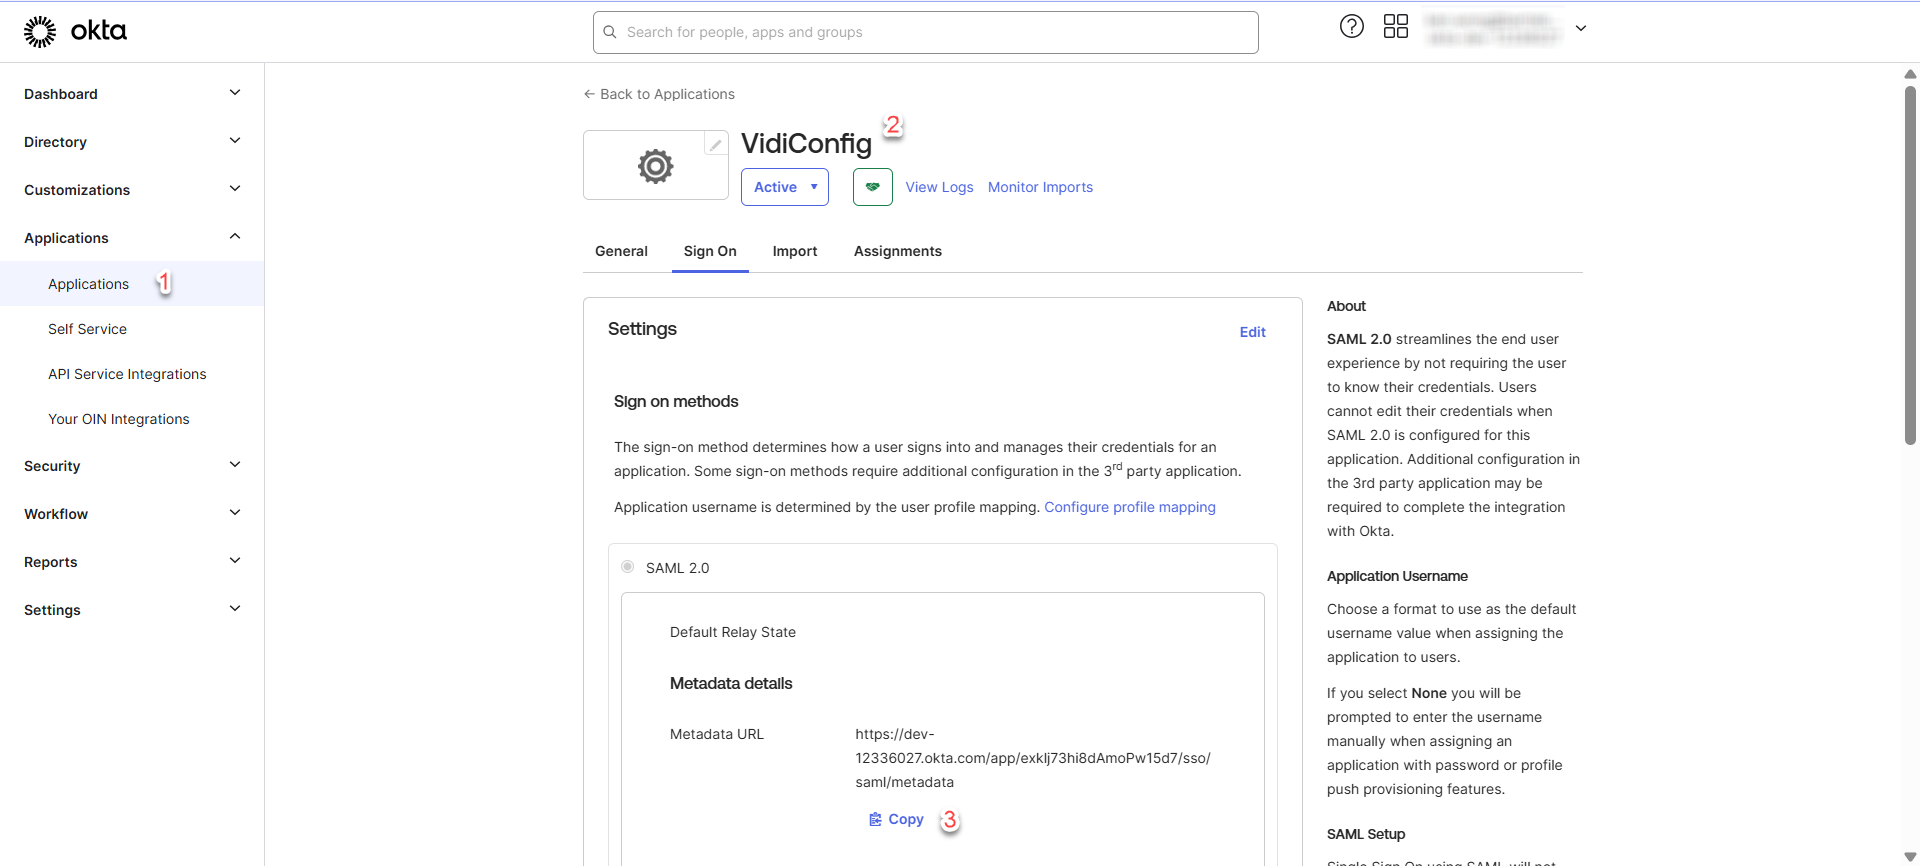
-
Domain URL can be obtained as follow:
-
App Id can be retrieved as follow:
Go to Applications > Click on the application > Find the App Id from browser URL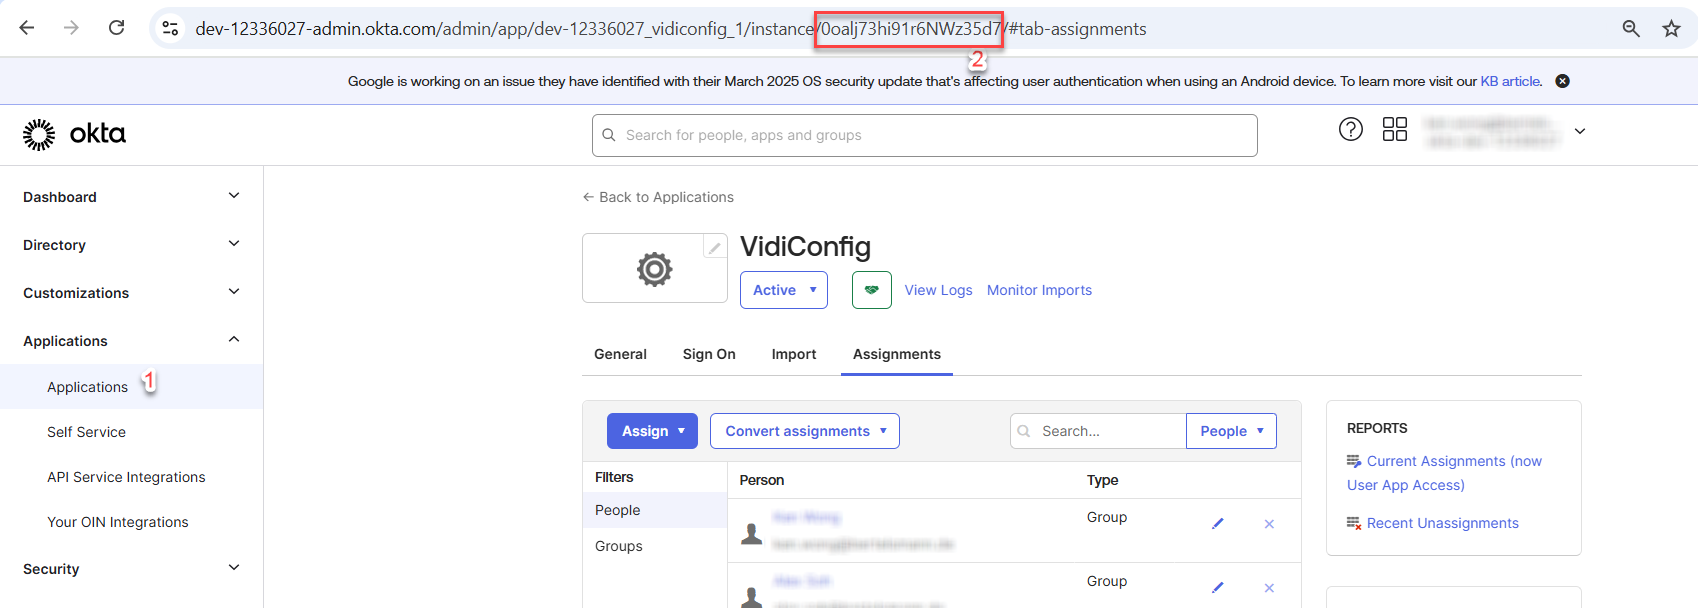
-
API Token can only be retrieved during the the creation of token. Refer to OKTA integration [C IG] | Create API Token.
-
Fill in all the information which are obtained from the previous steps.
-
Fill in the remaining fields and click “Save”.
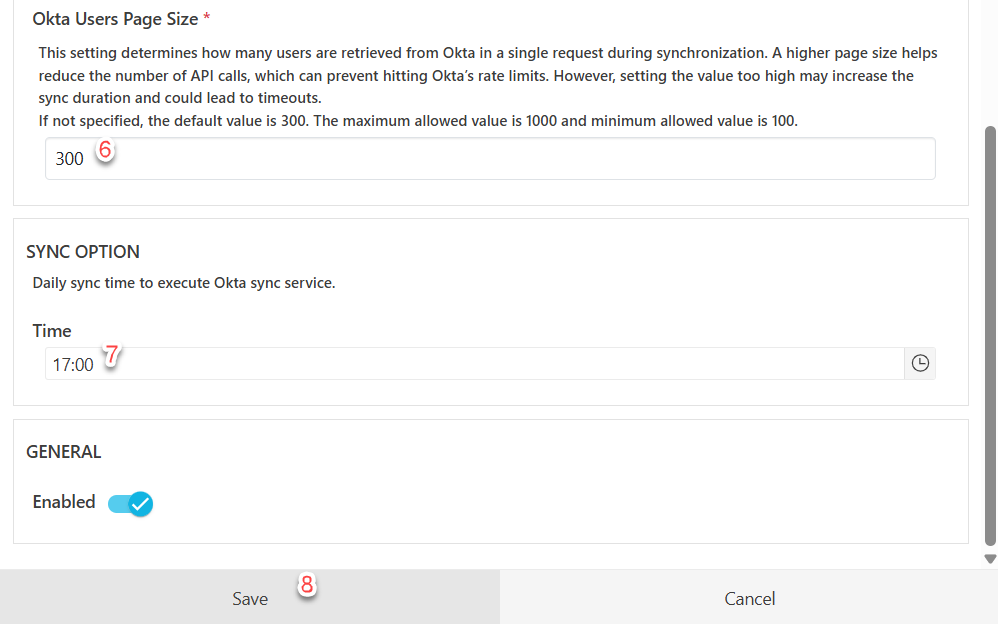
Determining Optimal Page Size
To determine what page size should be used, you can follow the formula below:
Page Size = (Number of Users ÷ (Okta API Rate Limit × 0.6))
(The 0.6 factor ensures usage stays below the 60% threshold to avoid triggering the customer-side email warning.)
After calculating, round the result up to the nearest multiple of 50 to provide a buffer for potential performance degradation
Example:
Let’s say:
-
Number of Users = 5,000
-
Okta API Rate Limit = 40 requests per minute
Step-by-Step:
-
Divide users by rate limit:
5,000 ÷ (40 × 0.6) = 208.33 -
Round up to the nearest 50:
→ 250
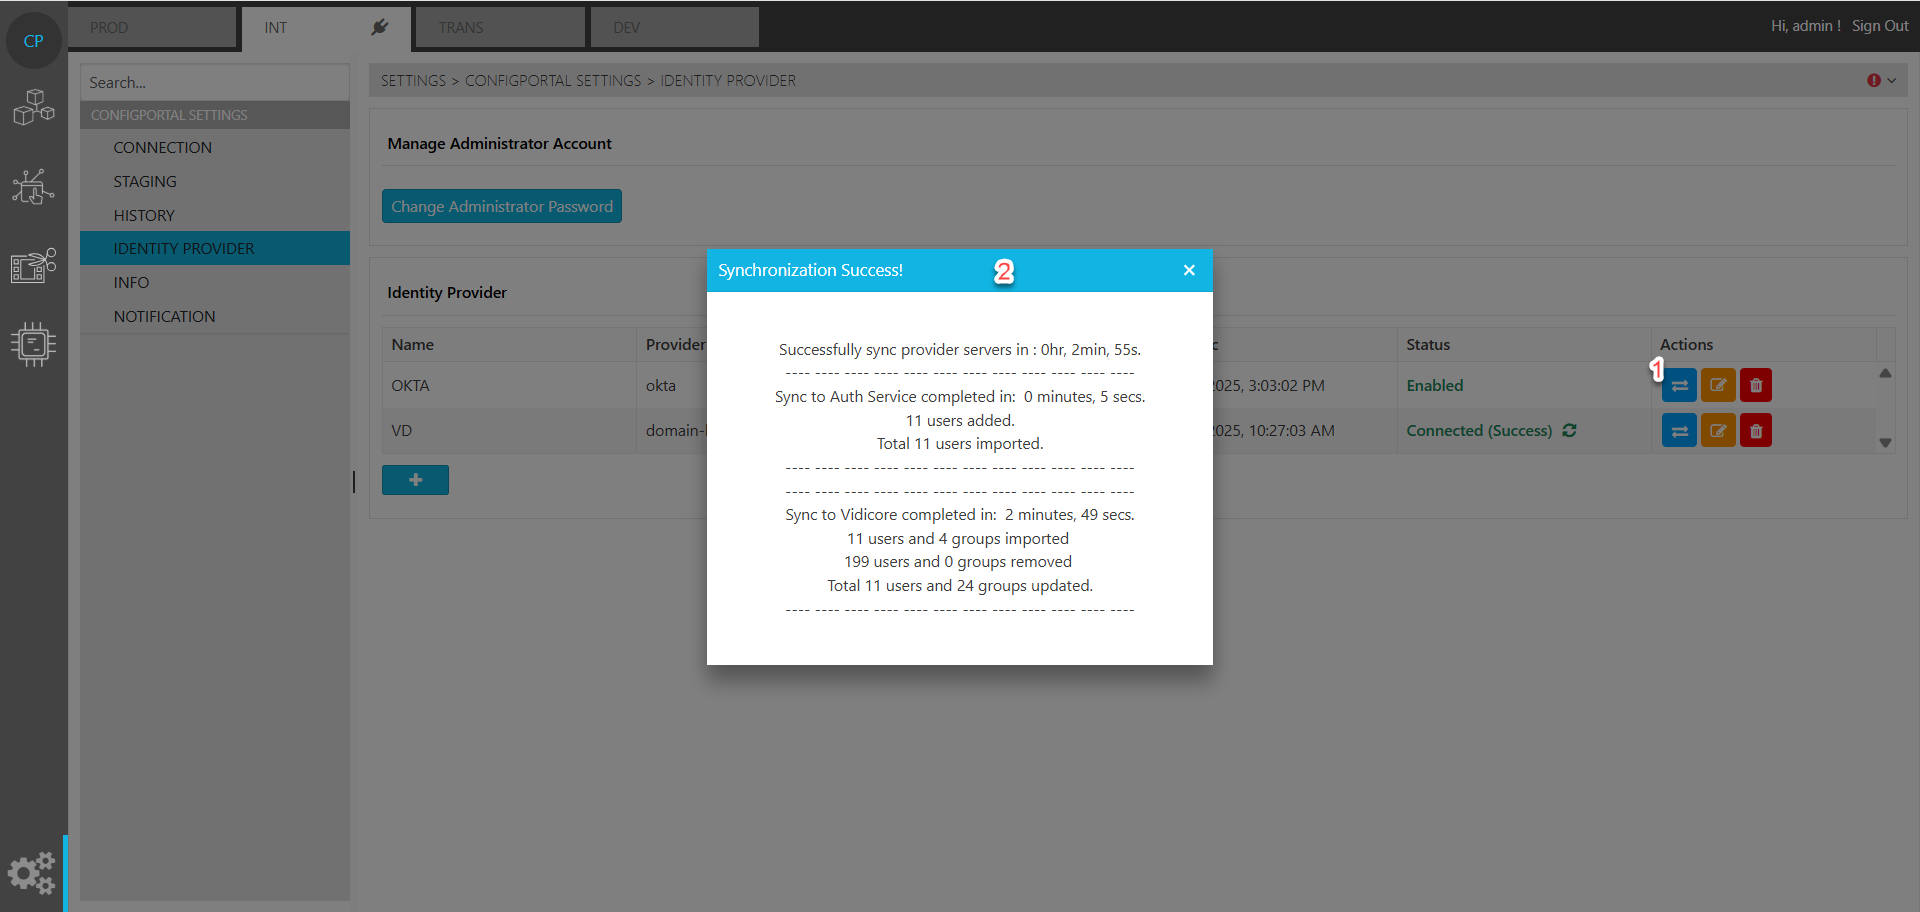
Sync Users and Groups
Now you should be able to sync all users and groups from configured OKTA