Create a Crash Recording
Workflow Description
As a VidiControl user you need to record something as quickly as possible and specify the metadata and duration later. Once the intended ingest source is determined, you can initiate the crash recording option on its respective lane on the timeline. A VidiControl has, based on predefined default duration for crash recordings, the option to modify its specifications before the recording is complete. Once the crash recording has been initiated it will be treated a growing file and expressed in your system for further processing.
Motivation and Considerations
If you need to record something as quickly as possible and do not have the time to pre-specify the recording.
Crash recordings are motivated by the necessity to start a recording immediately and on the fly. This implies that a crash recording will have a predetermined duration and specification. Crash recordings require that users modify all of these before the end of the predetermined duration.
Crash recordings use default settings with regards to the use of device and/or device pool (the destination parameter). The device and/or pool cannot be modifying during a crash recording.
Crash recordings also require that the user be fully aware of the choice in source used when triggering them.
Crash recordings are anchored to the current “now” time on the timeline.
Step by Step
Phase 1
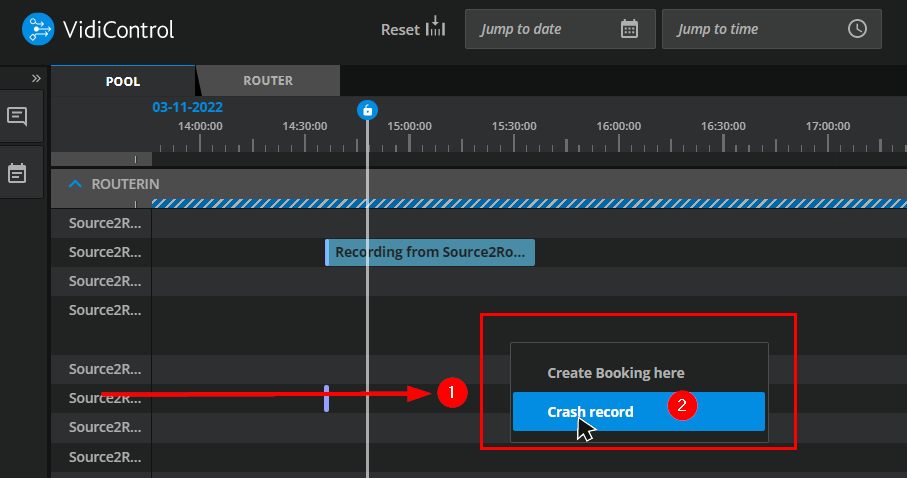
First you decide which source you want to use to draw your recording from. Pick the lane for the corresponding source on the timeline (1). After which you can open the context menu for that lane and select the “Crash record” (2) option.

Selecting the crash record option on the timeline.
It is also possible to start a crash recording my holding the [Shift]-key pressed while clicking on the source lane header:

Click on a source header holding [Shift]-key pressed will start a crash recording.
Phase 2
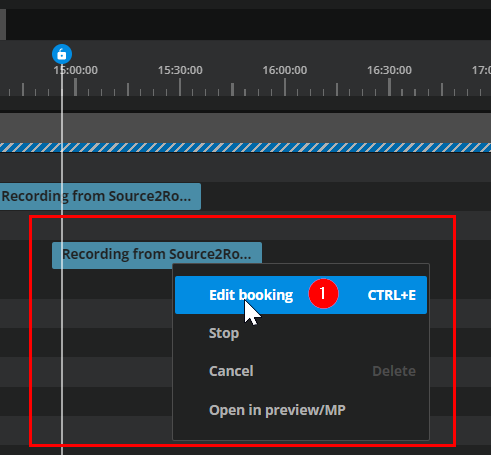
You can select the crash recording on the timeline, open the context menu and select the “Edit booking” (1) option and begin to modify specifications and metadata as you would any other booking component.

Selecting the editing booking option in the context menu in the timeline.
Phase 3
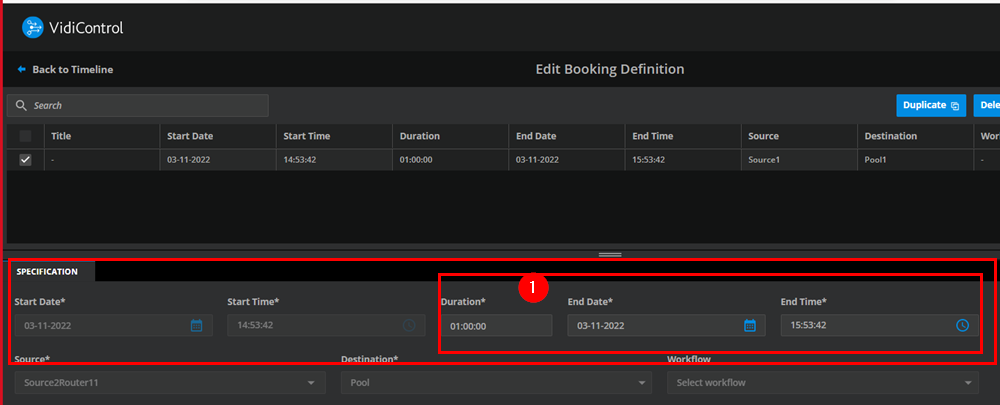
Please be aware that the crash recording is set to a default duration, so you may want to prioritize extending its initial duration.
This can be done in the Booking Dialog Area: Create a Booking, or directly on the timeline by extending component element to the right Modify a Booking Component on the Timeline .

Modifying the duration of the crash recording.
