Timeline Markers
Timeline Markers represent a tool to mark a position or area on the timeline which could be used for a variety of different use case. Adding comments, defining areas for publish, setting indicators for potential advertisement breaks or secondary events serve as some examples. This page contains following sections:
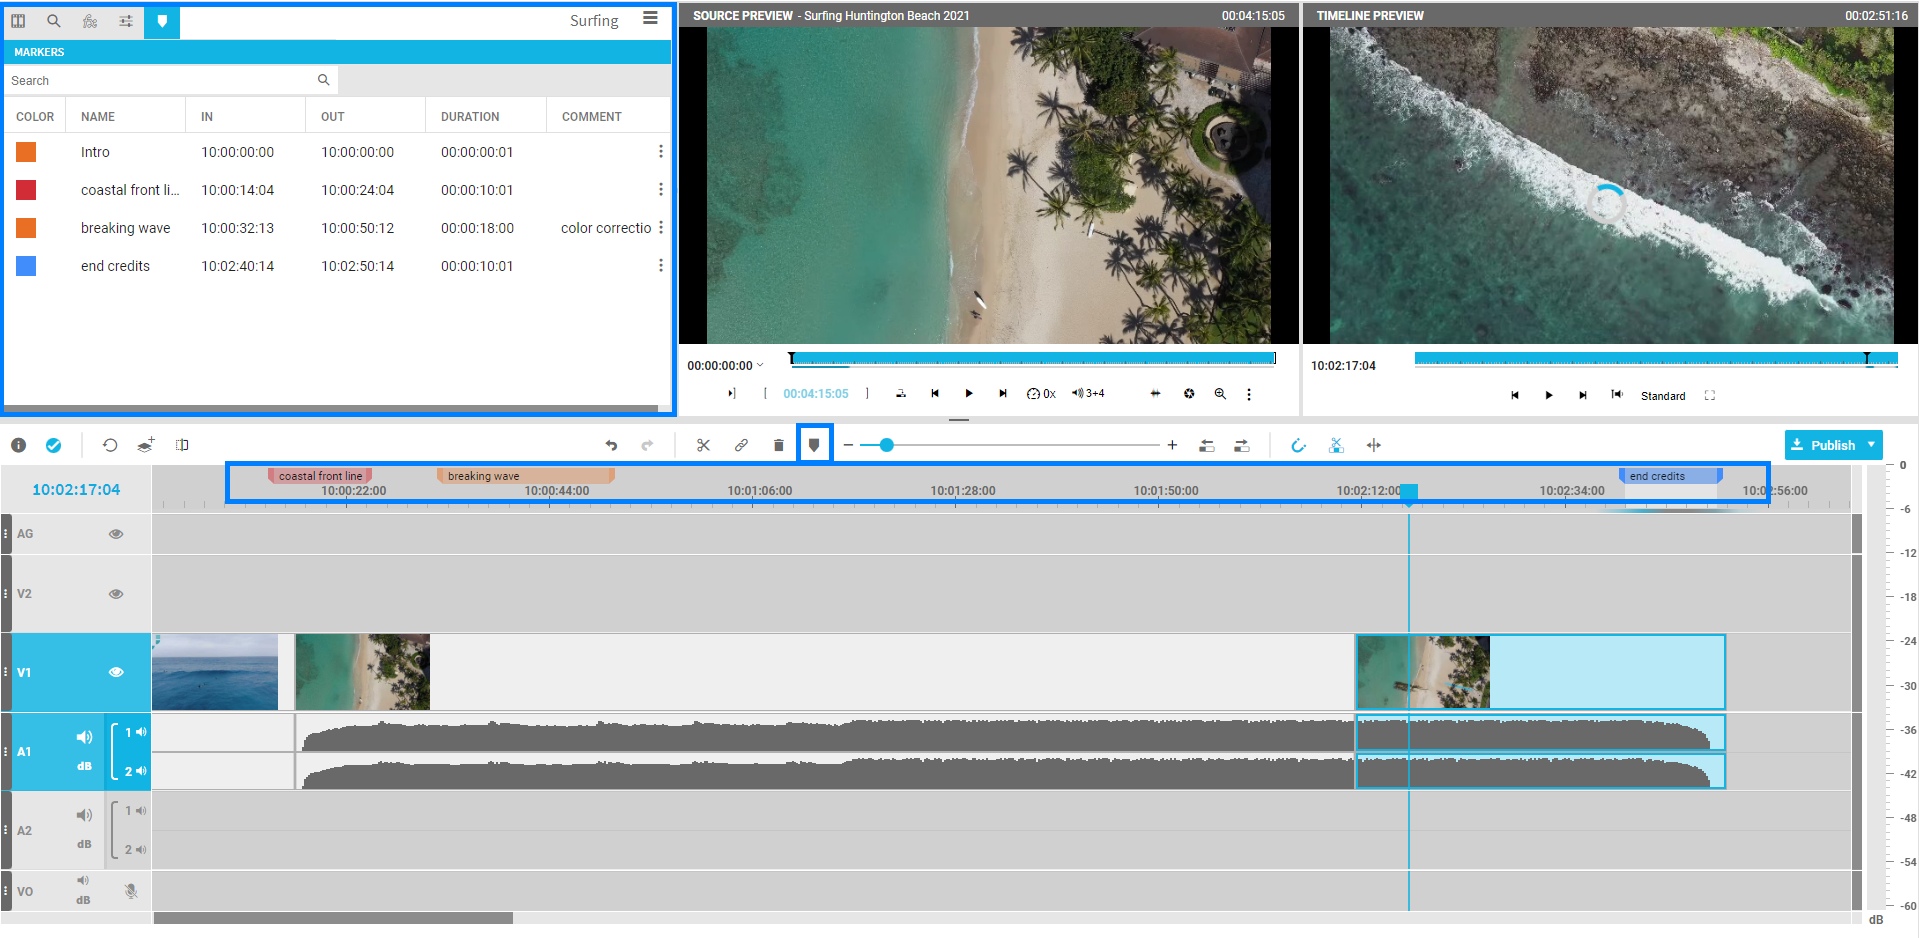
VidiEditor with Timeline Marker overview
Create and Edit Timeline Marker
Timeline markers are created using the marker symbol from the timeline menu or via shortcut “M”.

If you click the marker symbol, the marker will be set at the current playhead position indicated by a marker icon above the timecode values. Per default, VidiEditor creates a single point marker. This means the IN and OUT-point share the same timecode. Every marker has a default color and default type.
The configuration of the default color, default type and metadata fields, that are available for the user and shown in the marker panel, is done in Vidispine’s ConfigPortal. Typically, only users with special rights, such as administrators or supervisors, have access to ConfigPortal. For details to the configuration see Timeline Marker Configuration .
If you want to edit the properties of the marker you can do so by opening the Timeline Markers edit page with a double click on the respective marker symbol.
Edit Marker Dialog
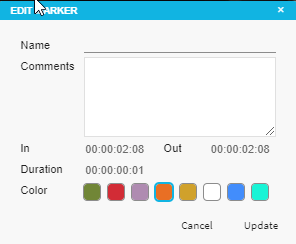
Edit Marker dialog without different marker options
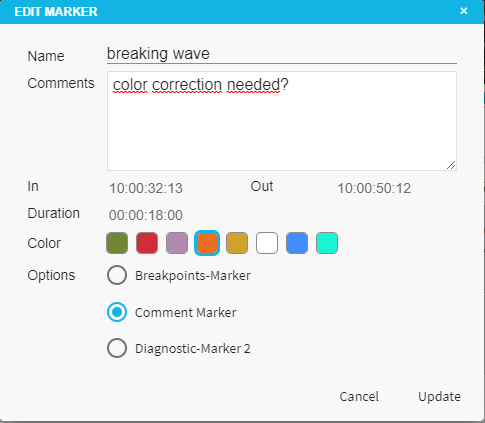
Edit Marker dialog: Example of a dialog showing all marker details
The above screenshots show examples of how the edit marker panel can look like. It depends on the overall system configuration as to which metadata fields, colors and options are shown. As a user, this dialog allows one to fill out the form and adjust IN/OUT values. If you want to mark an area on the timeline and not just a single point, you can manually change the timecode of the out or in the duration field. In order to commit the changes, select “Update” and the changes will be visible directly in the timeline.
For markers with a duration bigger than 1 frame, VidiEditor will show the marker name in the timeline.
See Timeline Markers Overview
You can open an overview dialog showing all markers in a table from the Media Management area by selecting the marker tab or by pressing the shortcut Shift + F5.
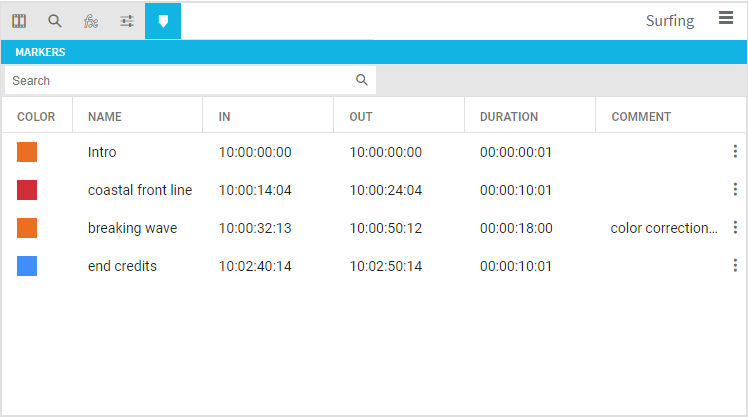
Tabular overview of all timeline markers
The dialog lists all markers according to their timeline position along with a color field, a name, and comment field as well. IN, OUT and duration timecodes are also displayed.
A single click on one field will activate the edit mode in order to change the values for the fields. You can tab through each field using TAB key. You will recognize editing mode by a line below the value and a text cursor.
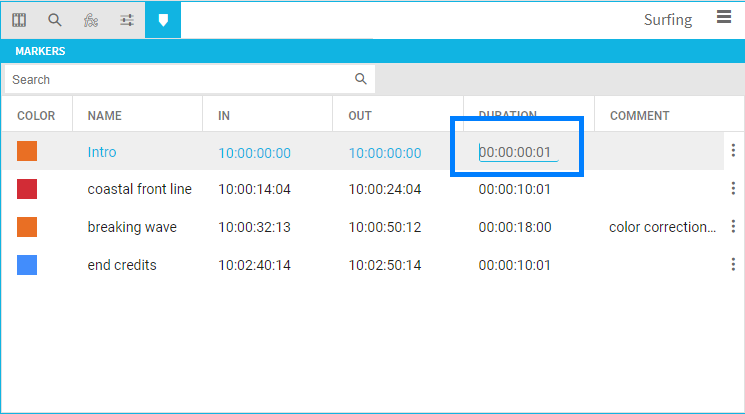
Selected marker and duration field in edit mode
If you want to edit more metadata fields than displayed in the table, you can open the Edit Marker dialog by double clicking on a field or by opening the menu and selecting “Edit Marker”. The menu is indicated by three dots on the right next to each marker line. From here you have the option to edit or delete the selected marker and publishing the timeline only for the marker area which is explained in the next chapter.
Publishing Areas of the Timeline Using Markers
It may be the case that you may want to publish only a part and not the complete timeline. To do so you can create timeline markers to mark the area you want to publish as described above. Either from the context menu of a marker in the timeline or via the menu of the marker overview tab, you can then select the option “Publish Selected Marker”. This choice will open VidiEditor's Publish dialog. In contrast to a standard publish of the whole timeline, the publish will only be done for the area marked by the IN and OUT point of the selected marker.
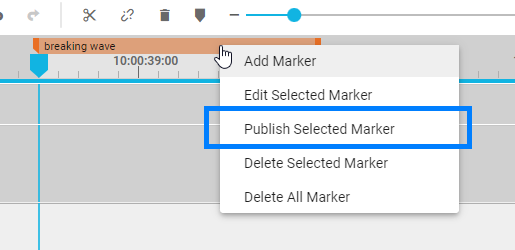
Context menu of a marker on the timeline
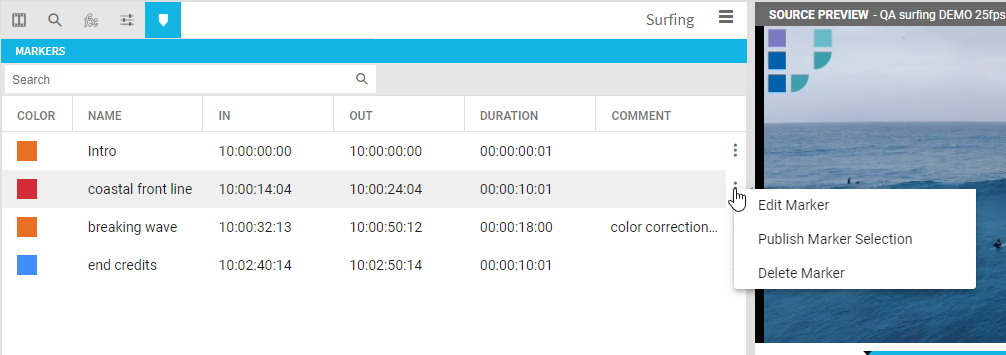
Marker overview tab with context menu to selected marker
Deletion of Markers
You can delete markers by using the context menu from the marker on the timeline or from the marker overview tab. The deletion will be done immediately.
