
Project Repository, Inventories and Environments
A project is stored as an independent repository which must be called project-<yourprojectname>. A project holds all the PREPARED configuration files for e.g. one customer or product test system.
Projects can contain one or more inventories which resemble different environments in the customers project for example like development, test, integration and production systems. A particular inventory is referred to as an environment or inventory. It is recommended to have basic information contained in the particular environment name such as cloud provider etc.
Projects and inventories/environments must be organized in this following structure:
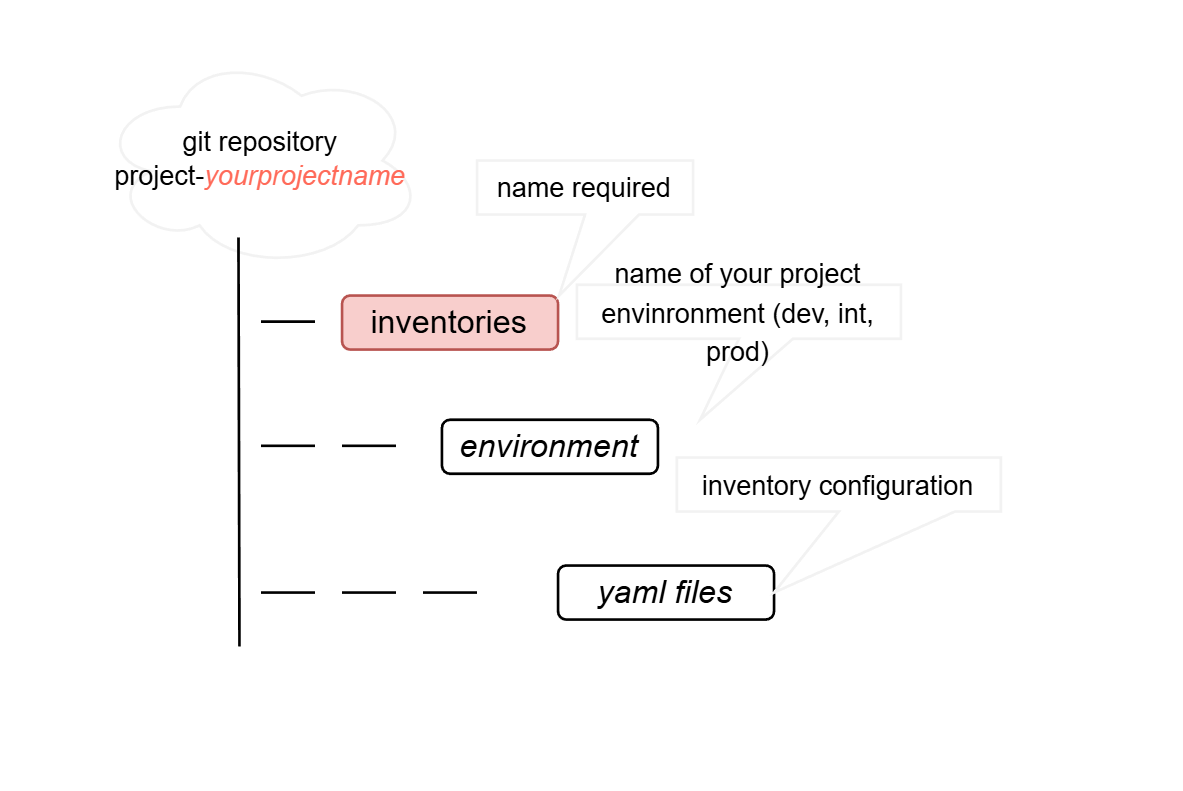
As an example, assume there exist three environments for a customer tvnetwork such as dev, trans and prod existing in an AWS environment. The repository name must be project-tvnetwork and the environments could exist under project-tvnetwork/inventories/tvnetwork-aws-dev and so on.
Inventory Directory layout
An inventory <inventory-name> must have the following structure:
<project-repository>   (1)
└── inventories
    └── <project-name> (2)
        ├── artifacts
        │   └── <instance> (3)
        ├       └── kubernetes (4)
        │         └── <instance>.config
        ├── data
        │   └── output.yaml (5)           -- for aws system
        ├── provider (6)                  -- for aws system
        │   └── templates
        │       └── server.yaml.j2
        │   └── provider.py
        ├── server.yaml
        ├── vault.yaml
        ├── 00_vpms3.global.v2.yaml
        ├── ...
|
Token |
Description |
|
|---|---|---|
|
1 |
<project-repository> |
This is the name of the git-repository where all inventories of this project are stored. Use |
|
2 |
<project-name> |
This is the name of the project which can be referenced in Prepared. |
|
3 |
<instance> |
The instance-name for this project. Mostly depends on the environment one installs the products. Defaults to |
|
4 |
|
After installation, this is the folder where the kubernetes cluster configuration file is stored. |
|
5 |
data / output.yaml |
This is the file which contains information about the AWS components like rds, opensearch, rabbitmq, activemq broker credentials and connection details. This is the same output file which is created by the terraform if you use our terraform script to build the infrastructure |
|
6 |
provider |
The scripts in this directory helps prepared to consume the data in output.yaml. |
SSL
The certificates required for the deployment can be managed also in the vault file(vault.yaml).
The required certificates are the private and public key for any communication via HTTPS (443)
global:
  system:
    ssl:
      tls_crt: |-
        -----BEGIN CERTIFICATE-----


        ***this should contain the content of your public key***


        -----END CERTIFICATE-----
      tls_key: |-
        -----BEGIN PRIVATE KEY-----


        ***this should contain the content of your private key***


        -----END PRIVATE KEY-----
The public key must be signed by a Certificate Authority (CA), and depending on the depth of the CA chain, all required certificates must be included in the same file
global:
  system:
    ssl:
      ...
      custom_ca_certs:
        custom_ca.crt: |-
          -----BEGIN CERTIFICATE-----


           *** custom_ca ***


          -----END CERTIFICATE-----
        certname.crt: |-
          -----BEGIN CERTIFICATE-----


           *** certname ***


          -----END CERTIFICATE-----
VidispineLicense
VidispineLicense file is part of the vault file (vault.yaml)
vidicore:
  base:
    default:
      ...
      licenses:
        slaveAuth.lic: |-
          SlaveIdentifier=yourLicense
          MasterIP=https://eu.license.vidispine.com:443/,https://uswest.license.vidispine.com:443/
Contact Vidispine sales in order to get a unique license for your environment(s)
GitRepository for inventory
-
Destination of Inventory
-
The primary destination for inventory is GitHub, where version control and lifecycle management take place.
-
Inventory Structure & Lifecycle Management
-
The Master branch is maintained in Vidispine.
-
Feature development and bug fixes occur in separate branches before integration.
-
Review and Update Process
-
Pull Requests (PRs) are created for proposed changes.
-
A structured review process ensures code quality and stability.
-
The Master branch remains in Vidispine, serving as the authoritative version.
-
Updating to a New Version
-
Any update to the inventory requires a formal announcement.
-
Updates include:
-
Bugfixes (Critical / High / Urgent)
-
Ad-hoc fixes in the cluster are always possible.
-
Bugfix testing in an integration system (if available) before being persisted in the configuration.
-
Client-Driven Changes
-
No direct changes by the client are allowed.
Continue to: Layered Inventory Files [DEV Prep]