Introducing VidiWave
Welcome to the VidiWave User Guide. VidiWave is a web-based audio editor specifically designed for journalistic and semi-professional workflows. As a cloud-based solution for proxy editing, VidiWave provides journalists and editors with tools they need to meet the challenges of today’s remote editing environment.
Accessible from Google Chrome, VidiWave offers a powerful set of features that focus on agile remote workflows without having to compromise on functionality.The system enables precise editing of a theoretically unlimited number of audio tracks and integrates automatable real-time effects and industry-standard analysis tools directly within the browser. VidiWave is seamlessly integrated with the Vidispine (Vidicore) media asset management system to ensure efficient exchange of media assets within the customer's existing infrastructure.
Accessing VidiWave
Getting Started with VidiWave
Users who have been granted access for VidiWave usage in VidiCore can login. Just enter the customer's individual html address in the web browser. Login with your personal user account and password and start your project.
VidiWave Areas
-
Project Bin Area
-
Source Preview Area
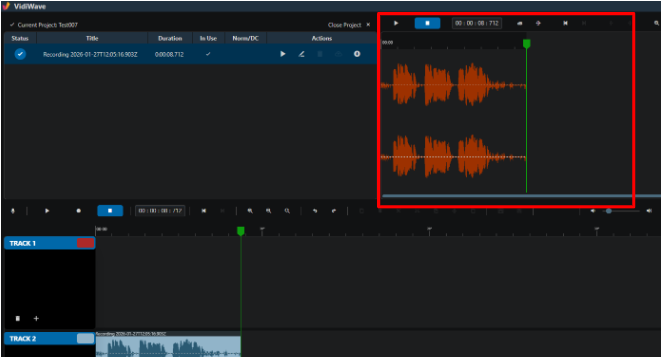
-
The Video Preview Area
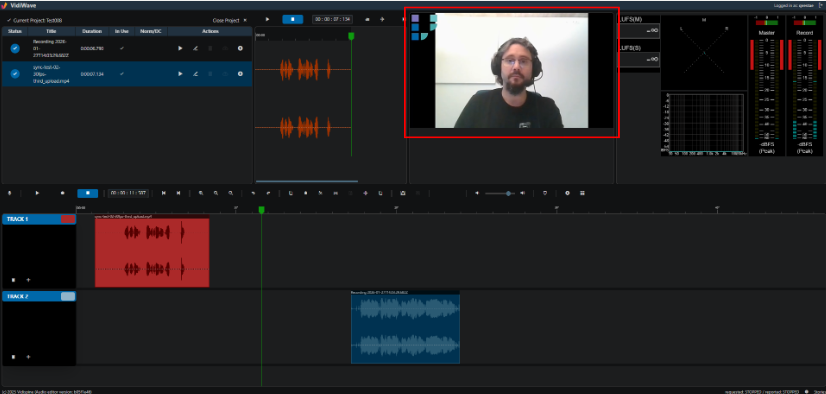
-
The Timeline Area
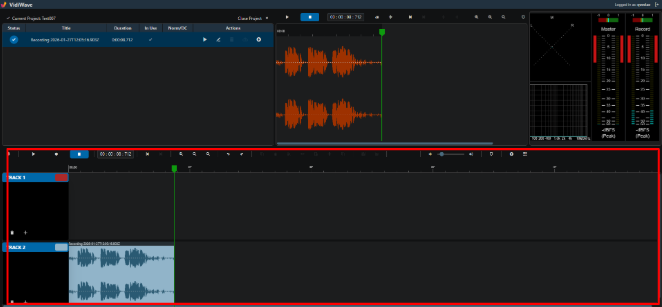
VidiWave Layout
The VidiWave user interface is completely web based and does not require any installations on the client computer. The design focuses on desktop usage directly in Google Chrome web browser.
Colour Themes
VidiWave comes with 3 colour themes that can be simply chosen when pressing the icon in the lower right corner. On default the theme will be chosen based on the setting of the operational system on the client. This can be overruled when the user selects a different theme explicitly.
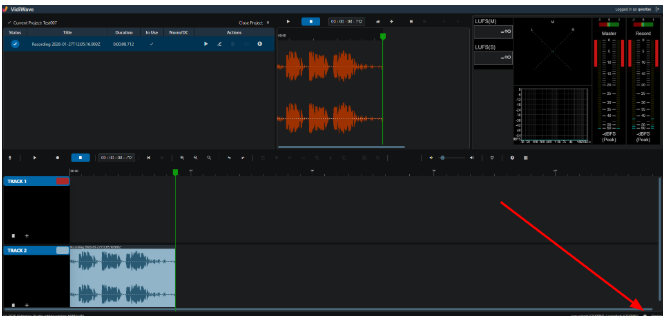
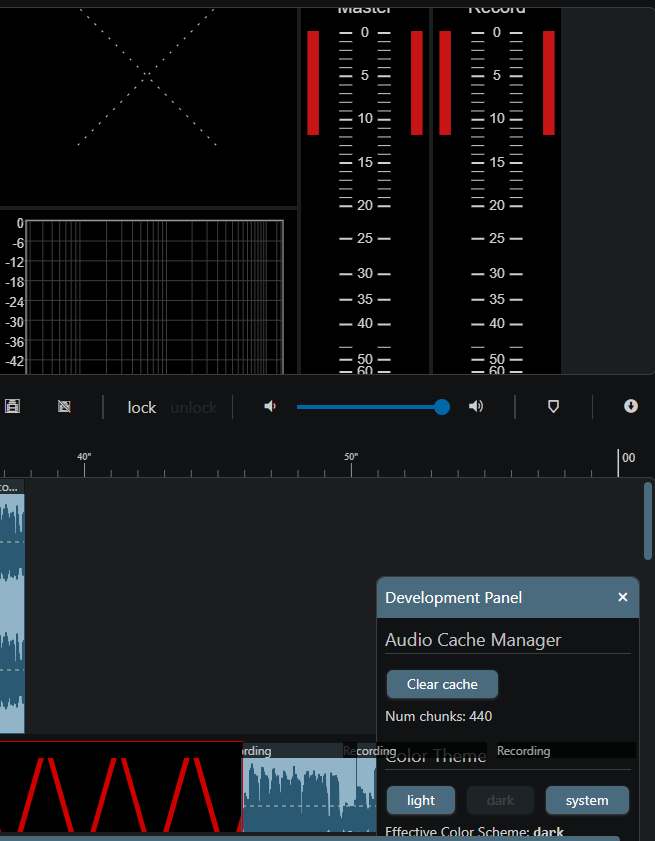
Following options exist:
System Default
If selected the VidiWave switches between light and dark theme based on the setting of the operational system on the client PC used.
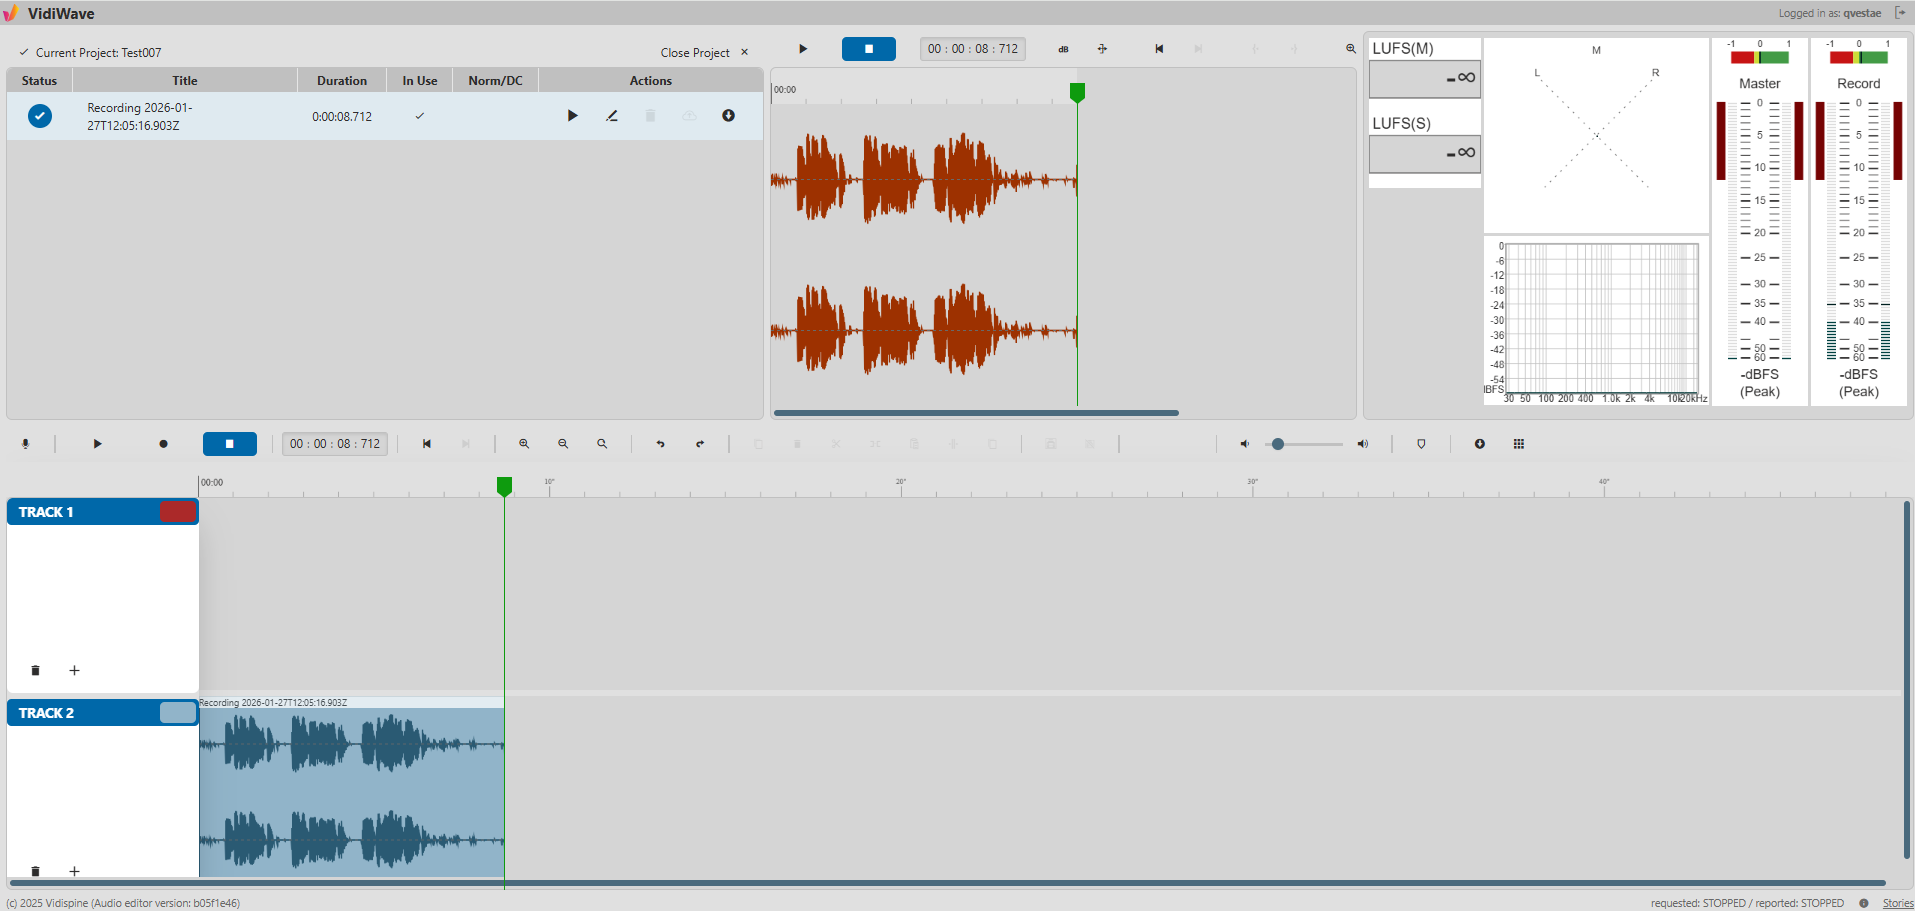
Light
A very light theme usable while working in brighter areas the GUI looks as follows.
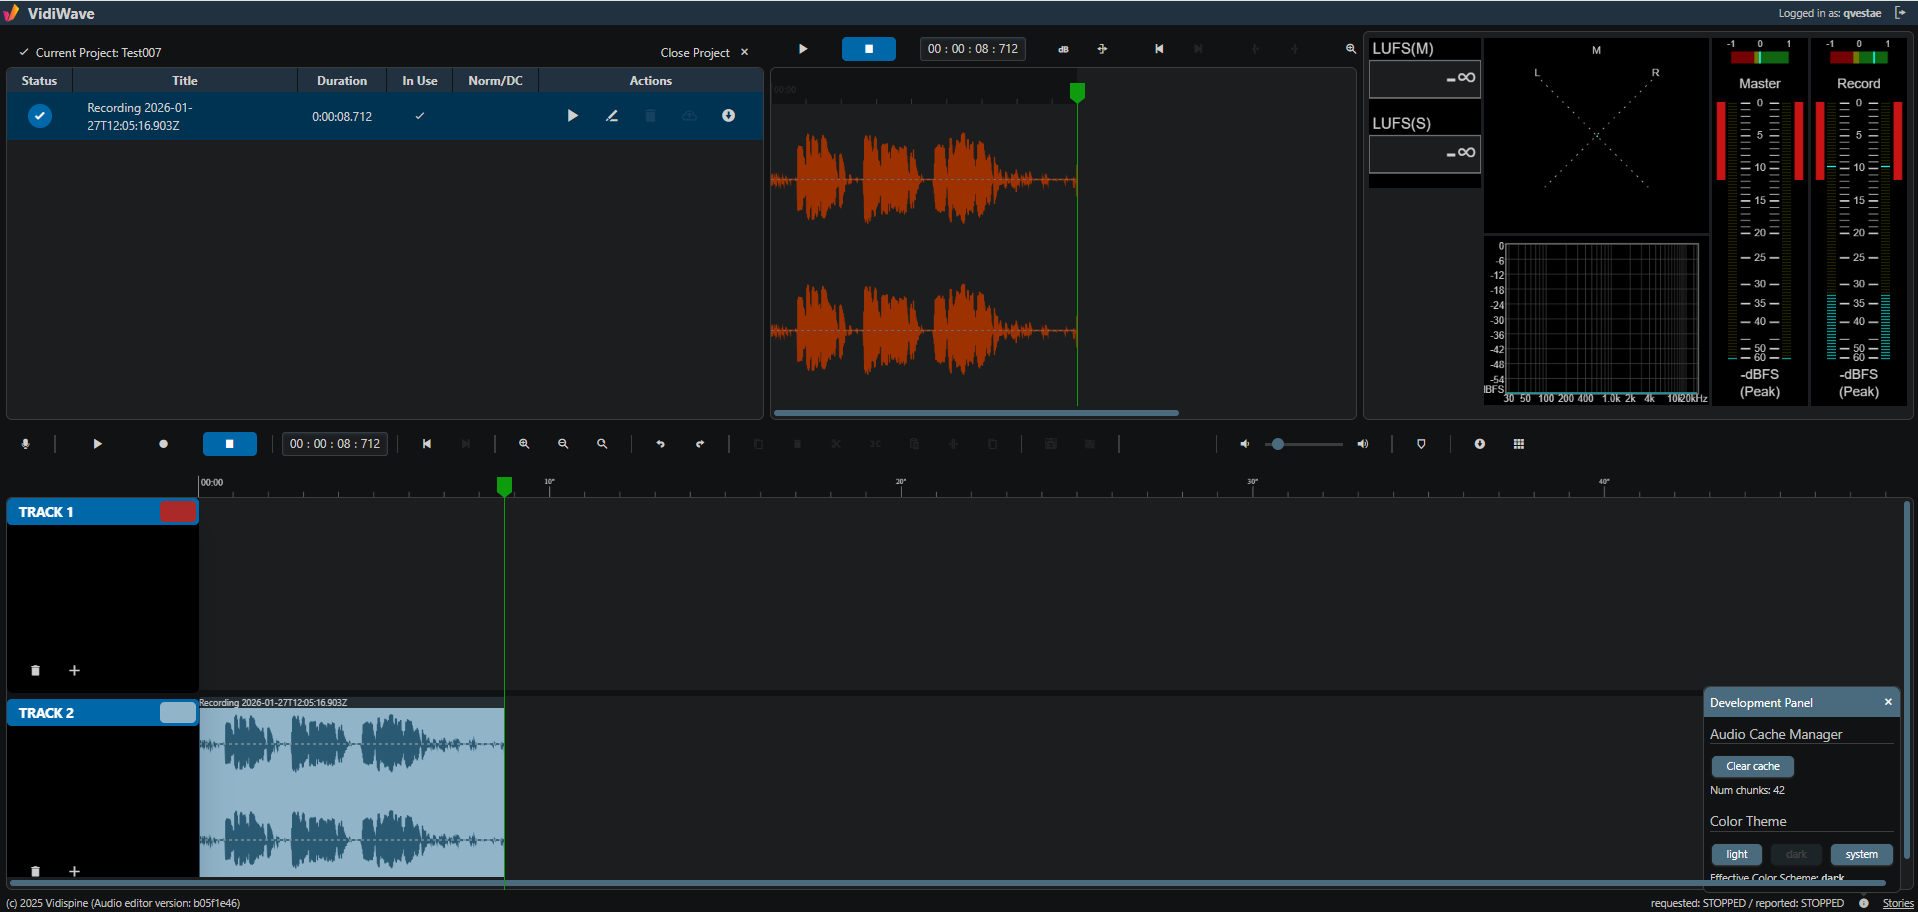
Dark
A very dark theme usable while working in darker areas the GUI looks as follows.
Dynamic Sizing Via Splitter Elements
Splitters in the GUI are small elements between the real working parts of VidiWave that allow the user to simply drag and drop to resize the different elements on a screen. There are different drag and drop splitters available allowing to drag areas adjusting its size:
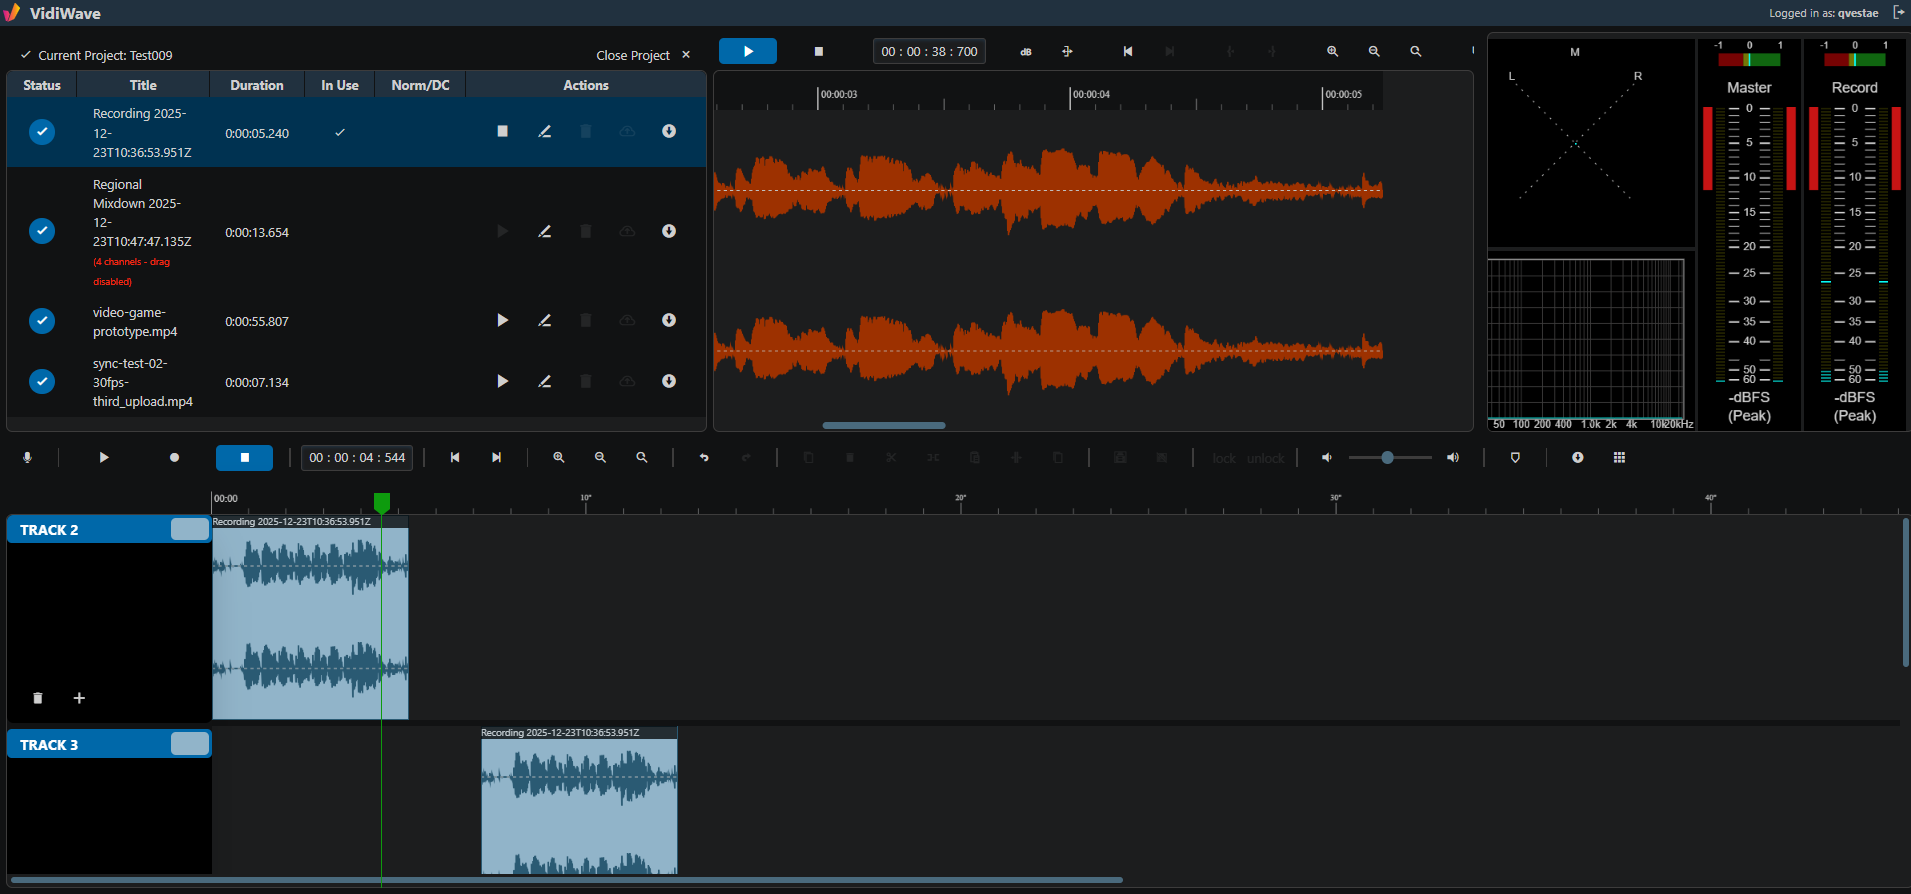

Simply drag the splitter to adjust the parts of VidiWave as needed.
Keyboard Shortcuts
VidiWave offers users a variety of keyboard shortcuts designed to increase the efficiency and reduce the effort of an editor's workflow.
VidiWave consists of 3 main focus areas. Those are namely:
-
Project Bin
-
Source Preview Player
-
Timeline
Depending on the focus chosen by the user different keyboard shortcuts are available that will be explained in following sections.
Apart from the aforementioned three main areas, there are also some global keyboard shortcuts which can always be used in the application regardless of which focus area is currently selected at the time as well as shortcuts in form dialogs where the user fills out metadata dialogs or other form fields.
To select a main focus area simply do a mouse left click on the main focus area.
Project Bin Shortcuts
|
Key |
Interaction |
|
Ctrl+C |
Close Project |
|
Space |
Play / Stop |
|
E |
Rename file |
|
D |
Delete |
|
Ctrl+I |
Upload to Vidicore |
|
Ctrl+D |
Download |
Timeline Shortcuts
|
Key |
Interaction |
|
Ctrl+A |
Select Audio Source |
|
Space |
Play / Stop |
|
Ctrl+R |
Record |
|
Shift+T |
Focus |
|
Ctrl+C |
Copy Selected Clips |
|
Ctrl+V |
Paste Clips from Clipboard |
|
Ctrl+X |
Cut Selected Clips |
|
Ctrl+Shift+X |
Cut and Ripple Delete |
|
Delete |
Delete Selected Clips |
|
Ctrl+D |
Duplicate Selected Clips |
|
Ctrl+Shift+S |
Split Selected Clips |
|
Ctrl+G |
Group Selected Clips |
|
Ctrl+Shift+G |
Ungroup Selected Clips |
|
Ctrl+L |
Lock Selected Clips |
|
Ctrl+Shift+L |
Unlock Selected Clips |
|
Ctrl+Right Arrow |
Seek to Next Marker |
|
Ctrl+Left Arrow |
Seek to Previous Marker |
|
Ctrl+ |
Zoom In |
|
Ctrl- |
Zoom Out |
|
Ctrl+Shift+F |
Zoom to Fit |
|
M |
Insert Marker |
|
R |
Open Regional Mixdown Dialog |
|
S |
Open Stereo Mixdown Dialog |
|
Ctrl+Z |
Undo |
|
Ctrl+Shift+Z |
Redo |
Source Preview Player Shortcuts
While using the Source Preview Player, it is the user’s goal to quickly and easily find the relevant content and add it to the editing timeline as needed. The following keyboard shortcuts are available:
|
Key |
Interaction |
|
Space |
Play / Stop |
|
Shift+T |
Focus Timecode Field |
|
Ctrl+Shift+N |
Open Normalize Audio Menu |
|
Ctrl+Shift+T |
Open Time Stretching Menu |
|
T |
Move Range to Timeline: |
|
Ctrl+Right Arrow |
Seek to Next Marker |
|
Ctrl+Left Arrow |
Seek to Previous Marker |
|
Ctrl+ |
Zoom In |
|
Ctrl- |
Zoom Out |
|
Ctrl+Shift+F |
Zoom to Fit |
|
M |
Insert Marker |
|
Ctrl+Shift+Left Arrow |
Seek to IN |
|
Ctrl+Shift+Right Arrow |
Seek to OUT |
|
I |
Set IN |
|
O |
Set OUT |
Timeline Area
The Timeline area is where users will be actively editing the project's sequence. The timeline area is divided into different sections. It is important that users become familiar with the layout, as well as the logic behind its behavior.
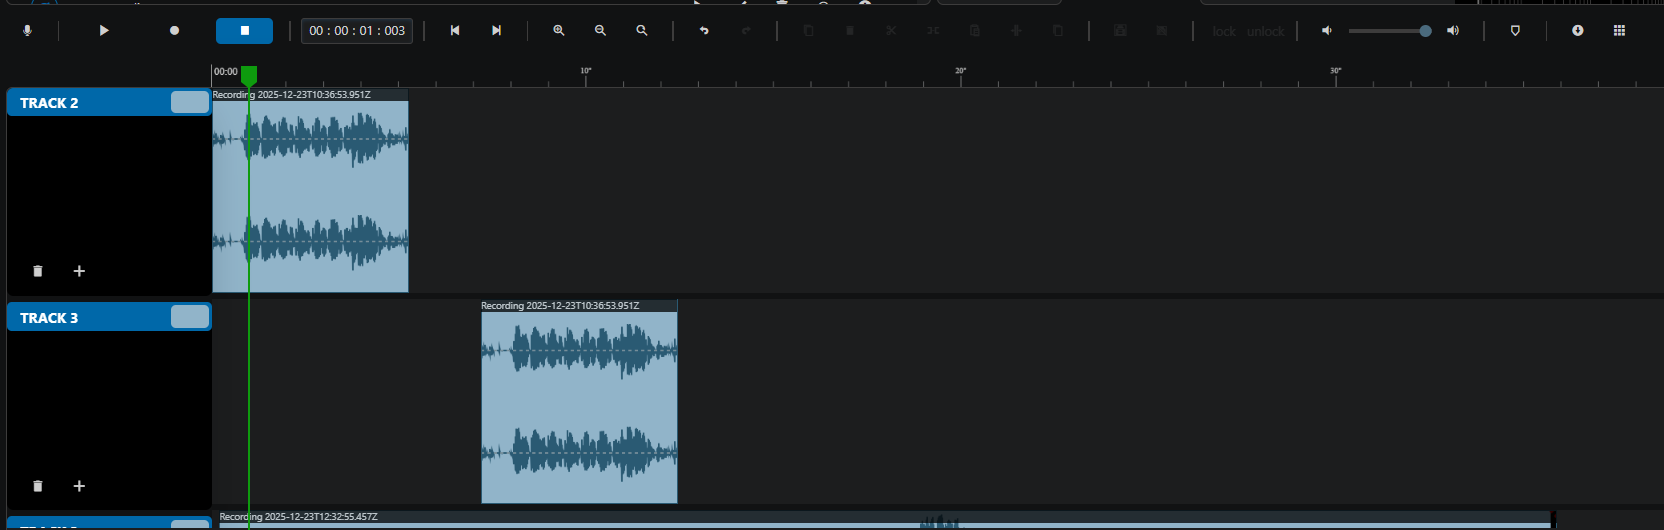
The Timeline Tools include editing options that affect the behavior of the timeline.
Supported Media Types
The VidiWave timeline supports different types of media segments. In most cases it acts as proxy editor using a proxy copy of the media for preview while high quality media is used for publishing and generating a new media file out of the timeline. It depends mainly on the system setting and its architecture what elements are usable in what way. The audio editor supports the formats RIFF-WAV (8-24 bit, up to 96 kHz) and Advanced Audio Coding (AAC), which are read via the Browser API (Web Audio API).
Add Media into the Timeline
Creating or editing sequences in the timeline require that one add material. This can be done by either adding entire media to the timeline, or selecting a partial of that media and add it to the timeline. Editors have different options to add media into the timeline.
Drag and drop from project bin
The user can grab a media item and place it on a desired track to add the complete item on that track. The timeline player will only play audio signals. If this media was not used on the timeline already, the in use indicator will update to in use.
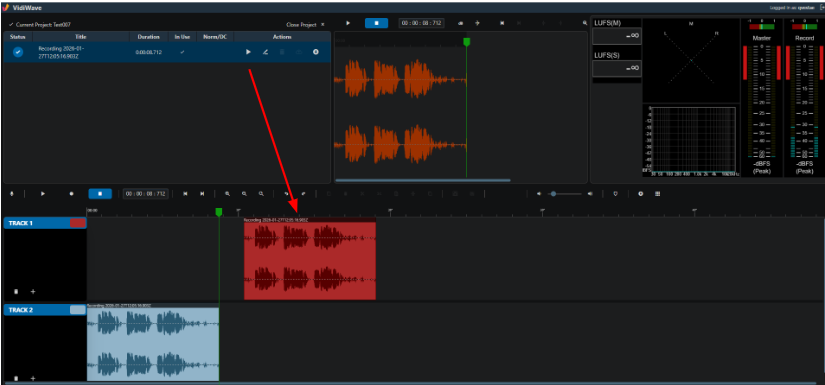
Via source preview player using drag and drop
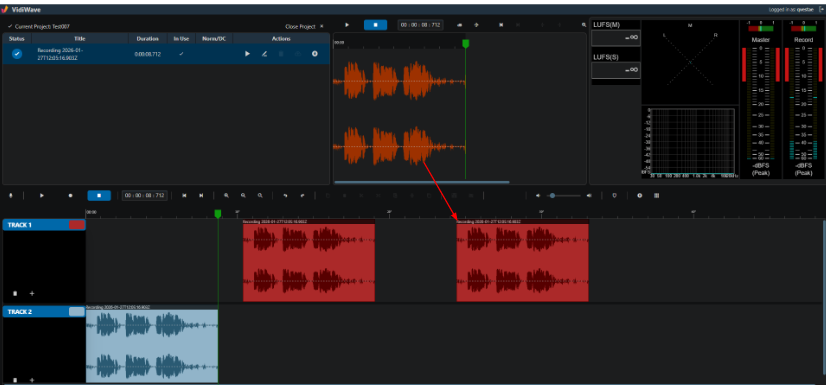
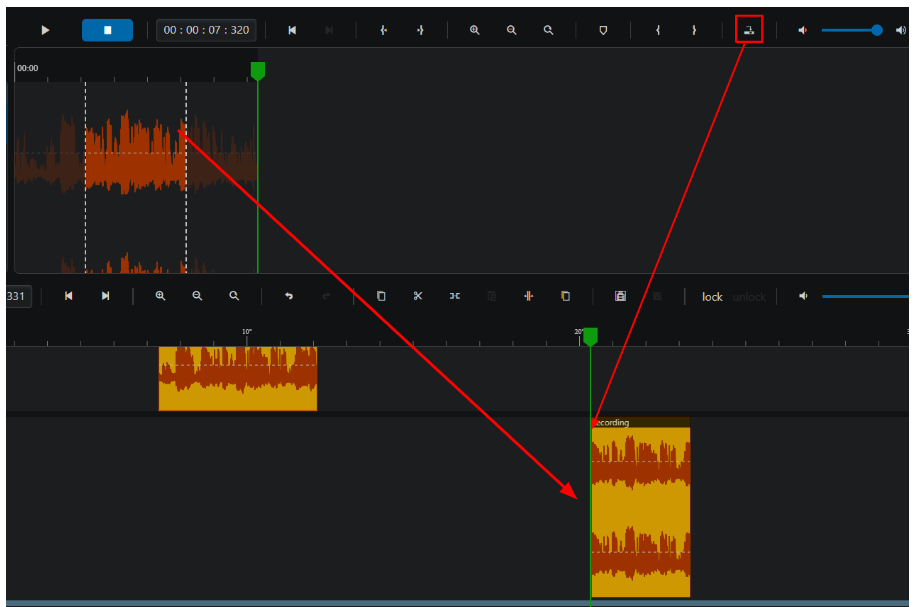
In addition, it is also possible to move the displayed media of the source player and drag it into timeline on the needed track.
Toolbar Options
When working on the timeline area, users will notice the timeline toolbar. It contains a series of options and functions to facilitate the editing process when assembling a sequence. All options will be explained below.
Add / Delete Tracks
By default, VidiWave projects are created with 1 Track.
More Tracks can be added by
-
recording audio sources
-
dragging and dropping material from the project bin to the area below the last track
-
dragging and dropping material from the Source Preview Player to the area below the last track
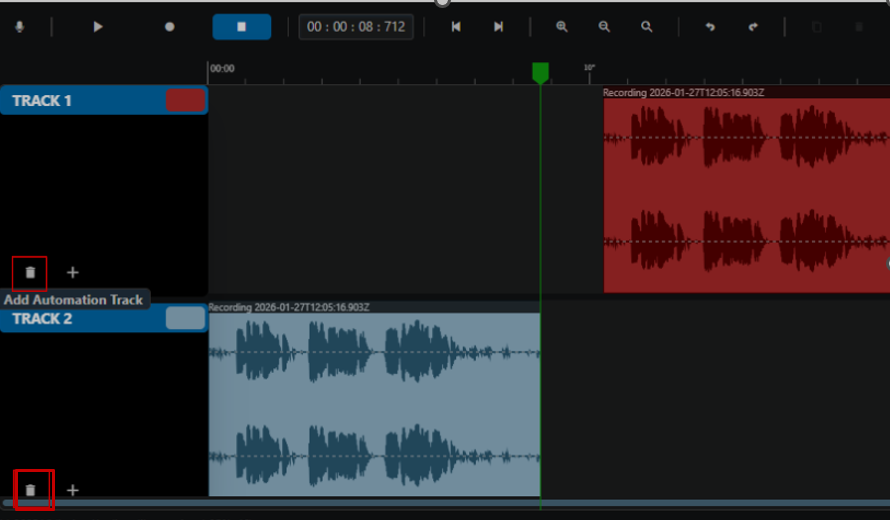
Tracks can be deleted by clicking on the trash icon.
Undo / Redo History
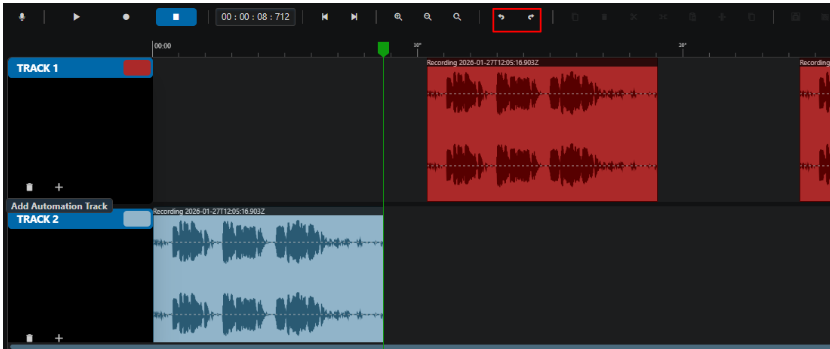
A user has the possibility to undo / redo interactions that modified the content of the timeline. This is very helpful as a lot of user interactions can easily sum up in a very short period of time creating a timeline composition. The undo / redo possibility helps to try out things on the timeline and easily reveal back to a before state.
Two options exist to execute undo / redo steps. At first the user can do keyboard shortcuts Ctrl + Z and Ctrl + Shift + Z to go 1 step for or back. Also it is possible to click on the Undo icon in the timeline toolbar.
Please note that the number of available undo steps depends on the size of the projects being edited and the available RAM. For very memory-intensive projects, the maximum number of undo steps may be limited to ensure system stability.
Select Clip
Clips can be selected to then do further things with them (copy, cut, delete, move). When clips have been selected they are visually highlighted. To select more than one clip just select the items by pressing Shift + select.
Trim Clip
When editing your sequence in the timeline, users can shorten or extend clips while dragging the IN or OUT point using the mouse. This operation is called a trim. When hovering on a cut (IN/OUT point), users will see a bracket indicating which segment will be adjusted (IN or OUT point).
If one drags the segment with the bracket, it will be shortened or extended depending on the direction of the mouse movement. After releasing the drag, the segment will be updated to the new duration.
Split clip
Before performing a split, users must first set the position playhead in the timeline to the desired frame in which the split will be made. In order to bring the playhead to the desired position, users can drag the playhead to the approximate position in the timeline.
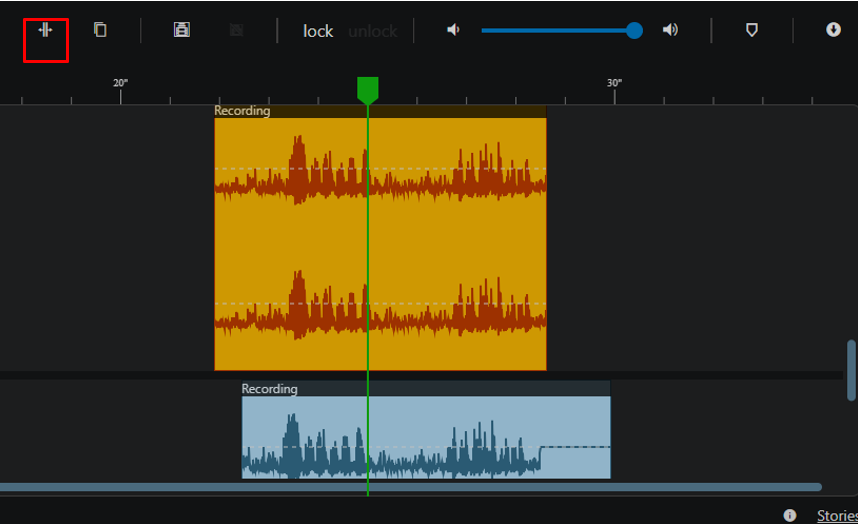
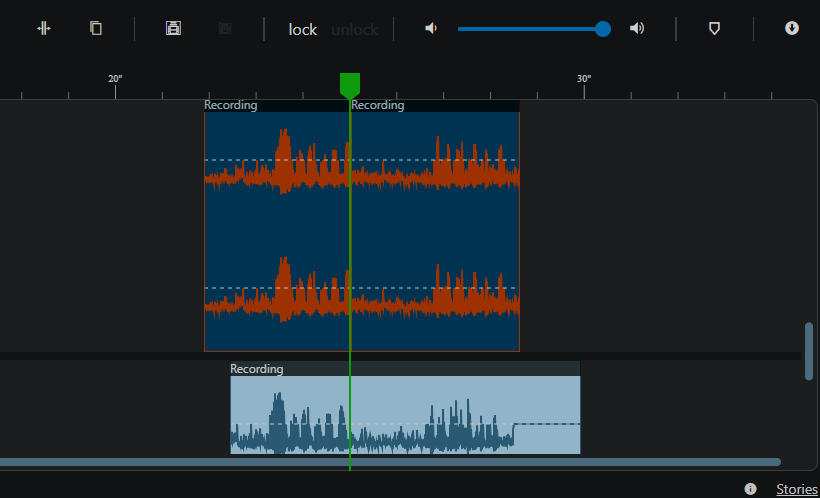
Once the desired position has been reached, select the "Split Clip" option on the timeline toolbar and the clip will be split.
Multi-Select and Group Clips
If you want to move segments together on the timeline, you can select these segments and group them. To select more than one segment just select the items by pressing Shift + select.
You also have the option to group the selected segments. This can be done by selecting the “Group” option from the toolbar after you have selected all segments that you want to group.
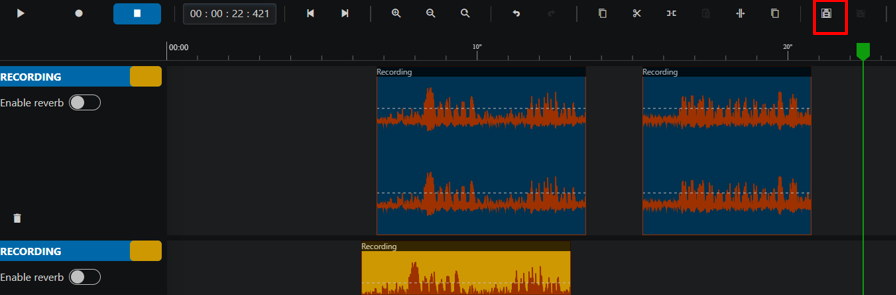
Conversely, you can choose to ungroup these segments again by selecting the “Ungroup” option.
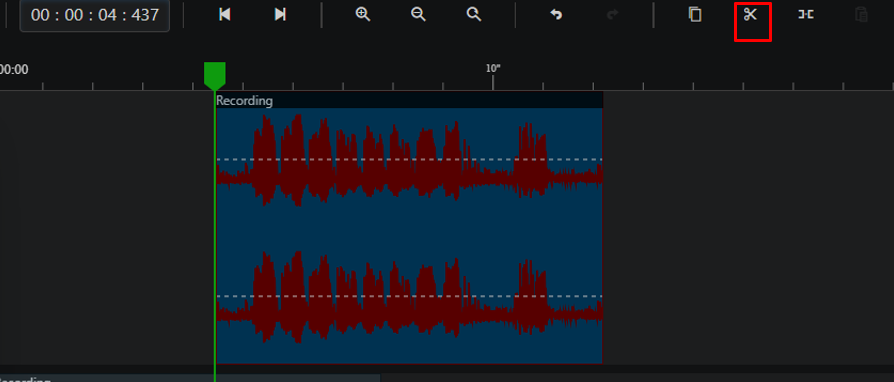
Cut Tool
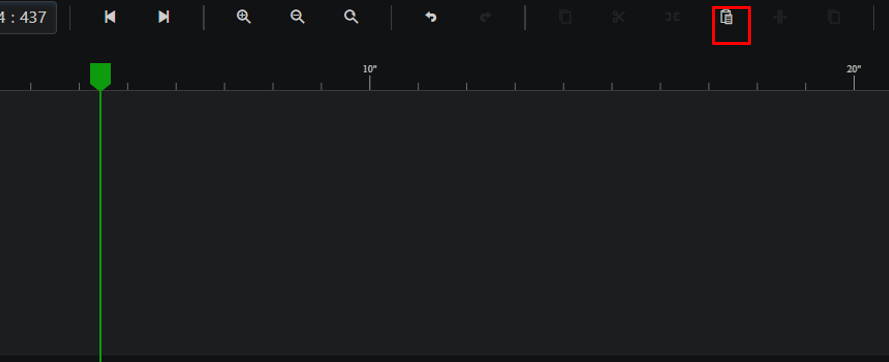
Clips can be cut (cut with or without moving back) and then inserted again.
The insertion occurs at the position of the playhead..
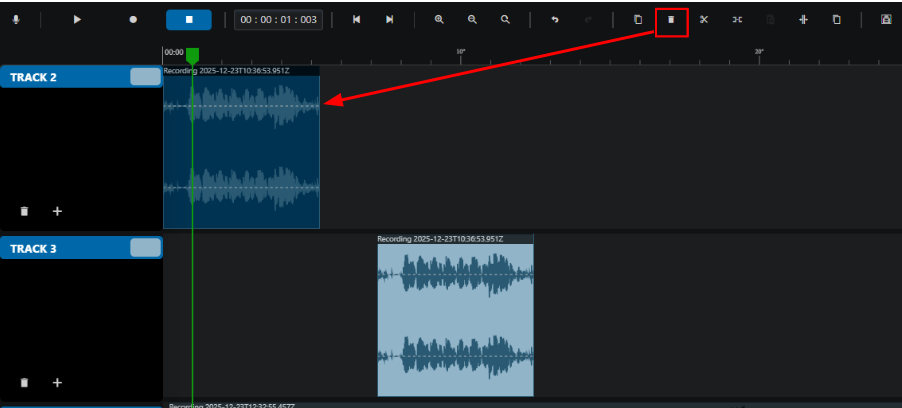
Delete Clip
When clips have been selected they can be deleted by clicking the trash icon.
Lock & unlock clips and groups
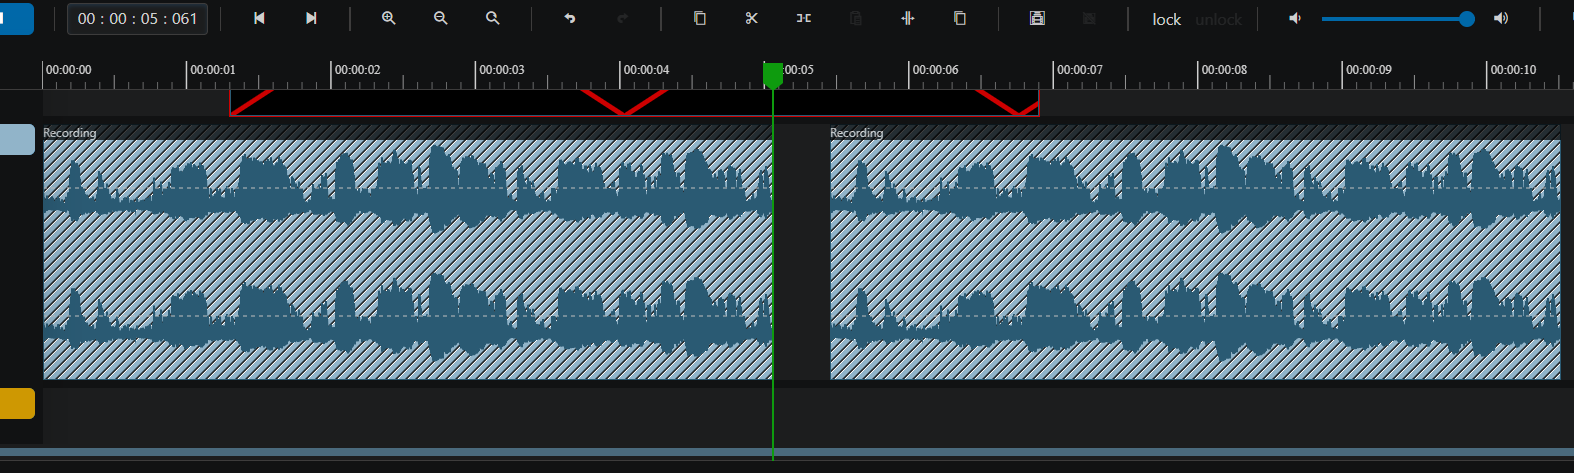
When clips or groups have been selected they can be locked by pressing “lock” to prevent them from further editing or deleting.
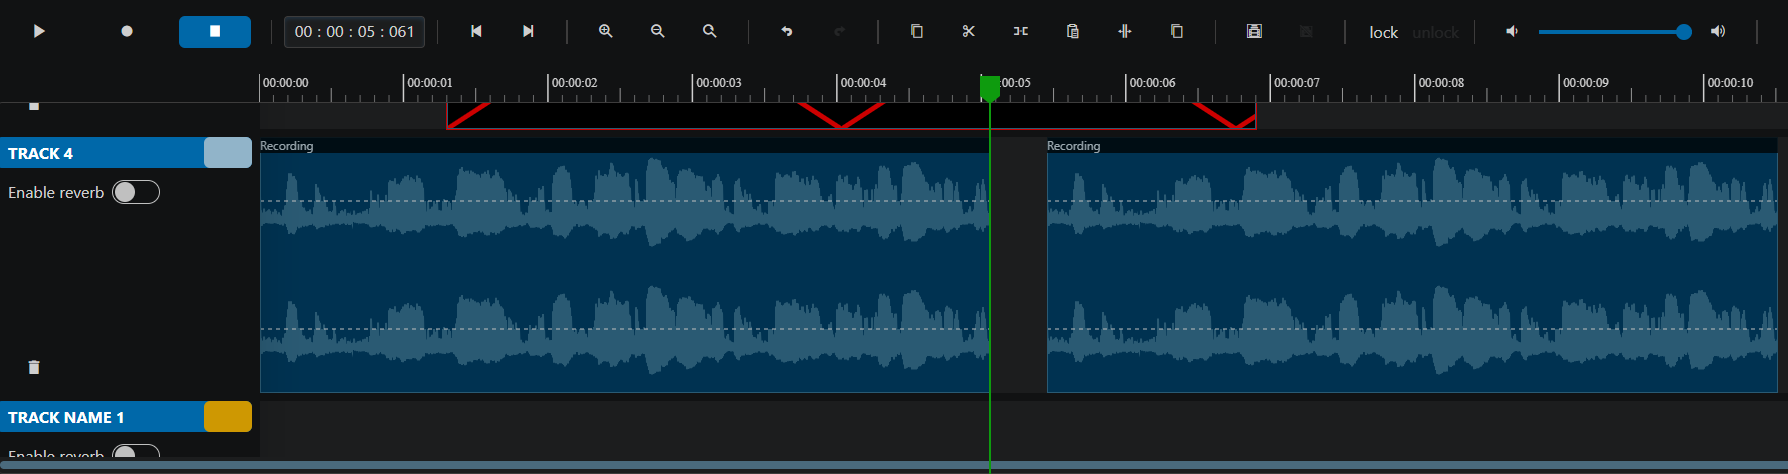
Locked clips or groups are presented visually differently:
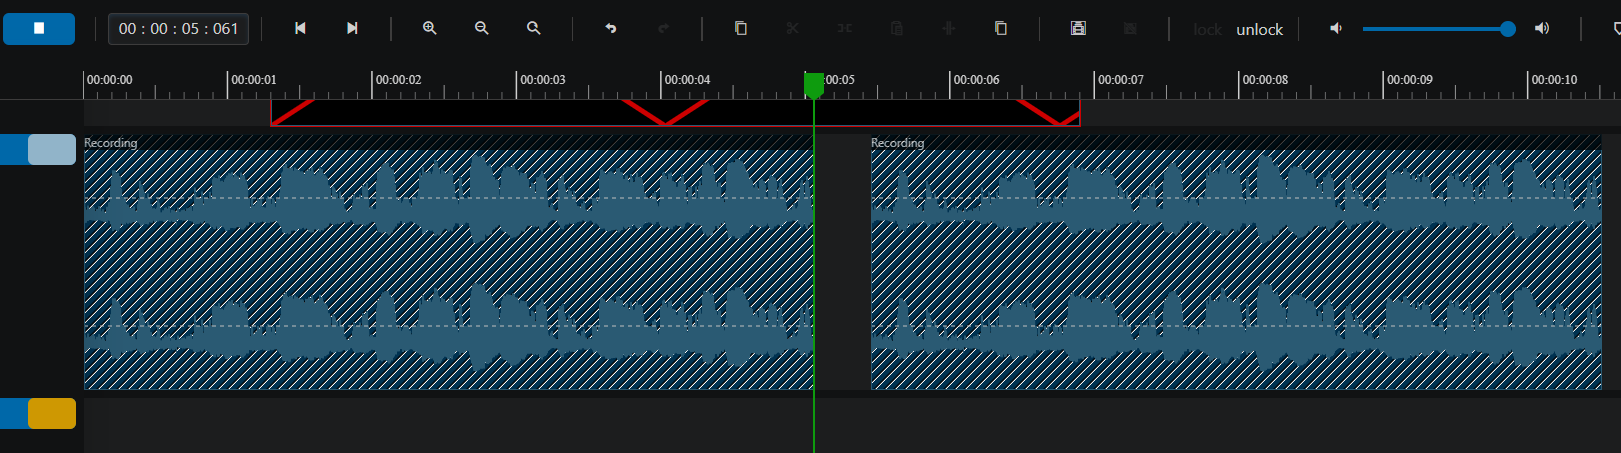
When locked clips or groups are selected they can be unlocked again by pressing “unlock”.
Marker
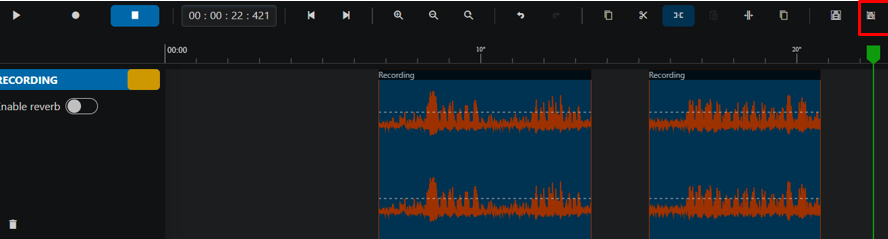
There's a “marker” button in the timeline toolbar. When the button is clicked a marker is inserted at the current position of the playhead above the timeline ruler. The marker has a unique ID and a timestamp.
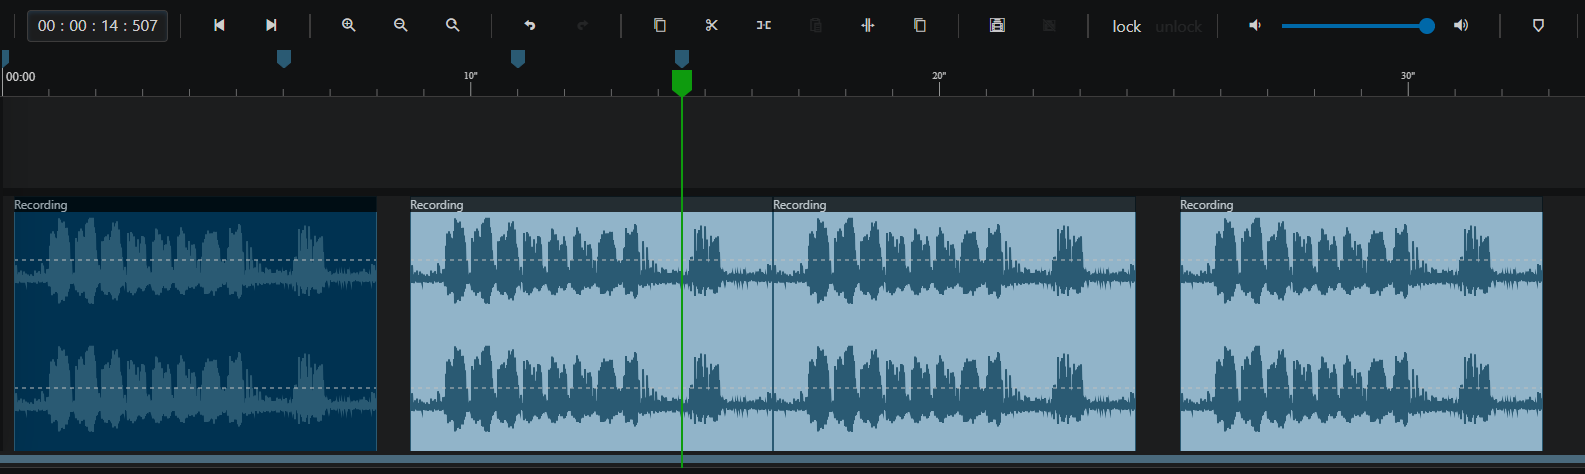

An existing marker can be moved on the timeline via drag & drop.
Right-clicking on a marker opens a context menu. The context menu contains the "Delete Marker" option. Clicking "Delete Marker" removes the marker.
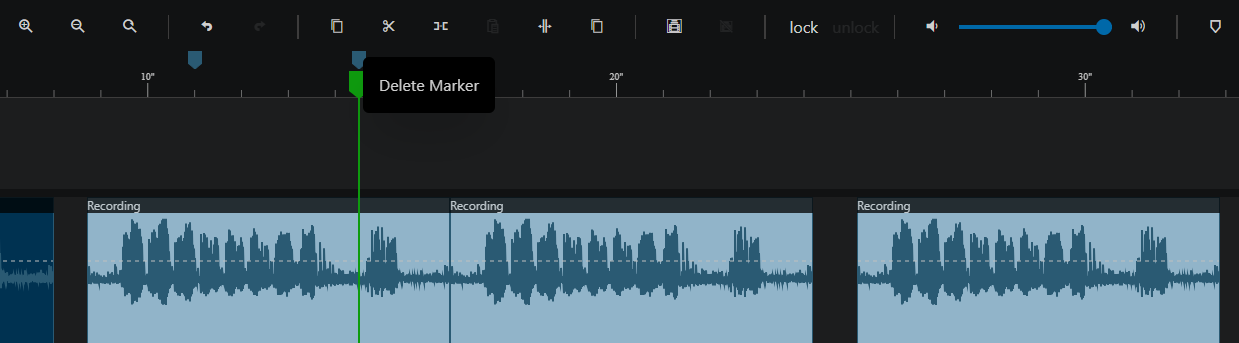
This option allows to create timeline markers suitable for various scenarios such as annotating the timeline doing partial publishes or to generate timecode based metadata.
Zoom Timeline
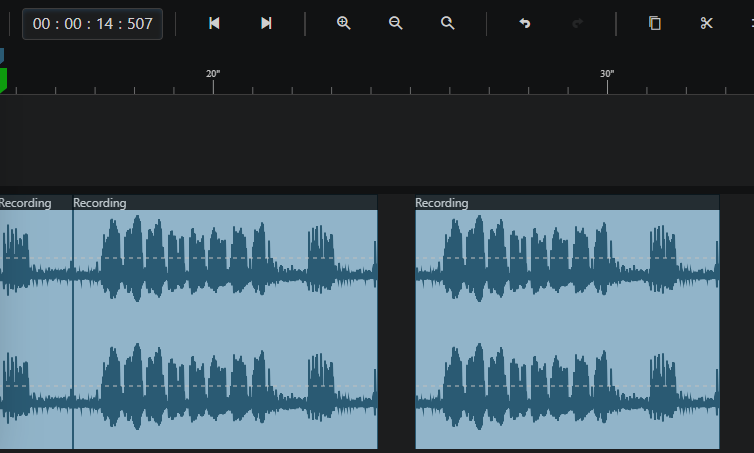
There are 2 options how user can zoom in and out of the timeline:
-
by clicking on the + or - magnifying glas
-
by using the mouse wheel while holding the ctrl. modifier
As a result, the visually represented space between time intervals is either increased or decreased with the zoom.
Create Mixdown
To finalize a project the user has the option to create a mixdown which corresponds to the playback of the entire timeline.
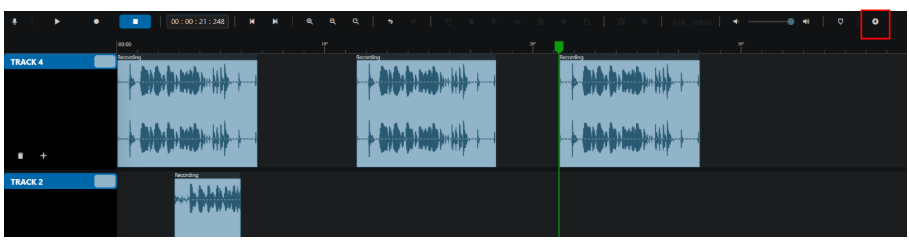
When the user clicks on the Download icon on the right side of the timeline toolbar a mixdown will be created and displayed in the project bin.
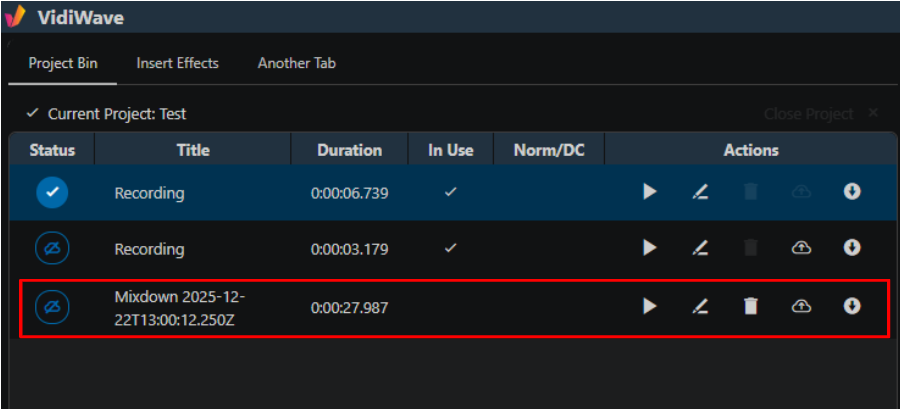
In the Project Bin area the mixdown can be published and / or downloaded (see 3.4. Publish (Upload) and 3.5. Export (Download).
Create Regional Mixdown (RF64)
The existing export function offers the option to export multi-channel audio in RF64 format. The assignment of tracks to export channels is freely selectable.
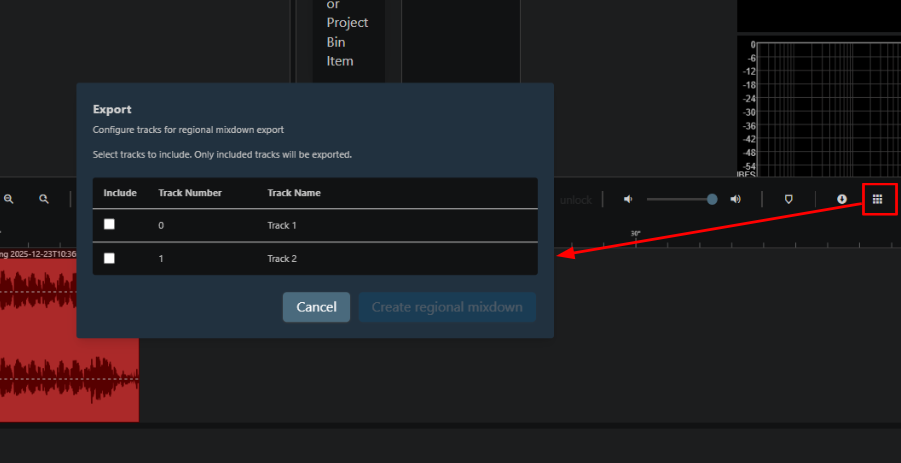
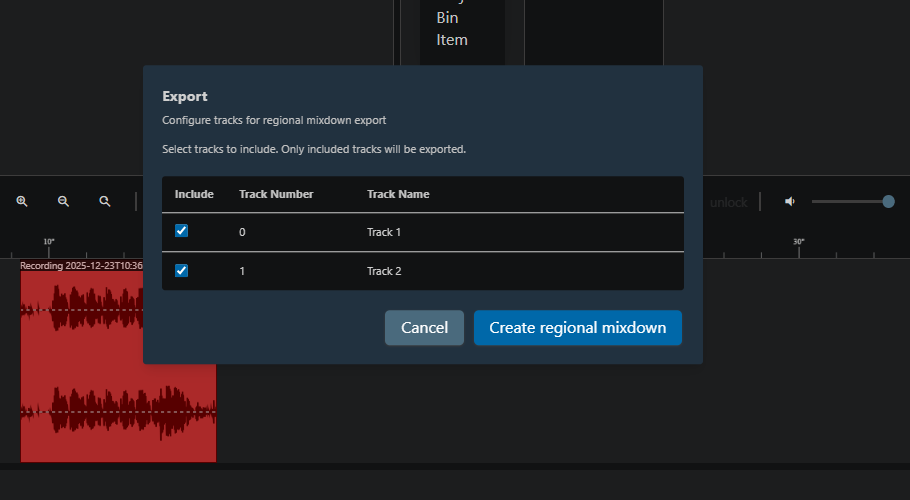
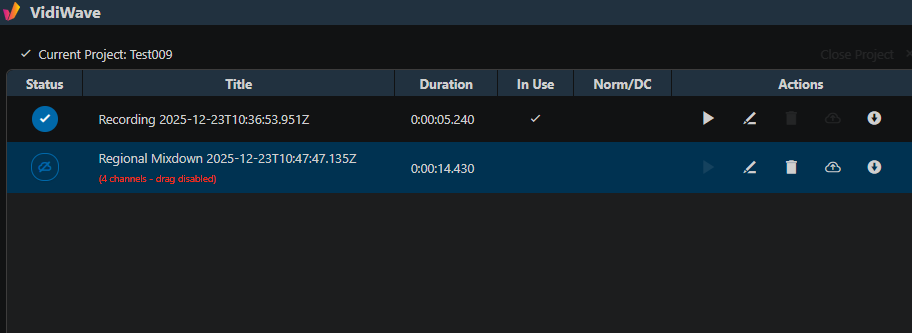
Preview and Timeline are not available for Multichannel items, they are only supported for Stereo items. That’s why dragging is disabled as well as the Play Button for the Source Preview Player.
Move Clip
VidiWave’s timeline supports an easy way to arrange clips on different tracks. A user can drag an item and move it onto a position in the timeline.
Timeline Saving
VidiWave projects are centrally stored in the VidiCore media repository and do not persist on the client computer. For convenience, the user does not require to save the status of the timeline. VidiWave will frequently auto save the project after changing the timeline, such as when segments are added, deleted or adjusted.
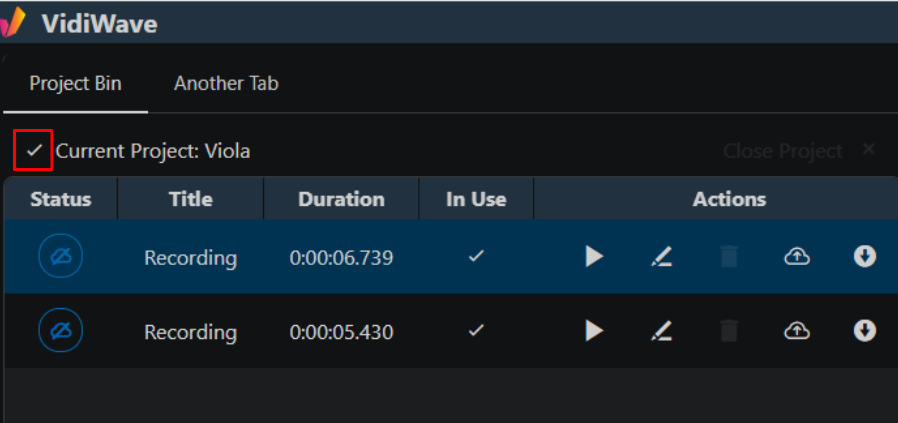
To make this process transparent to the user an indicator in the Project Bin displays the timeline’s save status:
Recordings
To start a recording the web page needs access to the microphone. This depends on the settings of the used browser. Often this access can be granted by the user per web page. In this case the browser will ask for access when doing the first voice-over recording.
Please ensure that the browser allows microphone usage for VidiWave when using this use case.
Select Source
The user can select the Audio source when clicking on the microphone icon in the timeline toolbar far left.
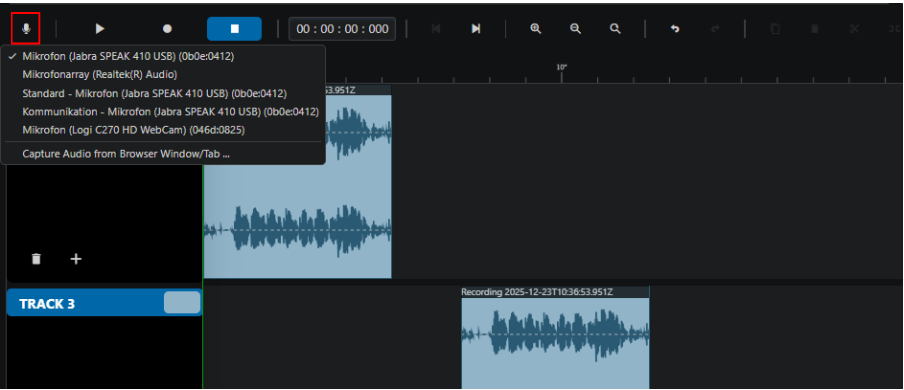
Record Audio Clip
As the usage of the microphone should be no problem, the user can just click on the record symbol in the timeline toolbar to start a recording.
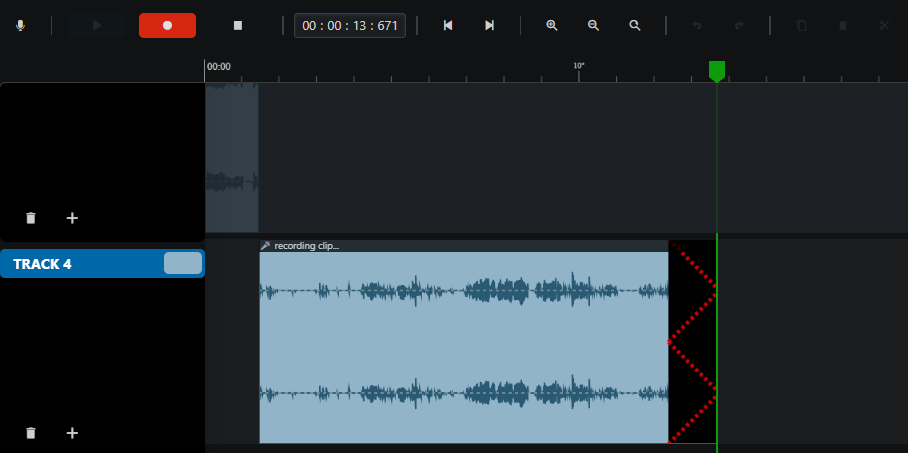
When doing so the record will start in a new track which will be added to the timeline.
As soon as the record starts a new clip will be created on the timeline indicating the area of the recording. Naturally, the audio from the rest of the timeline is played back in the timeline player during the recording.
A click on the stop button will end the recording. In result a waveform is displayed and the record is stored in the Project Bin.
Record Online Meeting
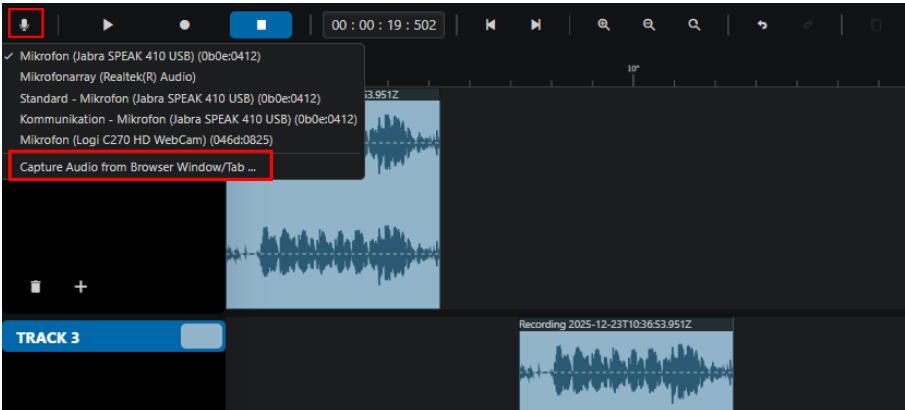
When the user wants to record an Online Meeting he can select “Capture Audio from Browser Window / Tab…” after having clicked on the microphone icon in the timeline toolbar.
The user needs to select the tab / window which he wants to record the audio from and share it.
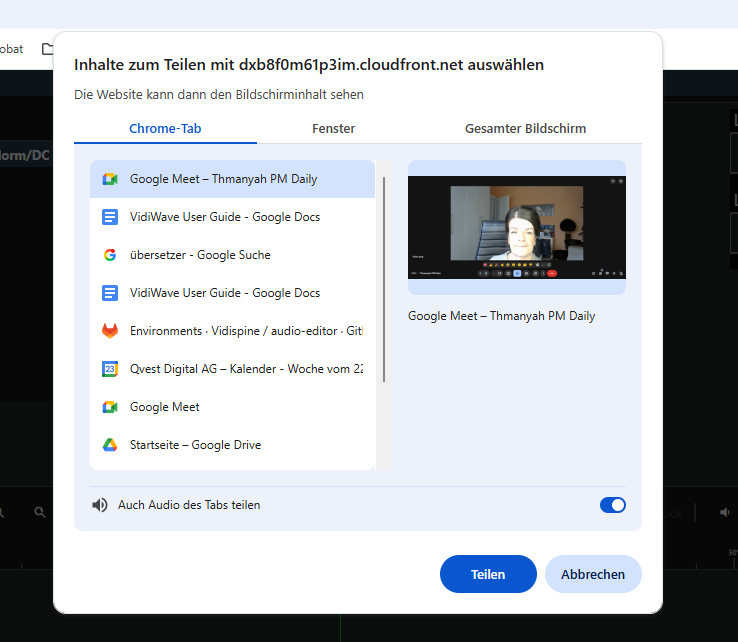
Afterwards he must return to VidiWave to start the recording. Starting and stopping recordings from Online Meetings works exactly the same way as recording audio clips from the microphone.
At this point of time the recorded audio only exists locally on the client PC. The Project Bin displays only the local voice-overs available for the currently opened project on the used client machine. The fact that media is local is indicated by a “not uploaded” icon also.
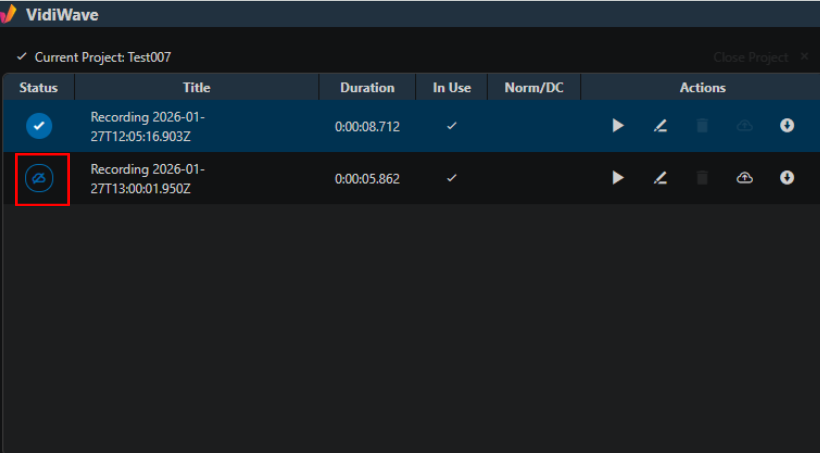
It is possible to work with the local media on the timeline to create a composition. It is also possible to use and reuse the local media. This for example allows to record multiple version of a record and deciding later which to use without the need of ingesting it to the central VidiCore database. The Project Bin allows to store those local audios until ingested even if not used on timeline. The user in here can.
-
Add local media to timeline
-
Playback local media
-
Rename the media’s title
-
Ingest a single a file to the central VidiCore database to become a normal audio only asset
Also an “In Use” indicator displays what recording are used on timeline.
Ingesting Recordings
On some point the user wants to conform the timeline to a new media file. This requires to have the e.g. recording in VidiCore as centrally ingested audio file. So on some step of the process a user needs to decide to ingest the local recordings to be able hearing it in the finally transcoded media file.
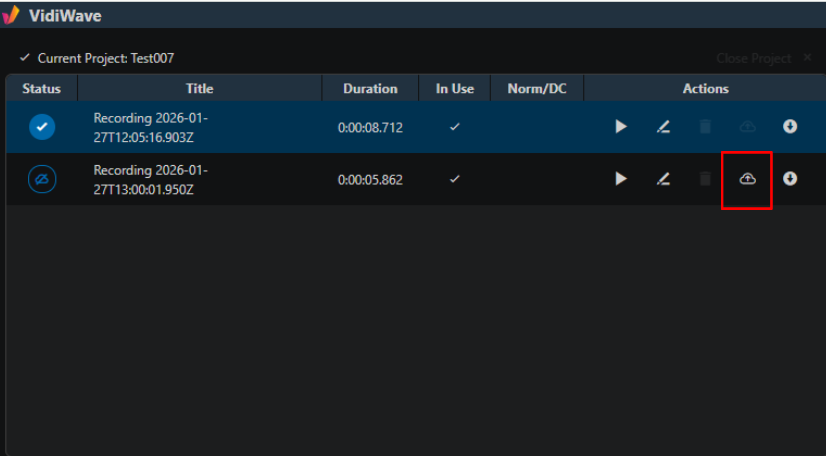
Ingesting a single media file from Project Bin can be done while clicking the publish button or using keyboard shortcut:
Latency and Buffering
Please note that the recording segments differ from other media that is loaded usually from a central server. The fact that they are recorded on the client machine allows to work fast while using the recording directly on the client. This has the advantage of a much faster working process where recordings can be played back directly without the need of waiting for ingest or streaming processes from the backend. So in many cases the timeline player will not rebuffer and the user can directly play the recording changes without waiting time.
Anyway the disadvantage of this approach is that the media is only stored client side until the users ingests it. If the user does not ingest the local recording they can get lost in case of a crashing client machine and they cannot be used on another client PC before ingesting. Also the publish will ignore not ingested local recordings.
Audio Levelling
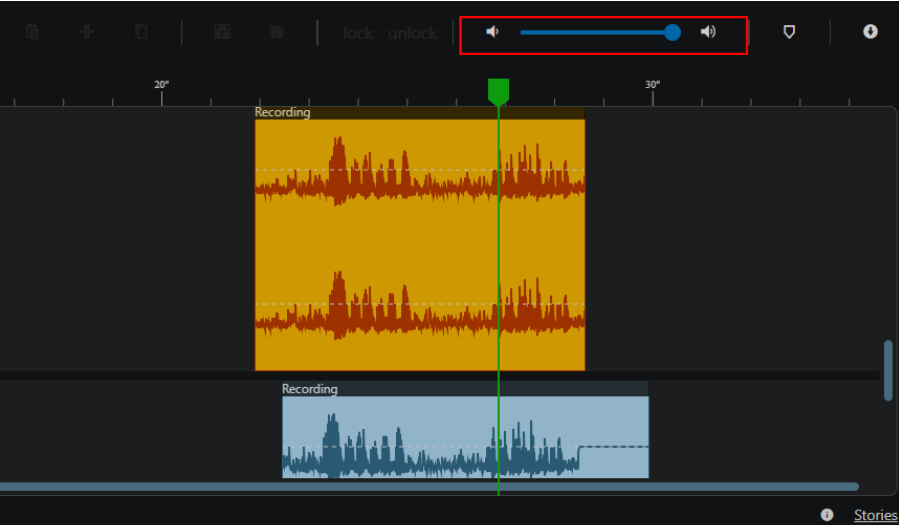
Audio leveling is possible on audio-only items as well as video segments with audio. This can be done by simply adjusting the levels by using the slider in the timeline toolbar.
All options can adjust the level in dBFS in a range between -60 to 0 dBFS. Also, this setting can be reset to its default value of 0 dBFS by clicking the rest button.
It is possible to adjust the level by simply drag the line. The changed dB value will be displayed in a tooltip while dragging and the value in the settings pane will be updated after releasing the drag and drop interaction.
Audio Effects
In order to add effects to a track a track needs to be selected first. After having selected a track the Insert effects command will appear on the left side of the Project Bin.
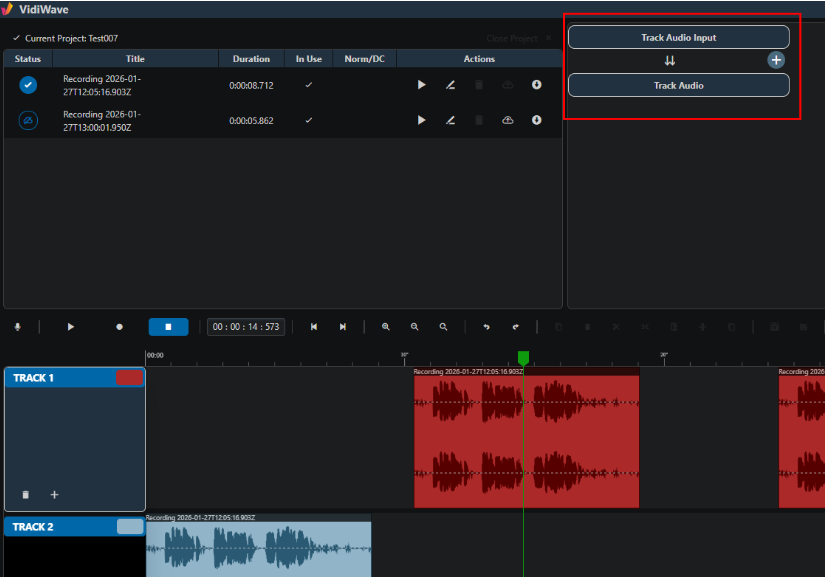
In order to add effects the user can click on the + icon and a list of all audio effects being available will be opened:
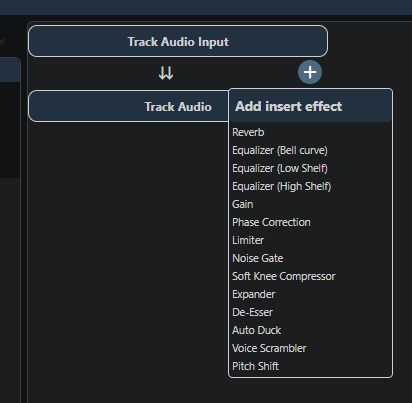
By clicking on an effect in this list the effect will be added. By clicking on the trash bin icon on the right side of an effect this effect will be removed immediately.
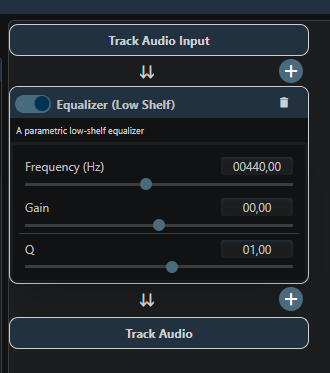
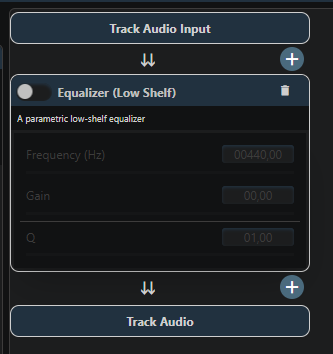
By using the On / Off Switch the respective effect will be turned on or off.
When being turned off the setting options will be greyed out:
After the second effect has been added there will be a scrollbar on the right handside which the user can use to scroll up and down the effects which have been added to the selected track.
VidiWave calculates the effects directly in the browser; the necessary data is loaded from Vidispine in blocks from the server.
The audio effects described in the chapters below are supported by the audio engine. Each effect can be applied individually to tracks. Multiple effects can be applied to the respective tracks simultaneously. Automation (varying the effect parameters over time) is possible. Effects can be configured individually and may have displays to clarify the settings (depending on the effect, e.g., loudness, level, frequency display for filters, compressor characteristics, etc.).
Reverb (Hall effect)
The reverb effect is a simple stereo reverb effect.
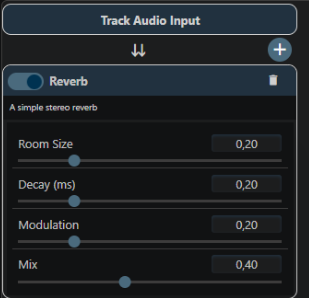
There are four common reverb controls in place which can be used to modulate the reverb of a track:
|
Reverb control |
What it does |
|
Room size |
It simulates the physical size of the space the sound is in. |
|
Decay (ms) |
It simulates how long the sound keeps bouncing before it fades away. Controls the length of the reverb tail. |
|
Modulation |
It simulates small movement or instability in space or air. |
|
Mix |
It controls how much reverb vs original sound you hear. |
Voice Scrambler
The Voice Scrambler is a ring modulator effect that distorts voice to make it unrecognizable while preserving high frequencies for intelligibility.
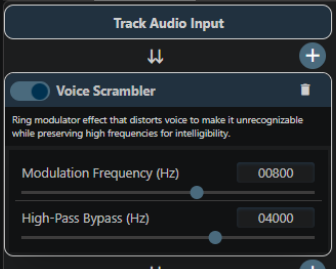
There are two Voice Scrambler controls in place:
|
Voice Scrambler control |
What it does |
|
Modulation Frequency (Hz) |
It controls the speed of the scrambling movement applied to the voice. It sets how fast that modulation oscillates, measured in Hertz (cycles per second). |
|
High-Pass Bypass (Hz) |
It controls the cutoff frequency above which the voice is not scrambled.
Below this frequency → scrambled Above this frequency → passed through clean (bypassed) |
EQ
VidiWave has three different equalizers:
-
a parametric high-shelf equalizer
-
a parametric low-shelf equalizer
-
a parametric single-band bell equalizer
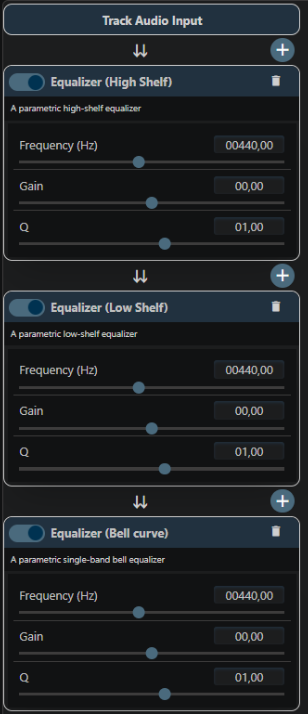
The following three controls define which frequencies are affected, by how much, and how wide the effect is:
|
Equalizer control |
What it does |
|
Frequency (Hz) |
It controls the center frequency the EQ band targets. It affects which part of the sound you’re changing. |
|
Gain |
It controls how much you boost or cut the selected frequency. |
|
Q (Quality / Bandwidth) |
It controls how wide or narrow the EQ band is around the selected frequency. |
Noise Gate
Another audio effect available in VidiWave is the Noise Gate effect. It automatically turns audio down or off when it falls below a certain level.
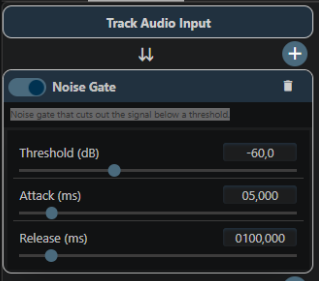
Those three controls decide when the gate opens, how fast it opens, and how fast it closes:
|
Noise Gate control |
What it does |
|
Treshold (dB) |
It controls the level the signal must reach for the gate to open. |
|
Attack (ms) |
It controls how quickly the gate opens once the signal crosses the threshold. |
|
Release (ms) |
It controls how quickly the gate closes after the signal drops below the threshold. |
Expander
An expander is like a gentler, more natural noise gate. Instead of muting quiet sounds completely, it turns them down when they fall below a set level.
The following five controls define when expansion happens, how strong it is, and how smoothly it reacts:
|
Expander control |
What it does |
|
Treshold (dB) |
It controls the level where expansion starts.
Audio above the threshold → unchanged
Audio below the threshold → gets quieter |
|
Ratio |
It controls how strongly the signal is reduced once it’s below the threshold. |
|
Floor (dB) |
It controls the lowest level the expander will reduce the signal to. Instead of going to silence, audio stops at the floor level. |
|
Attack (ms) |
It controls how quickly the expander reacts when the signal rises above the threshold. |
|
Release (ms) |
It controls how quickly the expander reduces level after the signal falls below the threshold. |
Soft Knee Compressor
The soft-knee compressor reduces dynamic range smoothly instead of abruptly.
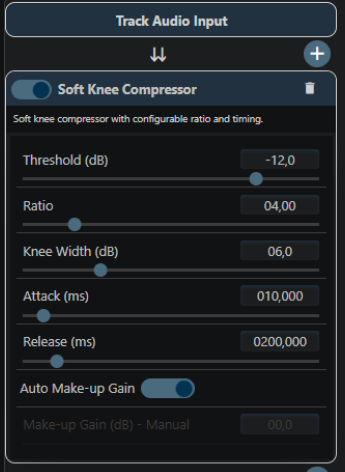
The following six compressor controls decide when compression starts, how strong it is, how gently it fades in, and how loud the result ends up.
|
Soft Knee Compressor control |
What it does |
|
Treshold (dB) |
It controls the level where compression begins. |
|
Ratio |
It controls how strongly the signal is compressed once it passes the threshold. |
|
Knee Width (dB) |
It controls how gradually compression fades in around the threshold. |
|
Attack (ms) |
It controls how quickly compression starts after the signal crosses the threshold. |
|
Release (ms) |
It controls how fast compression stops. |
|
Auto Make-up Gain |
Final loudness: It automatically boosts the output level to compensate for volume lost during compression. |
Limiter
The limiter can be used to prevent audio from going above a set level (to avoid clipping and distortion).
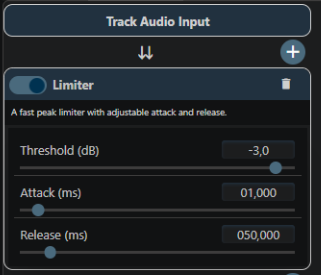
The following three controls determine when limiting starts and how quickly it reacts and recovers:
|
Limiter control |
What it does |
|
Treshold (dB) |
It controls the maximum level the audio is allowed to reach. |
|
Attack (ms) |
It controls how fast the limiter reacts when the signal tries to exceed the threshold. |
|
Release (ms) |
It controls how quickly the limiter stops reducing gain after the signal falls back below the threshold. |
Autoduck
Auto ducking automatically lowers one audio signal (like background music) when another signal (like a voice) is present.
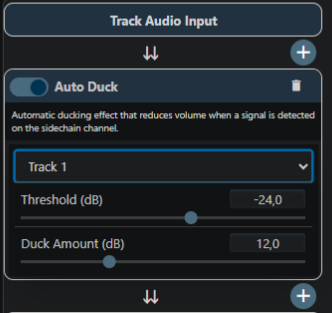
These two controls decide when ducking starts and how much the background is reduced:
|
Auto Duck control |
What it does |
|
Treshold (dB) |
It controls the level the trigger signal (usually the voice) must reach to activate ducking. |
|
Duck Amount (dB) |
It controls how much the background audio is reduced in level when ducking is active. |
De-Esser
In VidiWave there is also a De-Esser available which is a dynamic high-frequency attenuation driven by a sibilance detector. A de-esser reduces harsh “s”, “sh”, and “t” sounds (called sibilance) in speech and vocals.
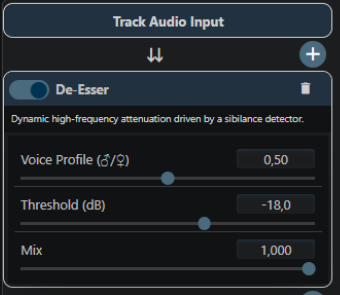
These three controls decide which sibilance is targeted, when it’s reduced, and how strongly the effect is applied:
|
De-Esser control |
What it does |
|
Voice Profile (m/w) |
It selects the frequency range the de-esser listens to, based on the voice type. |
|
Threshold (dB) |
It controls how loud the sibilant frequencies must be before reduction happens. |
|
Mix |
It blends the processed (de-essed) signal with the original (dry) signal. |
Phase correction
The Phase Correction can be used to align audio signals that are slightly out of phase, which often happens with multi-mic recordings, stereo tracks, or layered instruments.
The Delay (ms) control is the key tool in fixing phase issues.
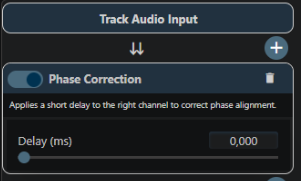
The Delay (ms) control is the key tool in fixing phase issues.
|
Phase correction control |
What it does |
|
Delay (ms) |
It controls the amount of time the audio signal is shifted forward or backward to correct phase differences. |
Pitchshifting
The Pitch Shift control changes the musical pitch of an audio signal without changing the playback speed.
|
Pitch Shift control |
What it does |
|
Pitch Shift (semitones) |
It specifically tells VidiWave how many semitones up or down to move the pitch. |
Additional effects
In contrast to the above-mentioned effects there are additional audio effects which can be added via the Source Preview Player:
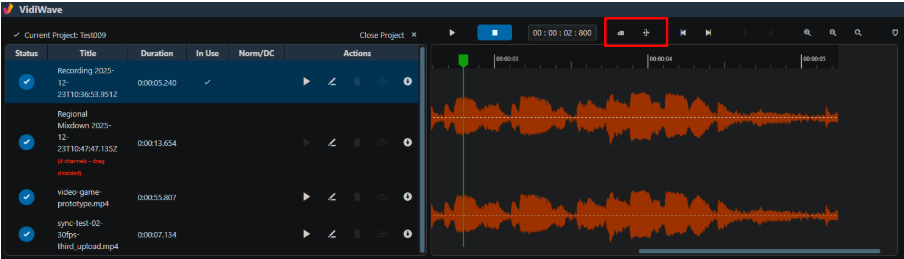
Normalization
Normalization is an automatic process that adjusts the overall level of an audio clip to a defined target, without changing its internal dynamics (no compression).
VidiWave offers different metrics to decide what “level” means. Here’s how it works and what each metric does:
-
The editor analyzes the entire audio file.
-
It measures level using the selected metric.
-
It calculates how much gain is needed to reach the target.
-
It applies one constant gain change to the whole clip.
The user can choose between the following Normalization types using the dropdown:
|
Normalization metric |
What it measures |
How it normalizes |
|
Peak Normalization |
The highest single sample peak in the audio (dBFS). |
|
|
RMS Normalization |
The average signal energy over time (Root Mean Square). |
|
|
LUFS Normalization |
Perceived loudness, based on human hearing (ITU-R BS.1770). |
|
|
DC Offset Correction |
A constant voltage bias (waveform not centered at zero). |
Shifts the waveform up or down so it’s centered at zero. Does not change loudness |
Moreover the user can set the target peak level between 0 db and -60 db using the Target Level slider below the Normalization type dropdown.
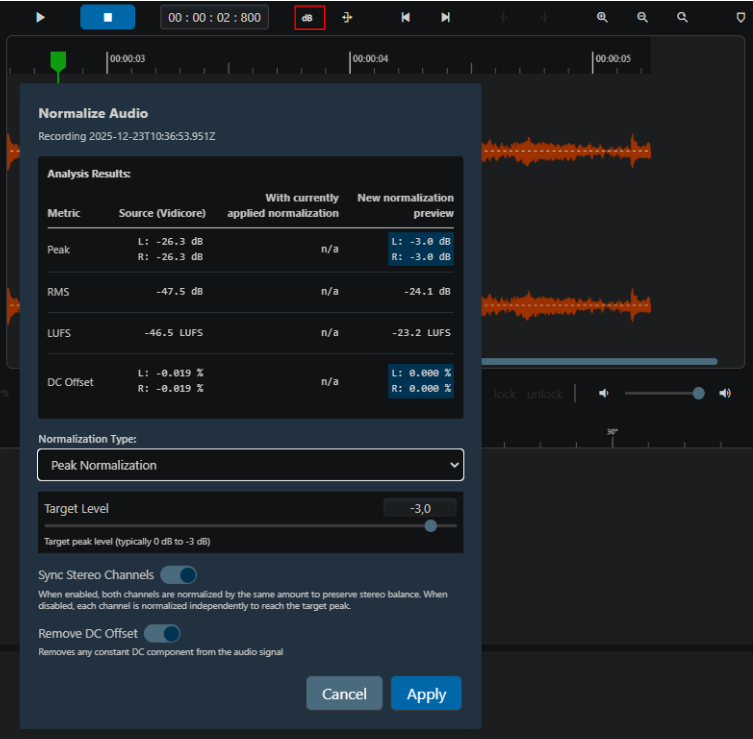
In addition two Toggle Switches are available:
-
Sync Stereo Channels:
When enabled, both channels are normalized by the same amount to preserve stereo balance.
When disabled, each channel is normalized independently to reach the target peak.
-
Remove DC Offset
Removes any constant DC component from the audio signal
Timestretching
Time-stretching is an audio effect that changes the duration (speed or length) of an audio signal without changing its pitch. Pitch correction is automatically applied.
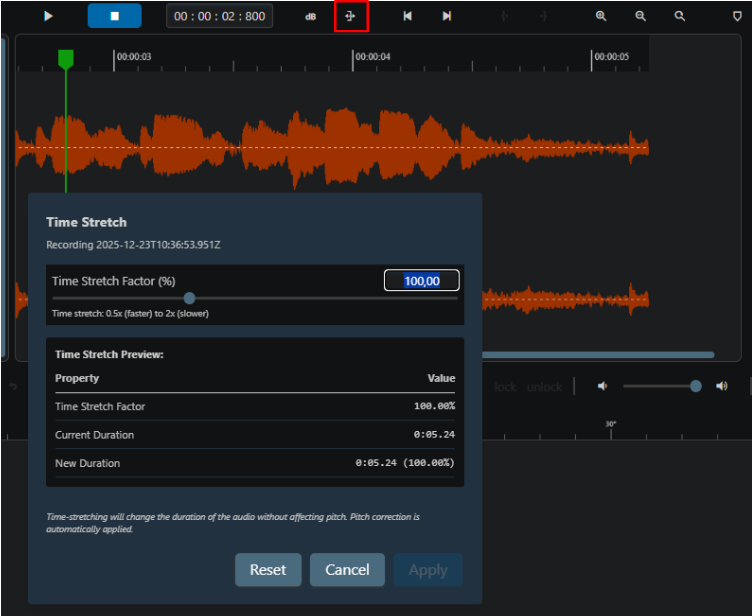
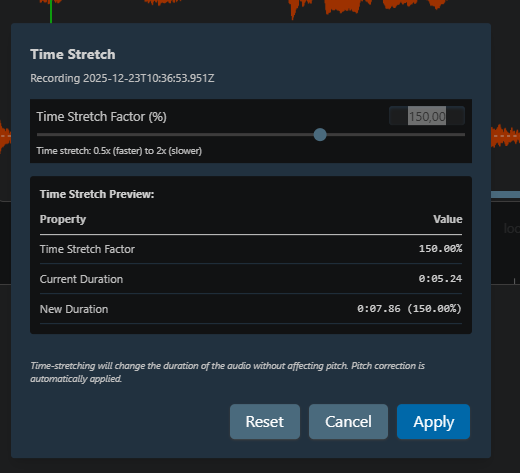
The user can change the Time Stretch factor from 50% (faster) to 200% (slower).
The Time Stretch window also provides a Time Stretch Preview displaying the current Time Stretch Factor, the current duration and the new duration after time stretching has been applied.
Automation of effects
The user can automate audio effects to change effect parameters over time - so instead of one static setting for an entire clip, the effect evolves as the audio plays.
First the user has to select the track he wants to add an effect to, add the effect as described above and select the desired settings. Then the user can click on the + next to the trash icon in the track lane and he can select the formerly added effect, for example Gain.
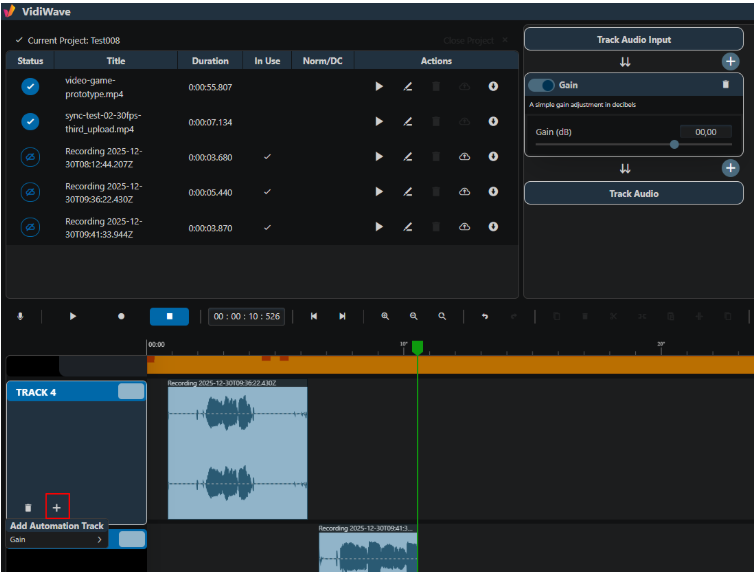
VidiWave displays the automation in lanes beneath the audio track.
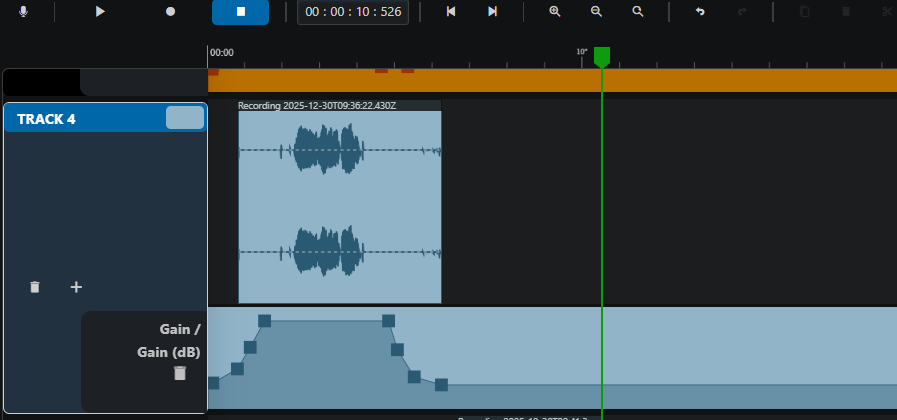
Points (nodes) define changes
Each adjustable parameter of the added effect can be individually selected and set.
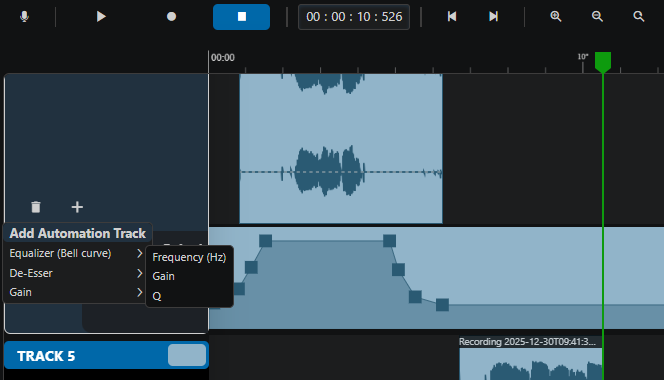
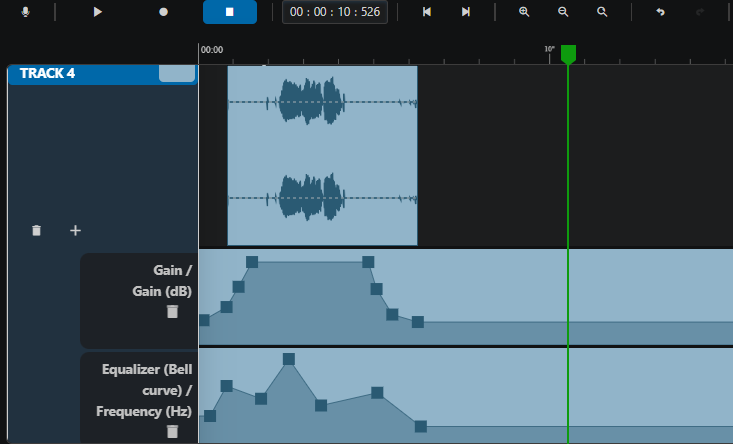
Automation subtracks can be added, removed, and edited. The user can move and delete control points. Linear interpolation takes place between the control points.
The temporal progression of the automation value is displayed graphically in the track.
Project Bin
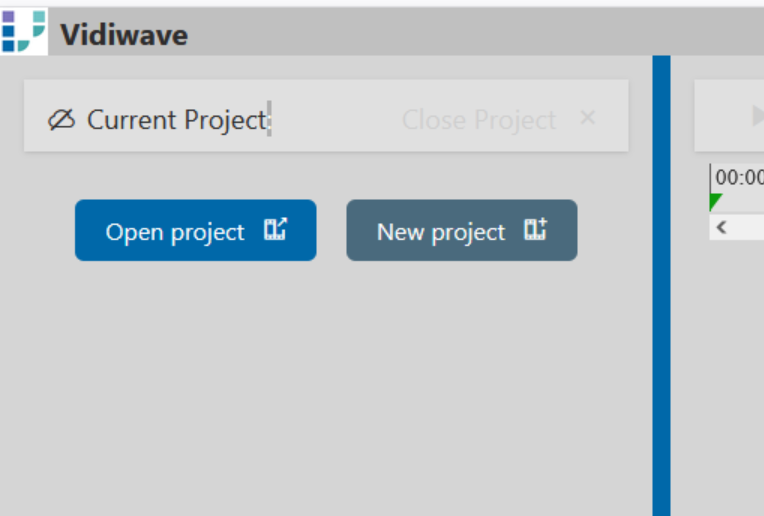
The Project Bin serves as a central area dedicated to the management of all of a project's content, as well as providing users with the opportunity to create new projects, or search for existing ones in a collaborative environment. It is important to note that when opening VidiWave, users are initially asked to choose between selecting an existing project or creating a new one, both of these options remain available in the Project Bin even after having created or selected a project.
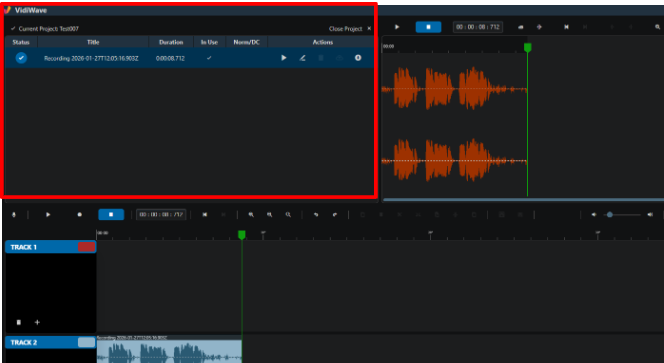
The Project Bin tab contains all the media associated with a particular editing project, along with additional metadata and the possibility to carry out actions for each item individually.
Open or Create a Project
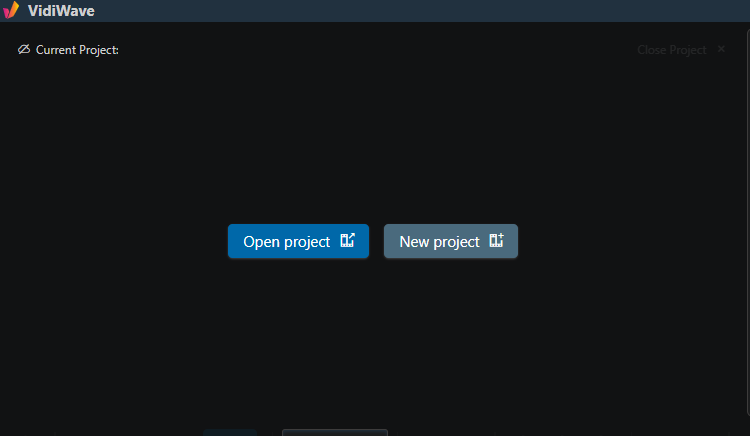
Open a Project
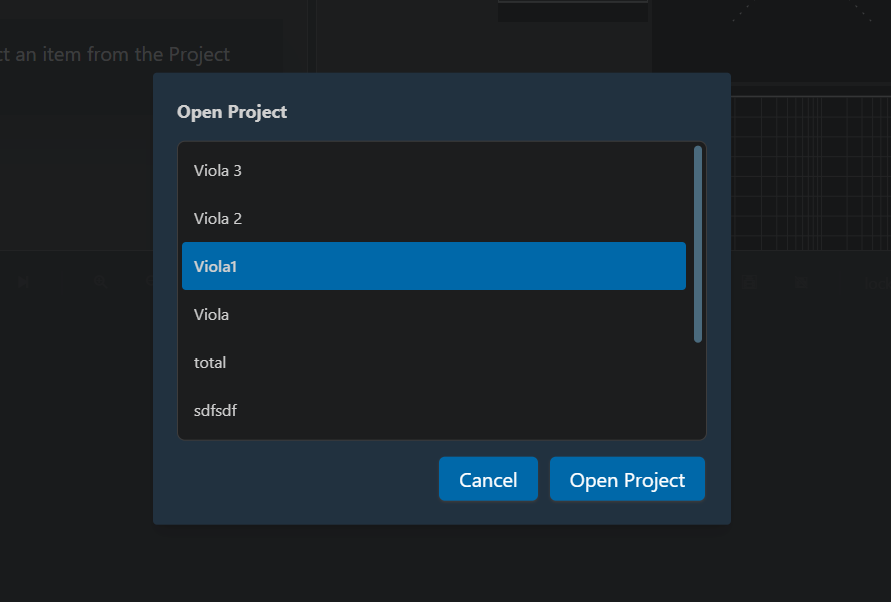
Directly from the Project Bin, users are able to open existing projects by clicking, the "Open Project" button. This will prompt the Open Project window, allowing users to select a project. After having selected a project the "Open" button can be selected.
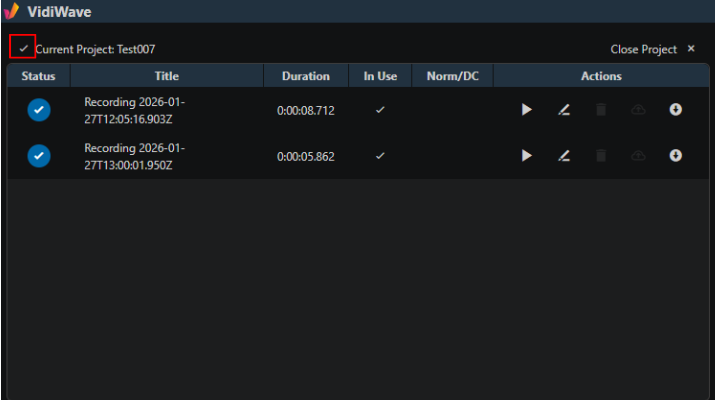
Auto Save
Please note that projects are automatically saved after any action. This is indicated by the following icon displaying a checkmark.
Create a New Project
From the Project Bin, users are able to create new projects stored in the media repository by clicking on the "New Project" option.
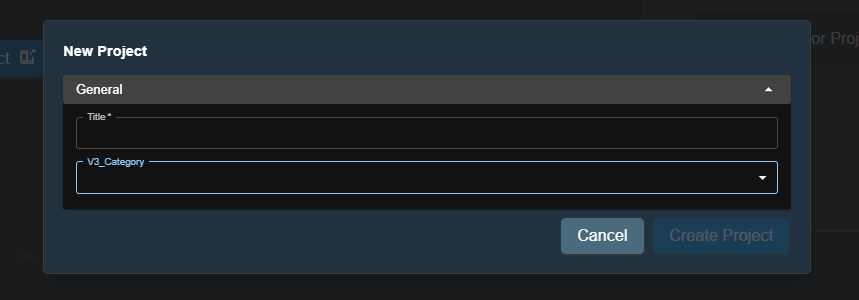
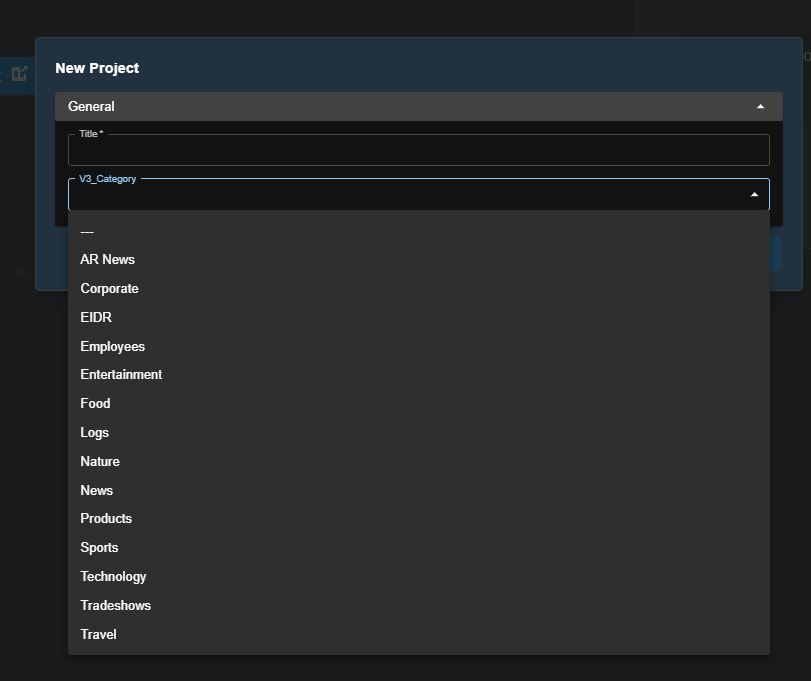
The Create Project dialog is similar in structure and function to the Publish dialog described in section 3.5. Only the differences are listed here:
-
The configuration data for the use case "Create Project" is used.
-
There is no workflow selection field. VidiWave retrieves the (technical) name of the workflow to be started from the Workflow field in the configuration data.
-
No project is open when this dialog is displayed. Therefore, the metadata fields cannot be pre-populated from an open project.
A collection is created when the dialog is submitted.
This new project will become managed and stored in the media repository with its own unique ID.
Rename a Project Bin item
When the user wants to change the title of a Project Bin item he can click on the pen icon in the Actions area and a new field will open.
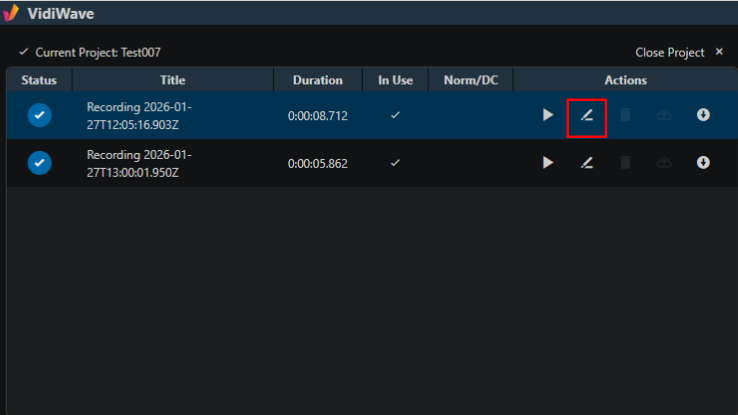
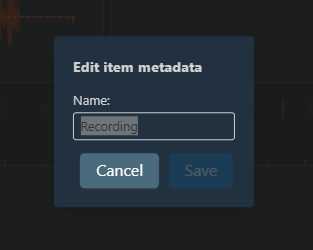
After having entered a different name the user can click the Save button and the item will be saved under the new title.
Adding Media to the Source Preview or Timeline
When managing media contained in a Project Bin, users are able to select relevant media and add it to the timeline in order to edit a sequence. There are two different approaches when adding media to the timeline. Users can either evaluate the material in the Source Preview Player before adding it to the timeline, or add it directly from the Project Bin into the timeline.
Add to Timeline
Users can immediately add media to the timeline area using drag and drop.
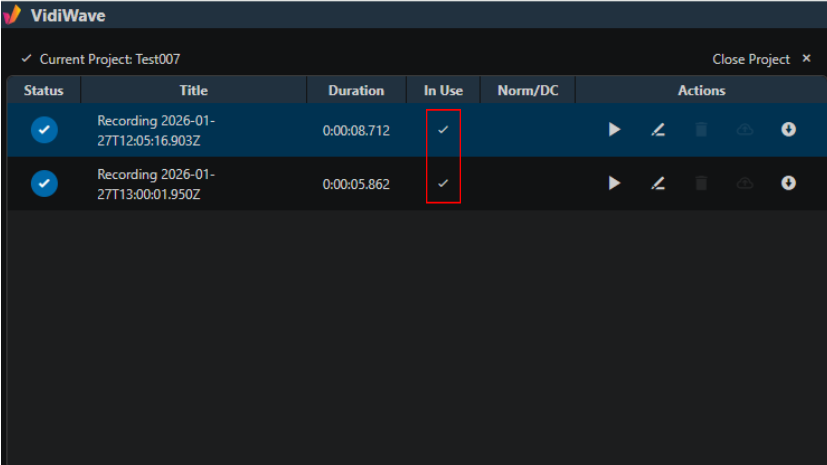
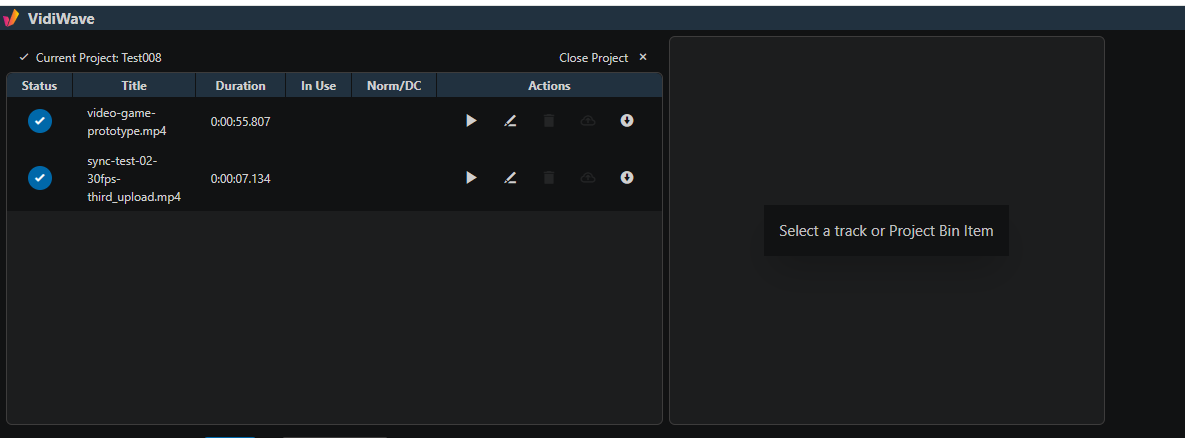
Please note that as soon as a clip is included in the timeline, the project will immediately identify said clip as "In Use". This can be observed by the "Check" icon being displayed in the "In Use" metadata column.
Add to Source Preview
Users can at any time review the Project Bin's video content by adding it to the Source Preview Player. This can be done by using drag and drop from the Project Bin into the Source Preview player. While the Source Preview Player displays the entirety of a video's content, users can decide whether to add the entire clip to the timeline, or select a portion of the clip to the timeline.
In Use Indicator
It is important to note that VidiWave also indicates whether any of the items in the Project Bin are currently being used in the timeline.
The "In Use" mark is not just applicable entire clips being inserted into the timeline. This is also valid for partial clips which have marked with in IN and OUT points in the Source Preview Player. As a result, as long as a portion of a media asset is used in the timeline, it will be marked as "In Use" in the Project Bin as well.
Publish (Upload)
The user has the option to upload Project bin items to VidiCore.
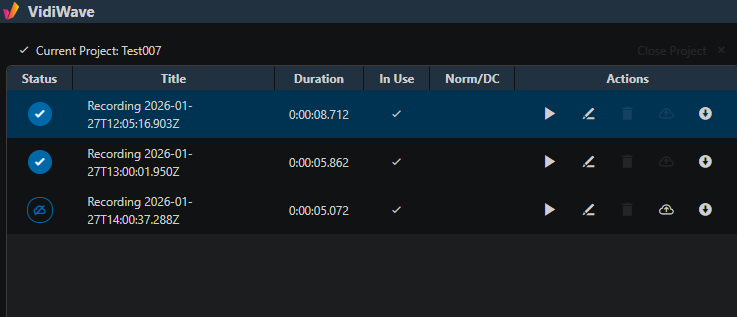
When the item has not been uploaded yet the user will see an upload icon in the Actions column and a strikethrough cloud icon in the Status column.
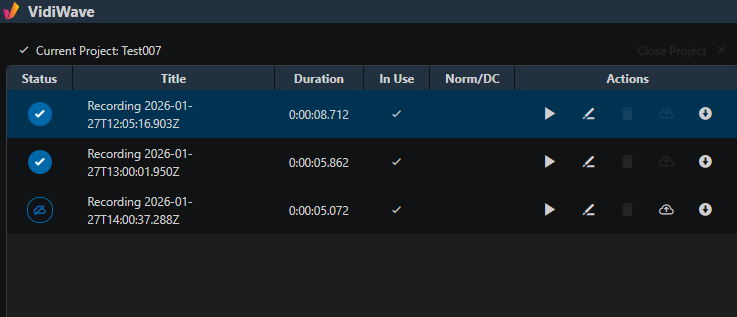
When he clicks on the Upload icon the Publish Dialogue will open and the user can add metadata before uploading the item to Vidicore:
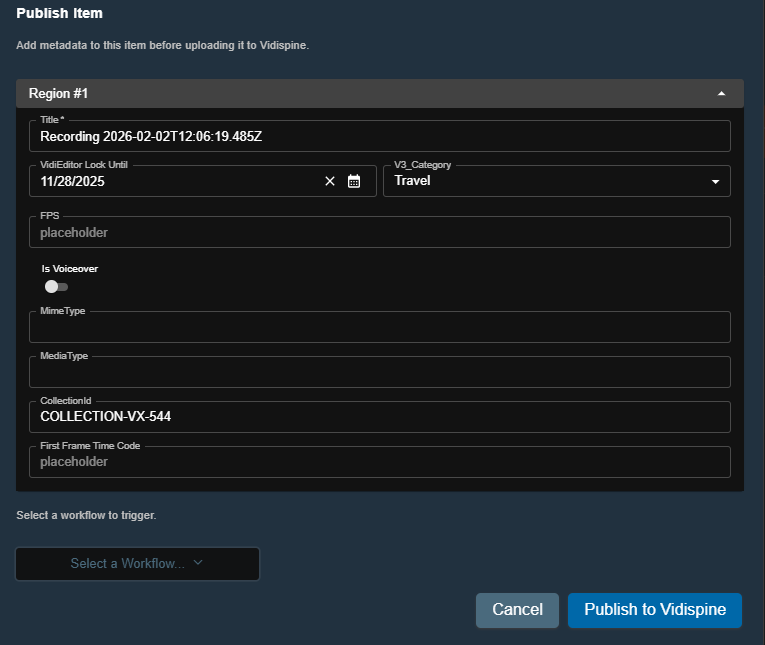
The Publish dialog contains two sections:
-
The upper section contains fields for editing user-selectable metadata.
-
The lower section contains the workflow selection field.
VidiWave enforces an input validation by preventing the dialog from being submitted if any of the rules enforced by VidiWave are violated. If the current input satisfies all validation rules, the user can submit the dialog. VidiWave will then create a new VidiCore item and populate it with metadata based on the input.
VidiWave will also start the VidiFlow workflow selected by the user.
As long as the dialog has not yet been submitted, the user can cancel the input and close the dialog at any time. In this case, VidiWave will not create an item in VidiCore, and any input already entered will be lost.
The configuration data for the "Publish Dialogue" use case is used. This data is determined once the application is loaded.
The workflow selection field does not display item metadata, and the value is not persisted. Here, the user selects the workflow that VidiWave should automatically start immediately after publishing the item.
The workflow IDs available for selection here are retrieved by VidiWave from the Workflows_45b9 field in the configuration data. The selection field displays the corresponding plain names of the workflows.
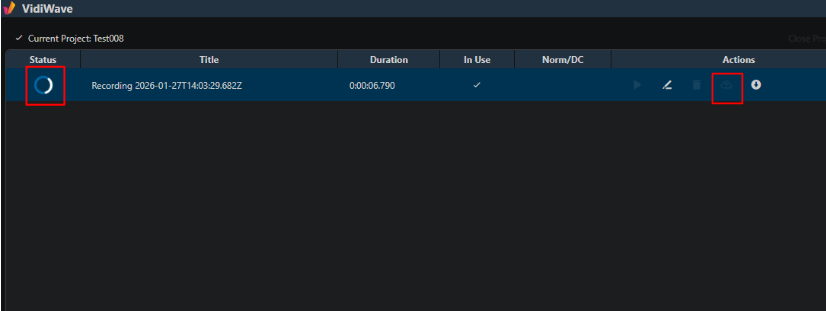
After having clicked on “Publish to Vidispine” the user will see a loading spinner and the upload icon will be greyed out:
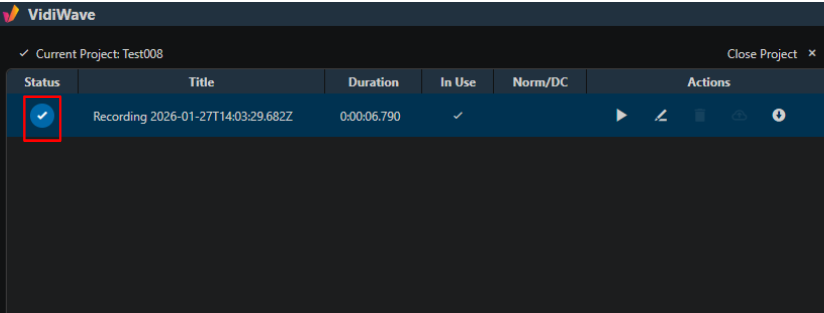
After the project bin item has been uploaded there will be a wav file in VidiCore and the Upload check will be displayed in the Status column:
Export (Download)
The user also has the option to download a single project bin item as WAV file.
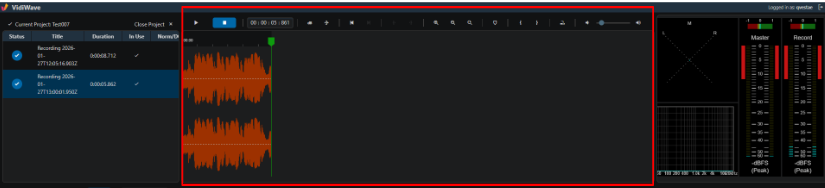
Source Preview Player
The Source Preview Player offers users a wide variety of options to further specify what sections of the media they wish to add to the timeline. These options can all be found in the toolbar above the player.
IN and OUT Marker
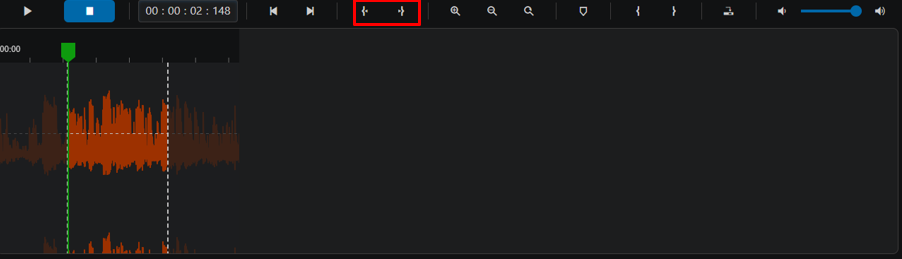
When adding media to the timeline, editors may want to add only a partial clip instead of the entire media asset. In order to achieve this, the player's IN and OUT points can be used to specify which portion of the clip users want to insert into the timeline. The "Add in" and "Add-out" buttons for setting the points in the player's timeline, as shown below.
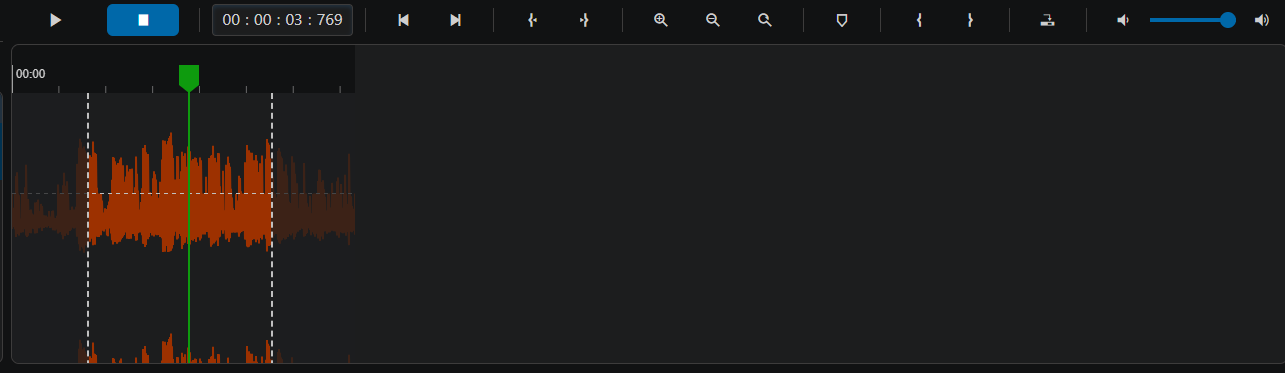


If users want to specify the insertion of an IO point, they can do this by dragging the playhead to the desired position. Once an IO point has been set, users may also drag the point to the desired position.
Users are also able to set and remove the IN and OUT points by:
-
Adding the In marker by pressing shift and the left mouse button
-
Adding the Out marker by pressing shift and the right mouse button
-
Moving the mouse cursor to the In Marker and removing it by pressing shift and the left or right mouse button
-
Moving the mouse cursor to the Out Marker and removing it by pressing shift and the left or right mouse button
There are 2 buttons for "Seek to In marker" and "Seek to Out marker" in the toolbar of the Source preview player the user can jump with between both markers back and forth:
Play, Pause and Skip
Apart from the typical player functions, such as play and pause, users are able to skip on a frame by frame basis. This is particularly helpful when accurately specifying the insertion of IO points.
Add to Timeline
With the add to timeline option, users can add either the entire media being played in the Source Preview Player, or a specific portion of the clip when IO markers are set. It is important to note that when using this function the point of insertion in the timeline is always the playhead’s position in the timeline.
Timeline Zoom
Particularly with long videos, the navigation in the source player might be not sensitive enough to what one would expect. This is due to the fact that the visible player size does not allow one drag the playhead with greater precision between frames. While this is no problem working with a short file, using a long file and dragging the playhead might already navigate the videos position several seconds or even minutes in the source material.
With VidiWave users can zoom into the timeline using the lens +/- symbol. While this allows one to see a smaller range of the video it also permits one to navigate the playhead with increased sensitivity and frame accurately.
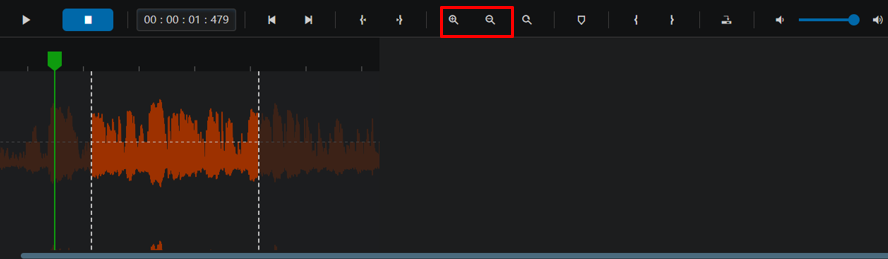
In addition the user can zoom in and out the source preview using the mouse wheel while pressing the Ctrl. modifier.
Adding Media to Source Preview Player
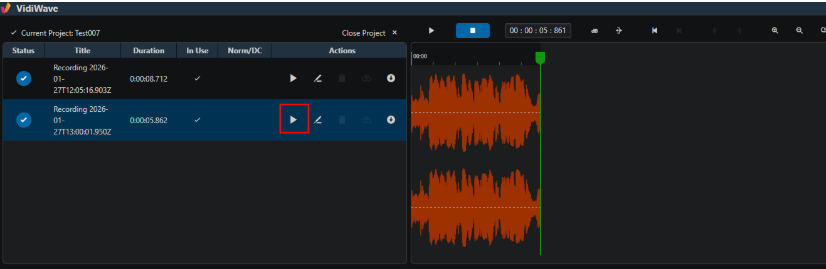
All supported media can be added from the Project Bin to the source preview player to view content and add it into the timeline. There are two approaches for adding media to the Source Preview player:
-
Press the Play Button in the Project Bin
-
Drag and drop media from Project Bin to Source Preview player
Audio
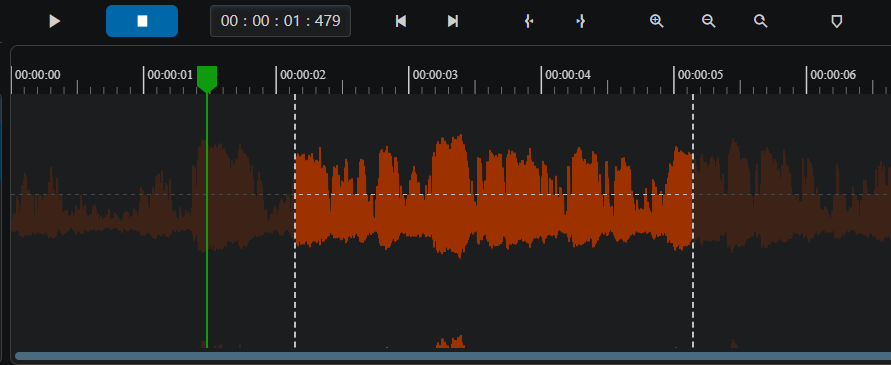
For audio files, the preview depends on certain factors. If the wave form data is available in VidiCore, the user will see a waveform preview in the player as shown below:
Video
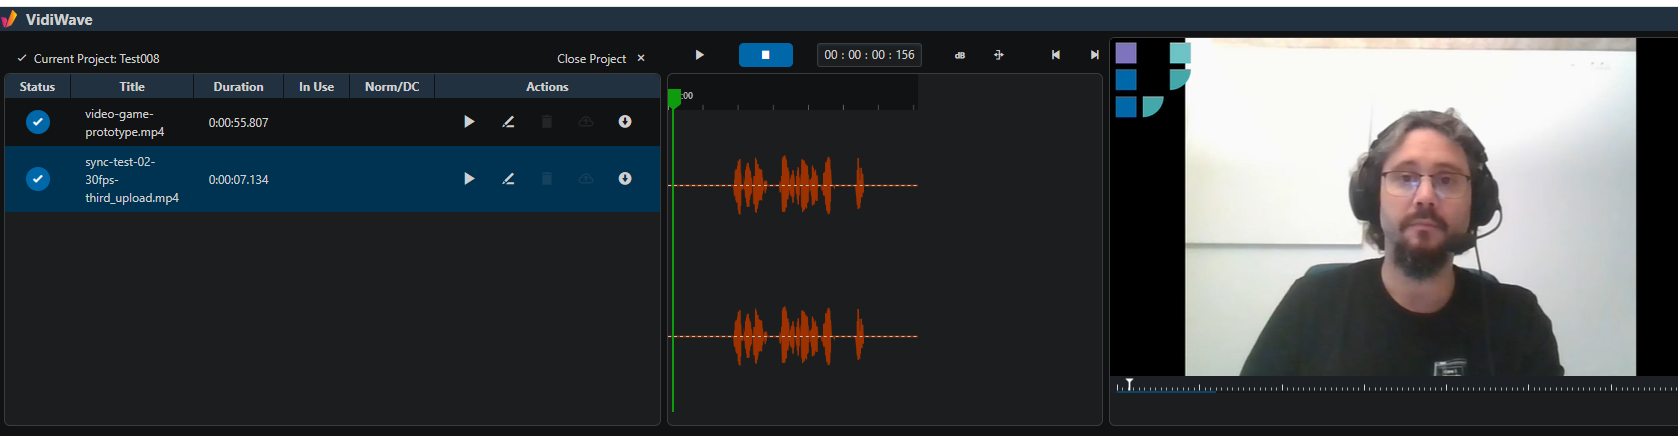
For video media the image signal will be displayed via the Video Preview Player while the Audio signal is still output in the Source Preview Player including the Waveform. For more information about the Video Preview Player see chapter 5. Video Preview Player.
Waveform View
The VidiWaves Source Preview Player supports playback of video and audio items. For those two types of items it is often convenient to preview waveform data visualizing the audio signal over time.
Video Preview Player
For video previews, the Vidispine VideoPlayer has been integrated. The video is streamed to the audio editor for preview in a low-resolution version.
For video media the image signal will be displayed via the Video Preview Player while the Audio signal is still output in the Source Preview Player including the Waveform. Playback of the respective components (video player, audio editor) is synchronized. This means that during the video preview, all audio tracks from the audio editor, including all applied effects, are played back in sync with the video. The user can select which component should be played in the interface. Only one video preview can be played at a time. Therefore, if there are multiple objects with associated video tracks, the user must make a selection. Video downmixing is not supported.
Preview Video assets from Project Bin
The user can preview a video file by clicking on the Play button or dragging and dropping the file to the Source Preview Player.
Analyzing tools
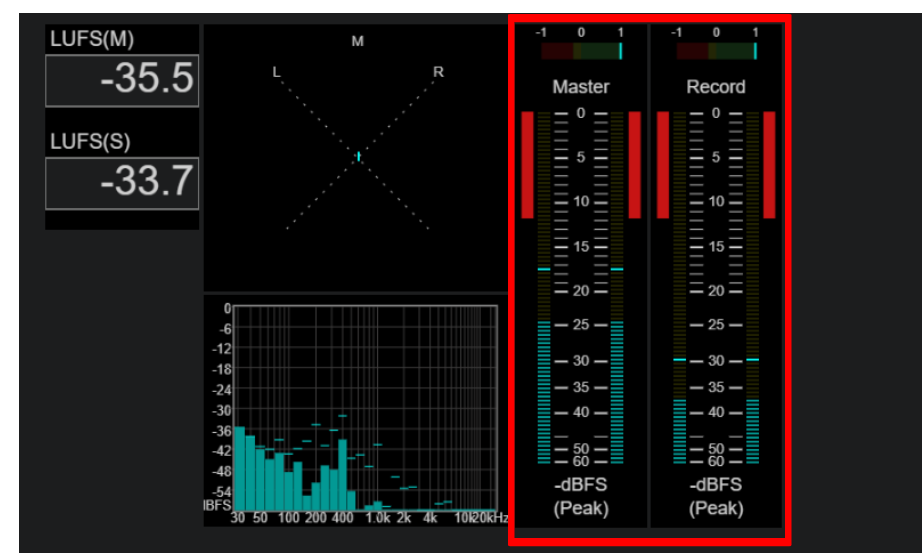
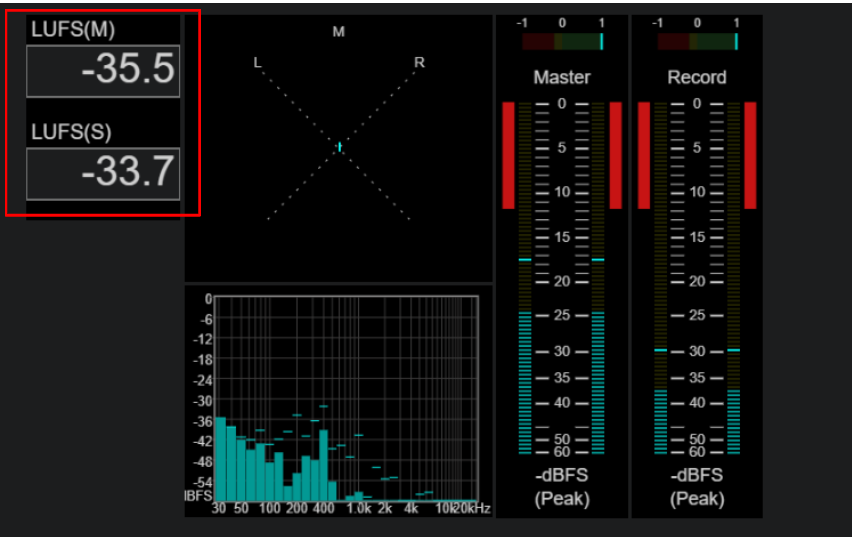
The user interface offers comprehensive analysis panels that visualize
-
the loudness,
-
the level and
-
the phase correlation of the master mix during playback.
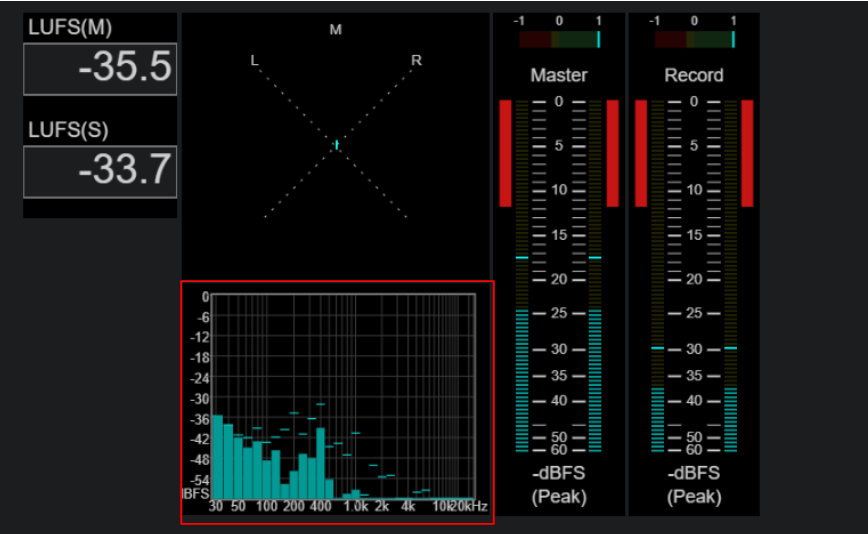
A stereo viewer displays the stereo width and a frequency spectrum for detailed analysis of the frequency distribution.
In addition a stereo display device is available to display the stereo width and a frequency spectrum can be used for detailed analysis of the frequency distribution.
Visualization Loudness
Frequency Spectrum
Stereo Viewer
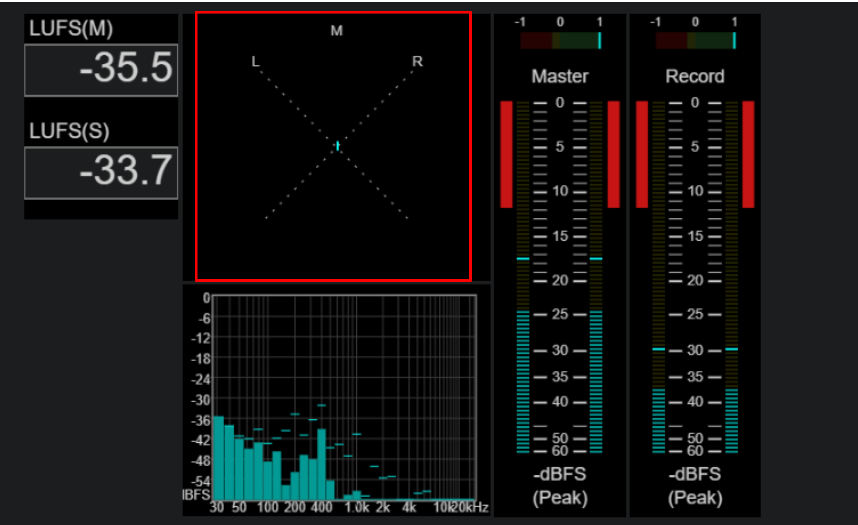
Visualization Phase Correlation
The VidiWave Timeline Player mixes all audio channels of the timeline into a mixed audio signal output when playing the timeline. Whatever channels are played back will be also previewed in a peak meter view that can be find on right hand side of the Source Player.
This indicator helps the user to judge on the output signal of the timeline playback and also gives prediction for the output signal generated on timeline publish. It displays the level of all channels the user also hears when playing the timeline.
The peak meter displays the mixed stereo signal in 2 bars and in dBFS scale.